Sakai is an online Collaboration Learning Environment, CLE for short. Indiana University has proactively deployed it for 100,000 students, and over 120 other Universities are involved with their own local deployments or test beds. Clearly, this well received application is worth checking out and taking for a vigorous and thorough test run.
This article is a practical introduction to Sakai, along with numerous screen grabs. The article’s purpose is to highlight the power and flexibility of this Java based application, and to explain how simple the creation of ad hoc online communities can truly be. I hope this article will give newcomers a grasp of the power of collaboration and learning tools.
If you are a course administrator, teacher, educational decision maker or student then knowing that Sakai exists and what it can achieve allows you to compare your current infrastructure with a modern free software online learning enabler.
So what is Sakai?
Roughly speaking, a Sakai site has a set of tools available; it also has defined groups of users which are enabled to use some of those tools. The administrator is king and can make sites and users, and populate the sites with the users, giving each one a specific role. Students have one role which allows them some privileges to use specific student-oriented tools, whereas instructors have a different role with far more power. For each site, the administrator activates a tailored set of tools out of a long list. The tool list is expanding with each release.
One refinement to the comments I have just made: an administrator has universal power and instructors tend to have site-wide administrative rights. Of course, this description is an over simplification, but I will come back to it later.
When students log in, Sakai presents them a list of sites that they have joined at the top of their browser. Each site is for a particular project or course. A student enters a given site and can interact with fellow students or the instructors using the available tools. Normally only members of the site get to see information like test results. These defended areas allow students to interact naturally with groups of peers in a rather flexible and adaptive manner.
To enhance the intrinsic value of the CLE, the architects of Sakai have been very clever: creating new tools is rather straightforward, and within the grasp of any Java developers who have previously written web applications. The success of the supporting infrastructure can easily be seen in the contribution section of the source code repository where many, many extra tools exist. As a result, it’s easy with Sakai to customize sites to specific needs. One can imagine a K-12 class using chat, wikis, and forums, and researchers using custom tools for grid interactions on top of the already available collaboration tools.
An aside
Sakai is released under an Apache-like educational license. Sakai also has a reasonable set of commercial partners that offer commercial support. For decision makers, this represents a highly important safety net and will definitely help acceptance.
The community has placed Quality Assurance in the middle of the development cycle and not as a provisional last thought. Before each release, there is a viperous smoking out of issues. The last (2.4) release tag involved 17 preplanned and minor iterations on a code base of more than one million lines of code with around 90 active and consistently hard working participants. At the most recent conference in Amsterdam, shadowy characters gave away a number of Sakaigers (cute but dangerous cuddly toys) as rewards to the QA’ers. My personal Sakaiger escaped quickly into the Amsterdam underground (figure 1) and I suspect it will soon become a member of the A team or involved in serious adventures requiring many sharp teeth and lots of biting. How can such a cute animal be so dangerous?!

Since Sakai is free software, anybody can see its evolving code base without restrictions. Showing a high degree of confidence in the QA process, the communal infrastructure applies free software tools such as PMD and FindBugs to perform scheduled automatic code reviews on the Sakai source every night. The bug pattern observers generate generic reports that are open to the whole world. Imagine proprietary code being washed clean in such a way. Certainly, if taken seriously enough, the process can only help to push bug densities down and stability up!
Getting started
Sakai is a Java based application that runs within a Tomcat server. As a result, the source code is pretty much OS independent and just relies on the fact that you have Java 1.5 installed on your machine. The demo is self-contained and has its own in-memory database. For initial learning the demo is great; however, when you want to deploy for a few hundred users you will need to connect to a more substantial database such as MySQL or Oracle (they are both supported). The change over requires only eight lines of configuration and installation of the database server with a clean database structure that supports the UTF-8 character set. Therefore, there is a clear path from demo to middle sized production.
For the sake of simplicity, I will assume that you have a GNU/Linux box, preferably Ubuntu Feisty 7.04 with 1GB of RAM or more, and Java 1.5 installed. At the time of writing, the following simple installation instructions are correct.
Download the demo package and unpack it in your location of choice (for example, your home directory) using the following command:
tar xvf sakai-demo_2-4-0.tar.gz
A directory sakai-demo should now appear. Verify that the environment variable JAVA_HOME exists and points to the top-level directory of your Java 1.5 instance. If the variable has not been set then one way to permanently arrange a value is to change your ~.bashrc file to include a line similar to:
export JAVA_HOME=/usr/lib/jvm/java-1.5.0-sun-1.5.0.11
where, of course, the value of JAVA_HOME is specific to your environment. The value will take effect after your next login. To start the demo under the sakai-demo directory type:
./start-sakai.sh
You will now see a lot of Java related logging gibberish flowing down the screen. Please, do not worry: it’s just debugging information hopefully stating that the world is perfect; be patient and wait the prerequisite minutes until you see text similar to:
Jun 19, 2007 11:31:52 AM org.apache.catalina.startup.Catalina

start INFO: Server startup in 117423 ms
We have minor glitches. At the time of writing, there were two small bugs in the demo, but I hope that, by the time you read this article, these trivial issues have been resolved. The first of these issues was that you needed to change the permissions of start-sakai.sh and the scripts in the sakai-demo/bin directory to be executable, and then make sure that the that sakai-demo/logs/catalina.out exists.
Browsing http://localhost:8080 should bring you to the main page, as shown in figure 2.
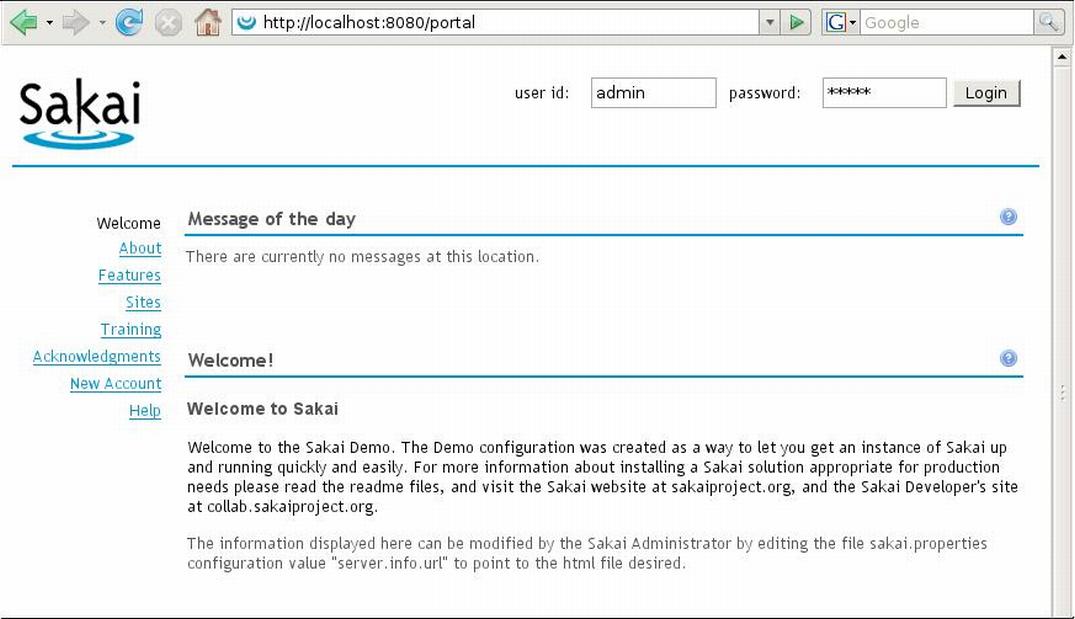
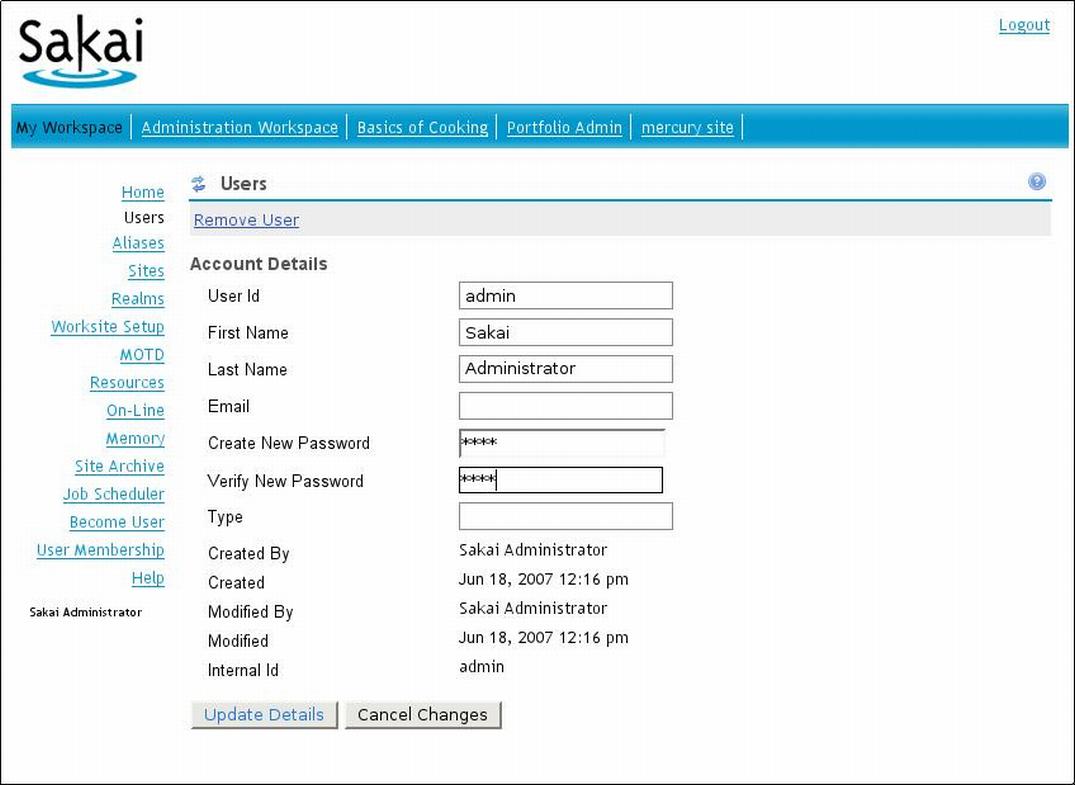
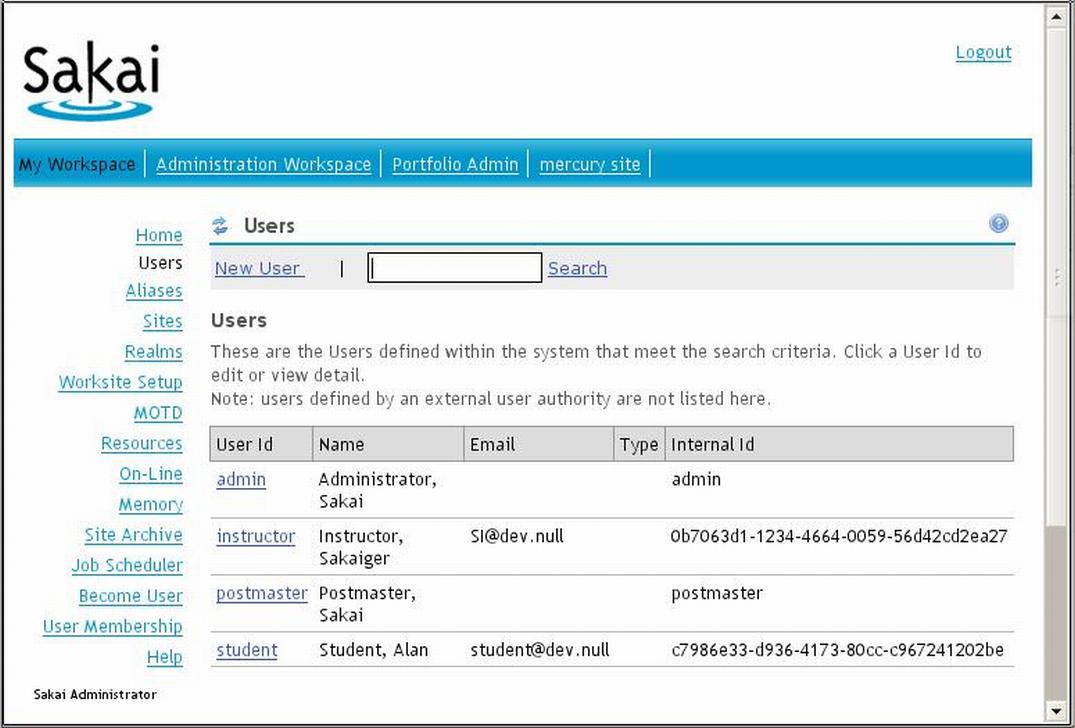
The administrator account is admin and the password is admin. At the very minimum, we should change the password. Therefore, login as admin, click on the user link on the left hand side and you will find yourself in the user administration tool. Select the admin account and you will see figure 3. Change the password in the “Create New Password” and “Verify New Password” inputs to your obscure, unguessable value and then update details. Hint: my password is quite rude if printed in a talking box of a cartoon character.
Sakai has a reputation for being initially more daunting than more specifically structured course management systems such as Moodle. At the risk of generating some heated comments in the feedback section of the Free Software Magazine, I see that there are obvious differences between a course management system (such as Moodle) and a collaboration learning system (such as Sakai).
Workflow tends to be more formalized within a CMS and is by its very nature more straight forward to understand and explain. In comparison to a CMS, a CLE has more convoluted flexibility. Unfortunately, the generalized nature of a CLE (and Sakai) makes the application more difficult to learn, as there are more options and approaches to site design and the flow therein.
As Sakai evolves, it brings in even more tools to its powerful learning domain; as this happens, interaction design and workflow skinning for various well-known situations will become crucial for adoption.
Project sites and course sites
At this point, you need to know the difference between a course website and a project website:
- A course site has been structured by the developers with a preset set of tools and roles and permissions. It comes with three roles, instructor, teaching assistant and student.
- A project site is more for ad hoc collaboration; it has only two roles: the maintainer and anyone that accesses the site.
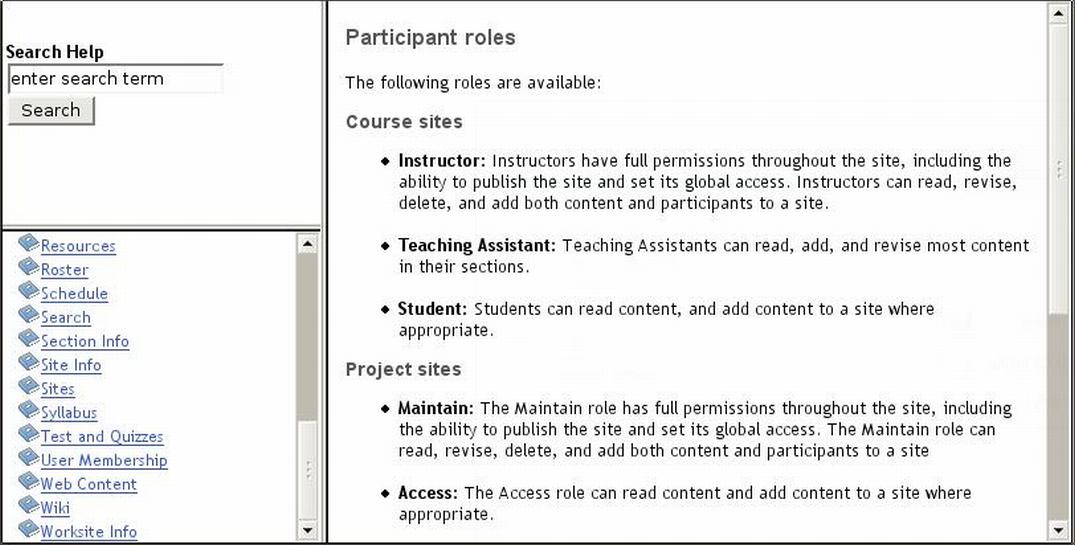
Sakai boasts a fully functioning help support which you can obviously access by clicking on the “?” icon; the help tool should be your first port of call before asking questions in the forums. The help function describes the difference between a course site and a project site perfectly (figure 4).
My first site—a project website
The recipe for creating your first site is as follows: Login as admin and add two users. Create a “project” site, choose the tools in the site and enroll the student and instructor.
While creating a sample project site, I will keep the article as simple and adaptable as possible for K-12 teachers and researchers.
Creating users
Login in as admin and select the user tool from the “My Work Space” site. Add an instructor to the site as shown in figure 5. You should choose a password that nobody can guess.
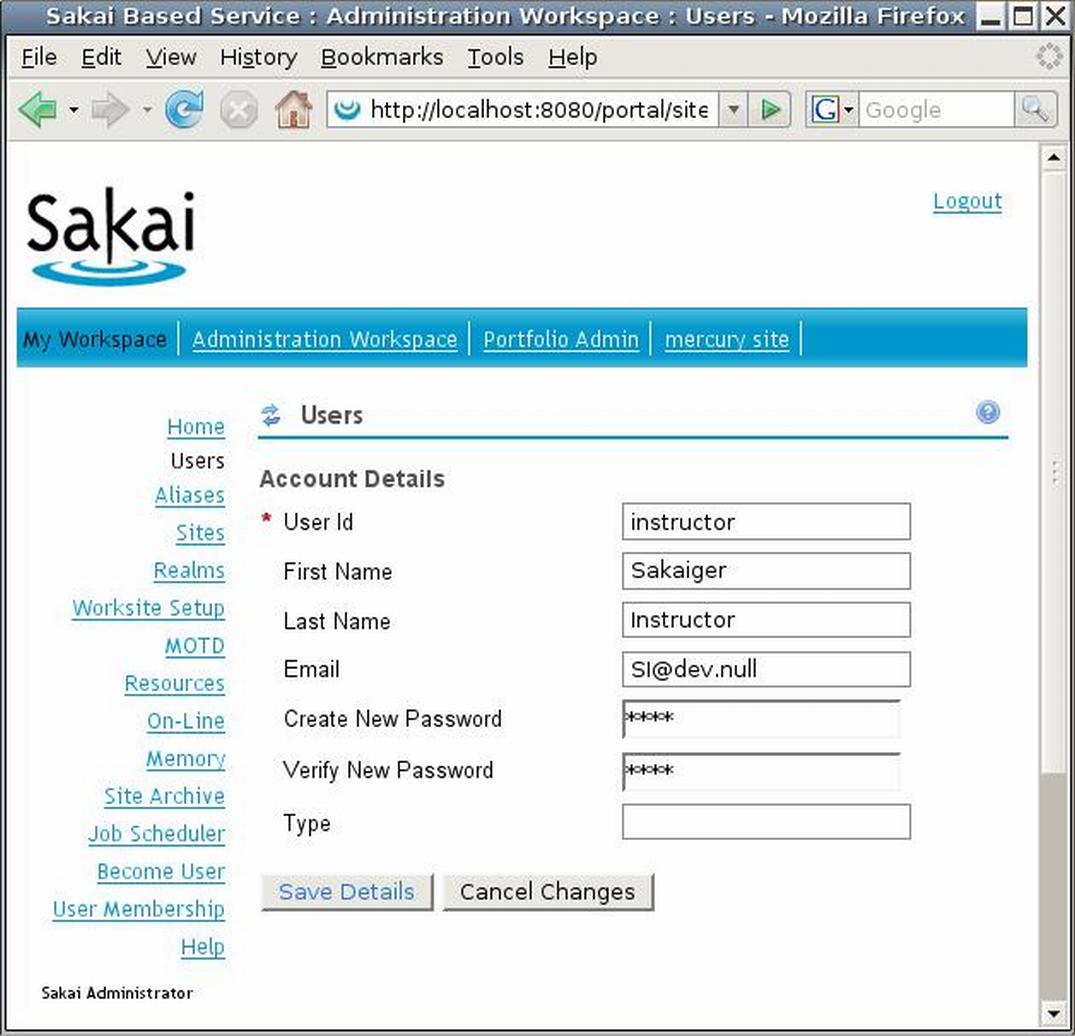
Do the same for the student account; note that the roles of the users are only defined per site and when generating or editing the site, and thus cannot be seen here under “account details”.
After creating the users and going back to the top of the tool via the refresh button next to the word “Users”, you should now be able to view a screen similar to figure 6. Don’t worry about the rather strange internal IDs. Just keep in mind that the ID will always be unique, even if the local user ID is not; the system uses this ID for the smooth tracking of objects across clusters of servers for large deployments.
Please note that logging in as student or instructor delivers a default working site that contains basic application-wide features (see figure 7).

The profile tool allows users to create a profile of themselves including photos, addresses, etc. The user has the choice to make information public. I won’t show you my personal profile as a figure—suffice it to say that the profile involves a lot of Photoshop manipulation and lying about my ability to climb large buildings in funny costumes. The membership tool allows users to join or un-join sites that instructors have made public. In the current scenario, admin will create the site and add the student and instructor; therefore, this tool is not strictly required for this article.
The student has the power to create schedules and view global announcements. The resources section enables the uploading of files via either a web form or Webdav. Dragging and dropping from local folders to the server via Webdav is a feature that students tend to love, but does occasionally have glitches.
Creating the site
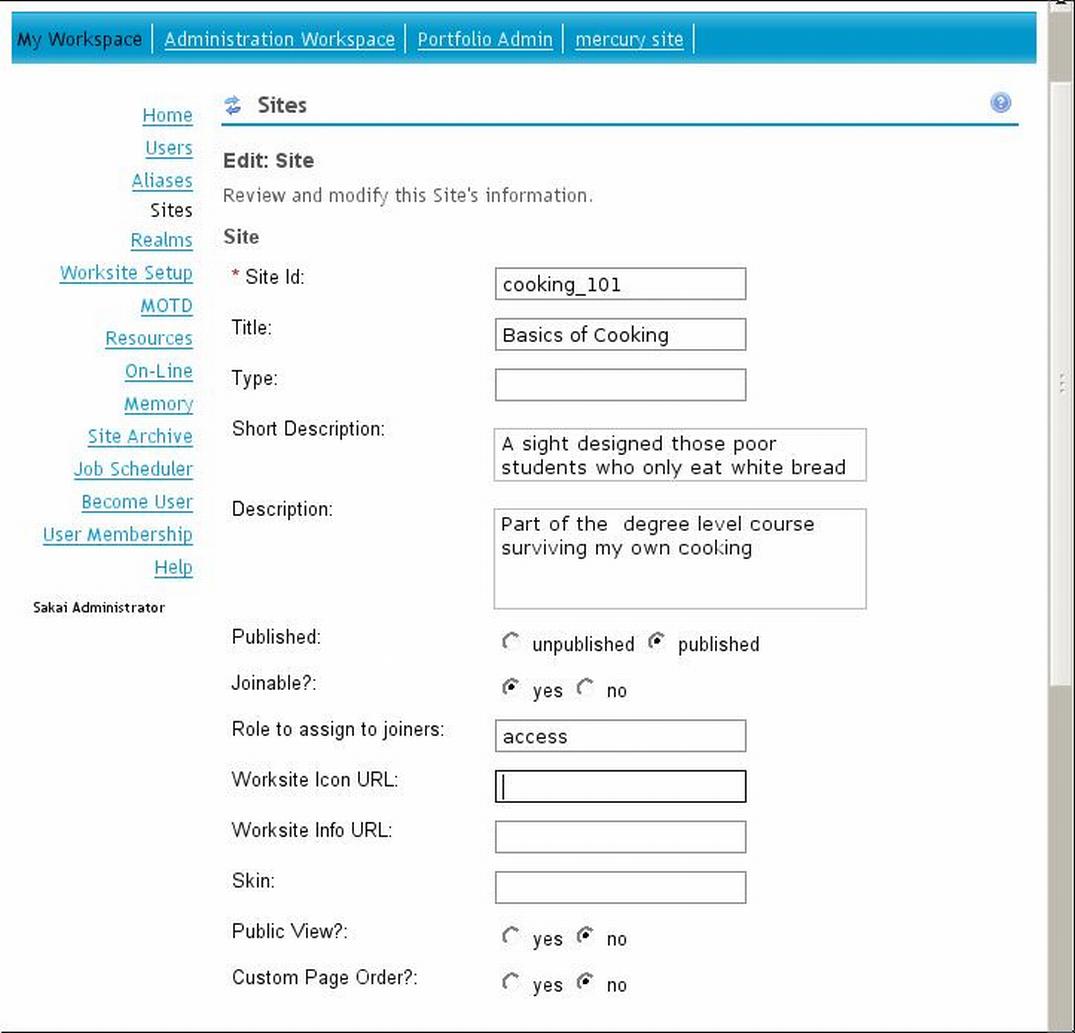
First, login as admin and visit the “My workspace” sites tool. Ignore all the links to sites that you do not recognize. The other sites are part of the default setup of the application (perhaps the GUI designers should hide the extras from the view of newbie administrators). Clicking on the link “New Site” will send you to a site edit form as shown in figure 8. Add the details as shown in the figure. Leave any undefined elements as default. Notice that thanks to your actions the application published the site: now anyone can join with the role named access. The system designers intended the access role to give students, project workers access to a site, but limit the students’ powers to modify the site. In comparison, a second possible choice: the maintainer’s role contains more powers and is designed for use by those in charge of the project for example a teacher or instructor.
Setting the site’s permissions
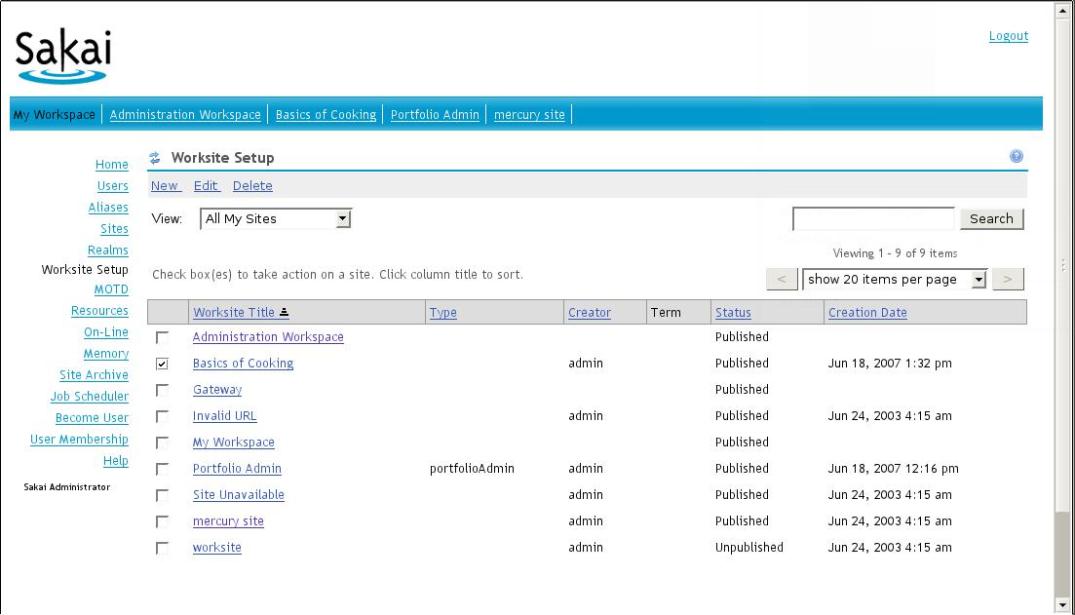
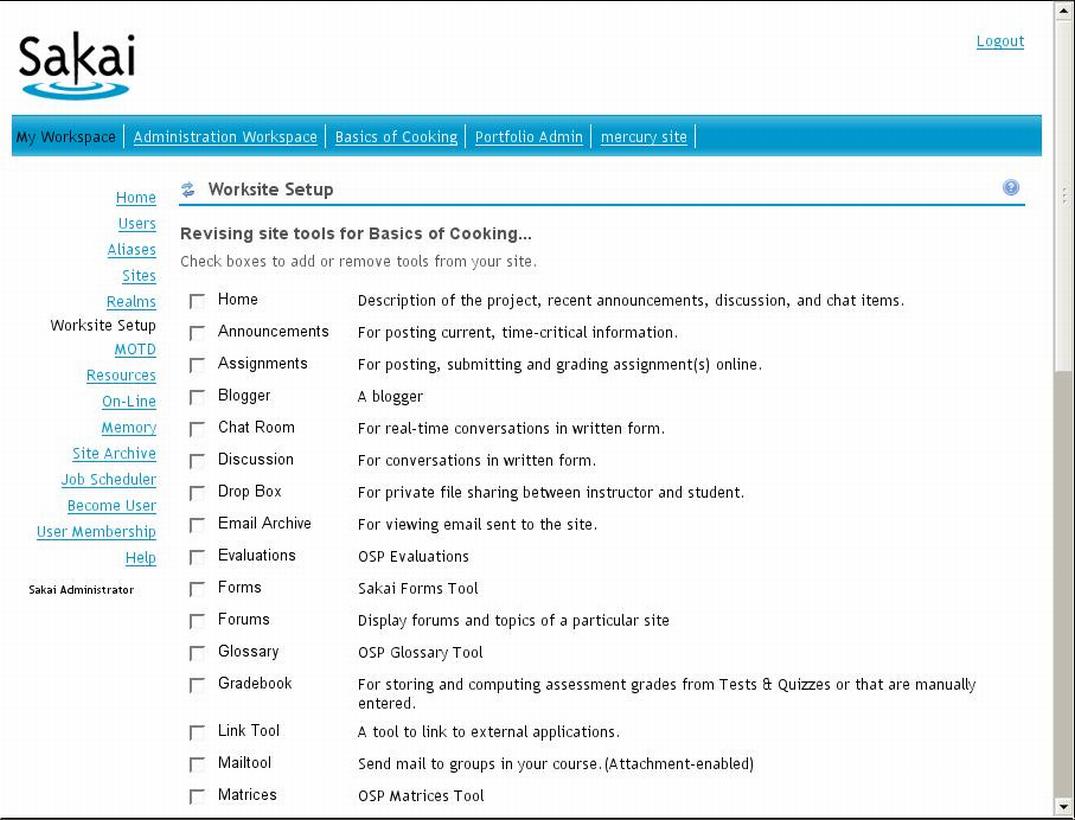
Next, you should visit the Worksite setup tool; select the tick box on the site ID “cooking_101” and modify the site by clicking on the edit link (figure 9).
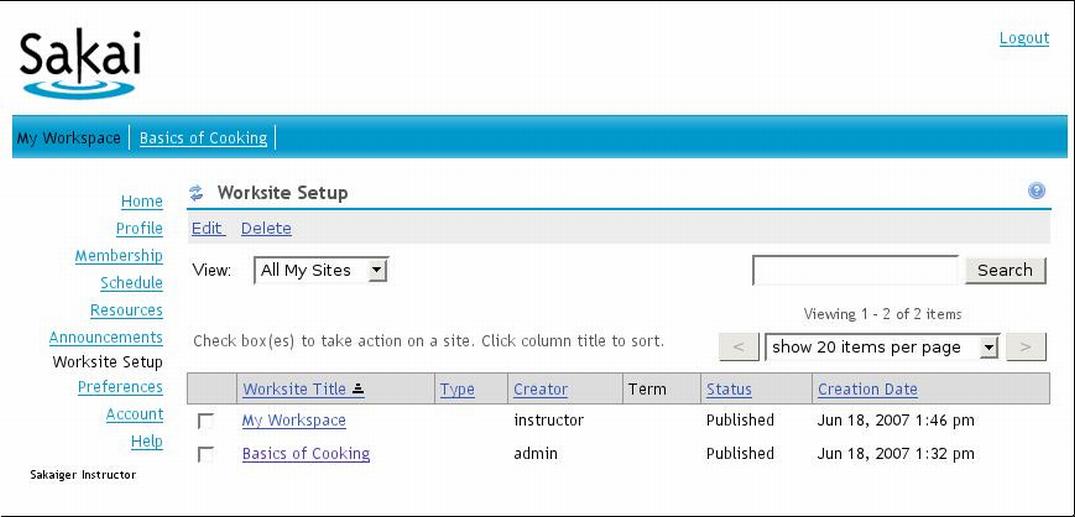
A quick aside: The instructor will be given the maintain role on the cookbook site, which will give him or her local site-wide administrative powers. When the instructor logs in, clicks on the site (in this case “basics of Cooking”) and then chooses the Worksite Setup tool, the instructor will see a lists of sites that are he or she can edit (figure 10).
Click on edit for the given site in the worksite tool (as shown in figure 11); you will see many options: for example, the page order option allows you to change the order of the menu links on the left hand side.
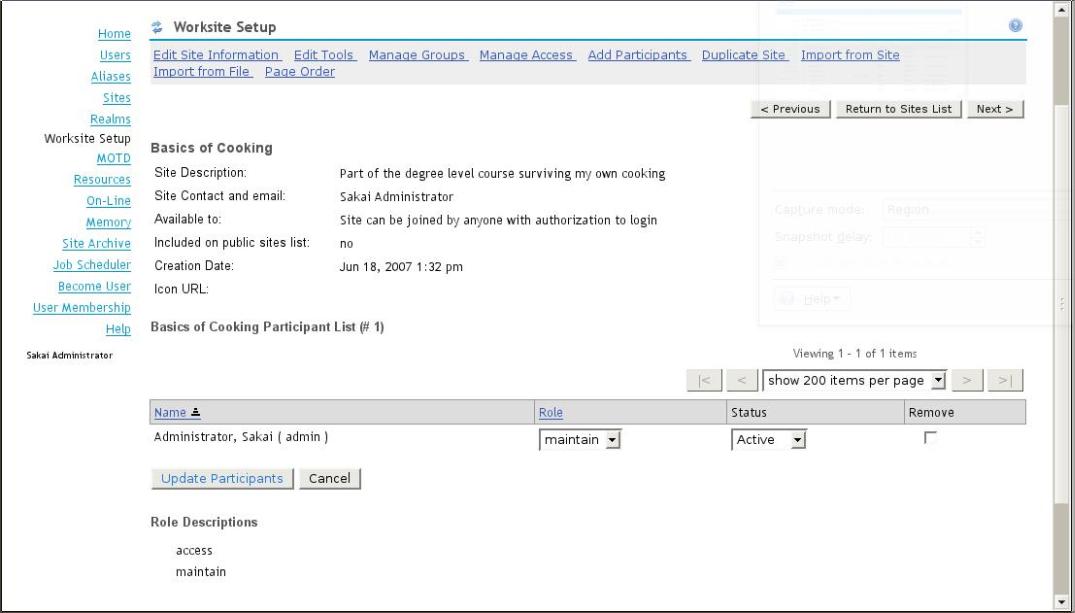
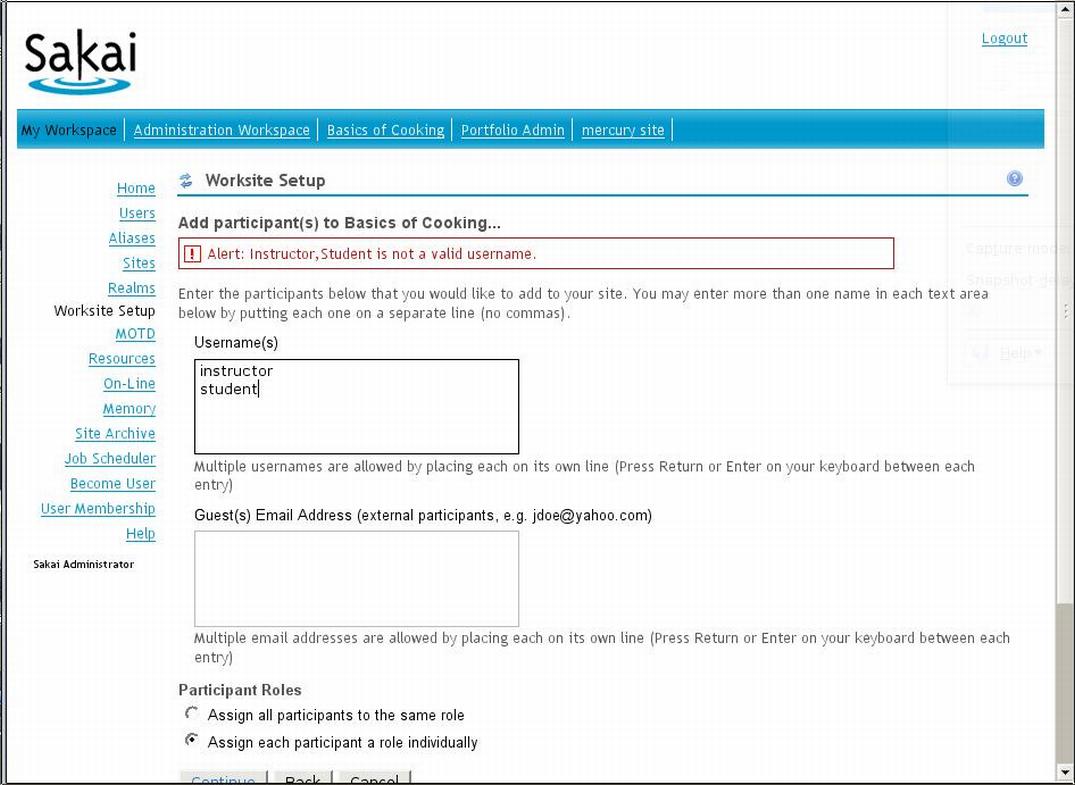
It’s now time to give the instructor the maintenance role, and to give the student the correct access rights; therefore, click on the “Add Participants link”. Fill in the details as shown in figure 12. Notice that there is one ID per line in the text area box, and these are not comma delimited (which I sometimes fill in without thinking). Another point to note is that I have chosen the “Assign each participant a role individually” option which saves a little time later. Next press the ”continue” button.
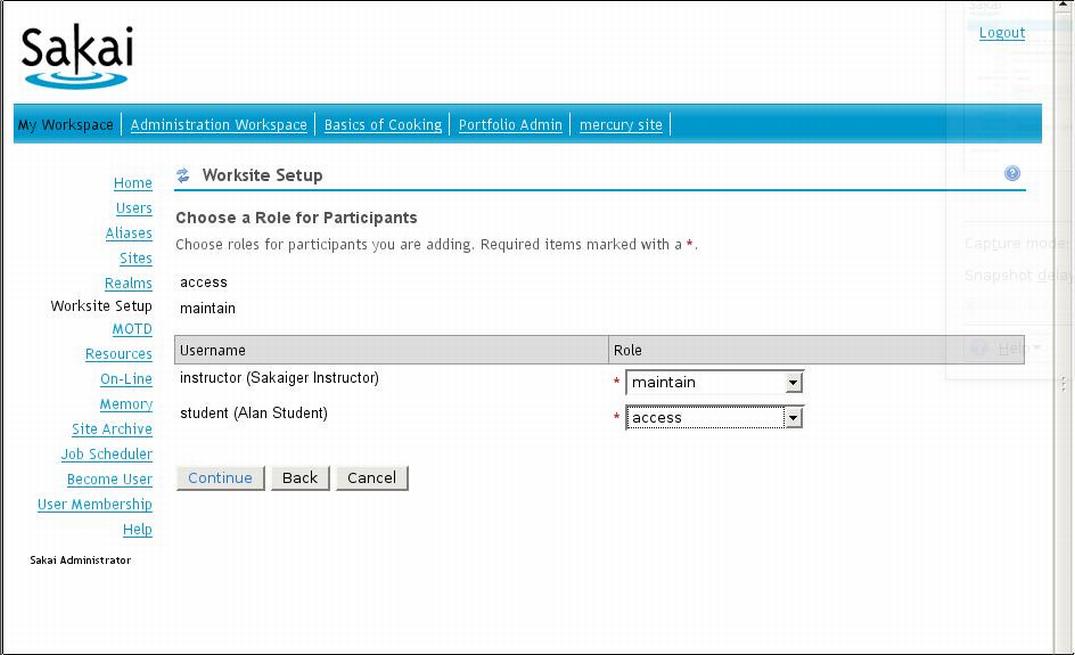
Select the correct roles by participant (figure 13) and then press continue. Next, you are offered an opportunity to send mail to the participants. Select “Don’t send ...” as the email will go nowhere in the demo anyway.
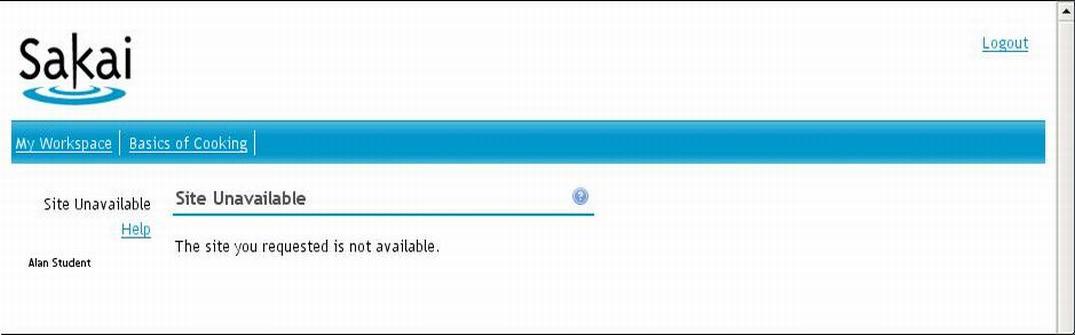
Don’t get excited yet: if you logged in as a student and then visited the cookbook site, you will only see an unpublished site similar to figure 14. The reason for this is that the project site does not have tools associated with it yet.
Adding the tools as administrator or instructor is straightforward. After selecting the cookbook site as shown previously in figure 9, select the Edit tools link (figure 15) and select the blogger, chat room, discussion, podcasts, poll, resource, search, site info and wiki tools.
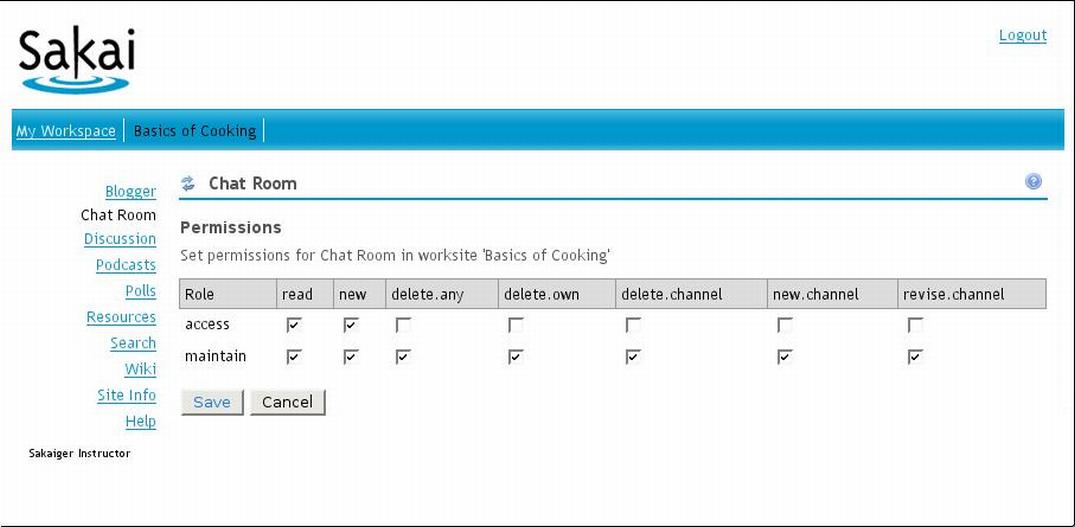
Log out now as admin and log in as instructor. Enter the cookbook site and select the chat box tool. Notice that you can edit the permissions on the tool via a link at the top. Clicking on the link will display the permissions for instructor and students (maintain and access), figure 16.
The permission names are intuitive enough, but can be made better with a little tool tip; and as instructor, you have a right to change those permission names. Under most conditions, it is hardly worth the effort to change these details unless you have a specifically idiosyncratic set of students. For example, the instructor may be a researcher that wishes other researchers to have the same powers for a given tool.
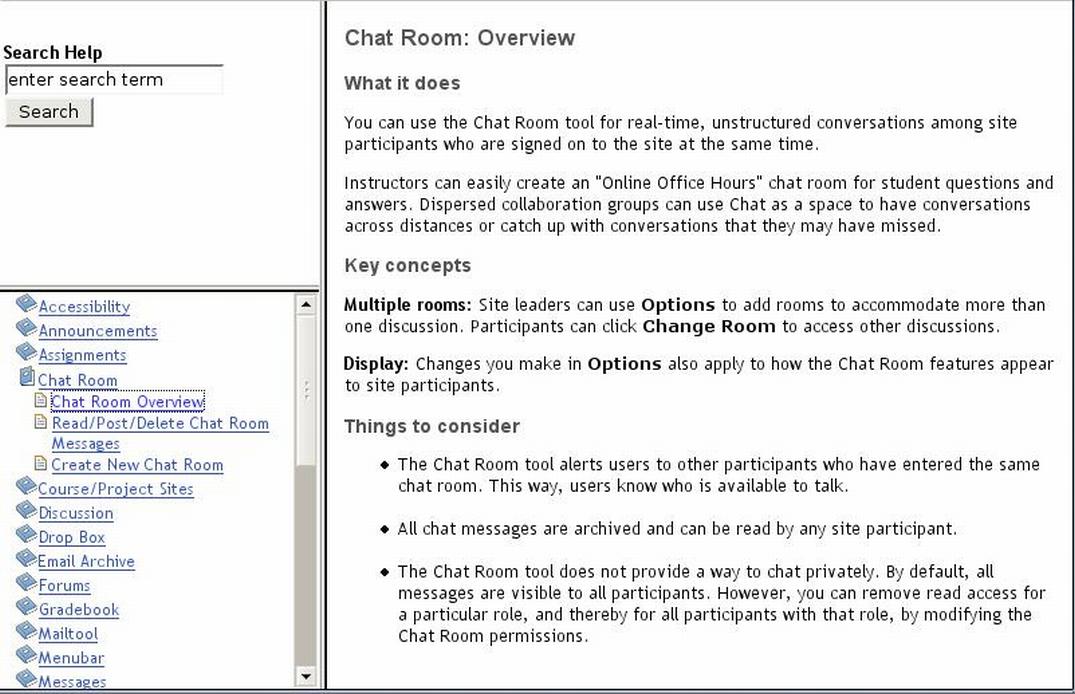
Again, I cannot help emphasizing the real power of a context sensitive help tool. Clicking on help delivers the following usable information, as shown in figure 17. Note that the help screen warns with honesty that there are limitations with the chat tool; however, at least you can have multiple rooms.
In conclusion, the recipe for creating a site is reasonably straightforward. Each new tool may have its own particular way of doing business and may require individual configuration from the instructor. However, the instructors do have a lot of power over their own configuration destiny.
I haven’t discussed the generation of courses sites; as I said, they are similar to projects, but with a slightly more rigid and mildly more complex structure. That I will leave to your own explorations; if you are stuck read the help text and visit the links mentioned later in this article.
sakai.properties
The system administrator modifies advanced configuration predominately via the central configuration file for Sakai, which sits in the Sakai directory and is thoughtfully named (very originally) sakai.properties. The property file defines global configuration such as the location of important files and if certain tools should be enabled or not. For example, as instructors visit the Search tool. Notice that the naughty administrator has forgotten that the tool is not fully activated until sakai.properties is updated with the line search.enable=true (see figure 18), and the server is restarted.

Upgrading the built in in-memory database to MySQL or Oracle is not brain surgery and requires around eight lines to be changed in sakai.properties and a correctly set up database. Migration of the data on the other hand involves more complexity and thus detailed recipes and significant testing.
Developing for Sakai
It’s very easy for a Java developer to build tools using a cleanly separated API. A basic tool is a Servlet plus an extra XML file that tells Sakai where to place the tool in the GUI. Once registered via the XML file, the new tool will just appear auto-magically in the tool selection dialog, as shown in figure 15.
The community recognized that adding tools to the core functionality can make the project more unstable. Therefore, there is a methodical process for achieving recognition for new tools. First, tools are set as contributions and stay in the contribution section of the source code management system. Anyone is free to patch and compile an instance. That sounds hard, but it is just a matter of dropping it into the right directory and compiling it. If the tool has significant end user adoption, then the community makes the tool provisional, and the developers place the tools code in the main source code branch. However, the application hides a running instance from the end user when the server starts up. At this point, highly motivated workers spread throughout the world perform a fully loaded double barrel QA cycle on the tool. If the tool makes it, then it will appear in Sakai’s full release (and it will be available for mass use). The developers become famous and snapped up as guests for MTV unplugged sessions.
What’s next
Sakai has deployment penetration, a healthy community and a centralized QA. Commercial support has grown, in part, due to the Apache-like license. The number of tools brought into the core package is widening. However, to reach the next level of penetration requires some significant tweaking of the GUI and workflow and, to a smaller extent, the underlying technologies. Personally, I believe that Sakai has already succeeded and now it is just a question of selling the idea of wider scale deployment outside the Sakaigers traditional university base.
Sakai is also very well documented. The community has a number of well-known online watering holes. These include:
Acknowledgements
I would like to acknowledge the rare few that have answered my dumb and dumber questions on the sakia-dev list, and especially to Steven Githens for creating SASH, a command line, Unix-like tool for the coding masses, awesome to the power of very large numbers indeed.
Further reads
You can read other articles about online project management and web project management to know more about project management itself (editor).