For a long time, hibernation has been associated with proprietary operating systems. Now, the feature has started taking the front row in GNU/Linux systems too. What’s more, it’s fast, flexible and is a real time saver!
Introduction
Software hibernation or suspend-to-disk is a very productive operating system feature. It has many advantages over a cold system start or reboot. Not only does the hibernated system load up faster, the user also gets back to his previous session without much effort. This is important because of the time the user saves by avoiding the need to set up a work session again.
So, how is hibernation different? It is different because it saves the contents of the RAM (Random Access Memory) into some non-volatile storage medium before shutting down the system. Consequently, when the system boots up again, the operating system loads the suspended image from disk to get back to the previously stored session.
Software suspend, as hibernation is popularly known in Linux systems, has evolved a lot in present day kernels. It is constantly getting more and more stable and useful. Some implementations are available in the kernel while one is available as a patch that can be applied to the 2.4 or the 2.6 series. This article is meant to introduce you to the implementations available and the features that they provide.
Not only does the hibernated system load up faster, the user also gets back to his previous session without much effort
History and available methods in Linux
The history of software suspend in Linux can be traced to Gabor Kuti and Pavel Machek who developed a patch for the 2.2 series known as swsusp. It was probably an abbreviation for swap suspend as the snapshot image was written to the active swap partition of the system. Gabor used to maintain these patches on his personal page. The code base for this patch became the basis for three different implementations that we have today: swsusp, suspend2 and uswsusp.
swsusp was first incorporated in the 2.5.18 kernel. It subsequently became a part of the 2.6 stable release. Later, a fork of swsusp, known as pmdisk evolved. The difference between swsusp and pmdisk was that the latter’s code was much cleaner and well structured. Moreover, while swsusp used the /proc interface, pmdisk used the /sys interface. pmdisk cleanups were eventually merged into the swsusp code base.
Among all the available methods, the one that generates the maximum excitement is suspend2 by Nigel Cunningham. It introduces some important changes in the way the snapshot image is handled and is also noticeably faster. suspend2 is currently available as a patch for 2.4 and 2.6 kernels and will hopefully be merged into the mainline kernels in future.
Also worth mentioning is uswsusp, abbreviation for userland-swsusp. It is an implementation of an interface for software suspend in the user space. All kernels starting from 2.6.17 have uswsusp merged in them. The module gives access to software suspend functionalities by exposing common file operation methods that can be used to operate on a character device. This is only useful for developers who would like to write their software suspend applications in user space and hence I won’t delve into this topic in detail here.
swsusp
How swsusp works
swsusp works by taking a snapshot of the contents of the RAM. This snapshot or suspend image is copied and then saved in an atomic operation fashion to the active swap partition. Upon rebooting, if a valid image signature is found on the active swap, the image is loaded and the snapshot transferred back to memory. This gets back the saved state to the user. The following illustration shows the sequence in simple terms:
- User requests for software suspend
- All the running processes are given the
suspendsignal - The devices are frozen so that they don’t change the system state when the snapshot is taken
- The memory image is atomically copied with interrupts disabled
- Frozen devices are awakened so that the image can be written
- The image is written to swap
- Devices are suspended and the system powered off
The resume process involves just the inverse of the above steps.
Configuration and running
Configuring and running swsusp is a breeze since it is a part of the 2.6 vanilla kernel. If swsusp has not been compiled in your running kernel, you will have to enable it and recompile your kernel. It is always a good idea to compile a fresh stable version instead of tinkering with the running version because that way you always have a backup with you.
To enable swsusp, bring up the kernel configuration window:
$cd /your/linuxsourcedir
$make xconfig
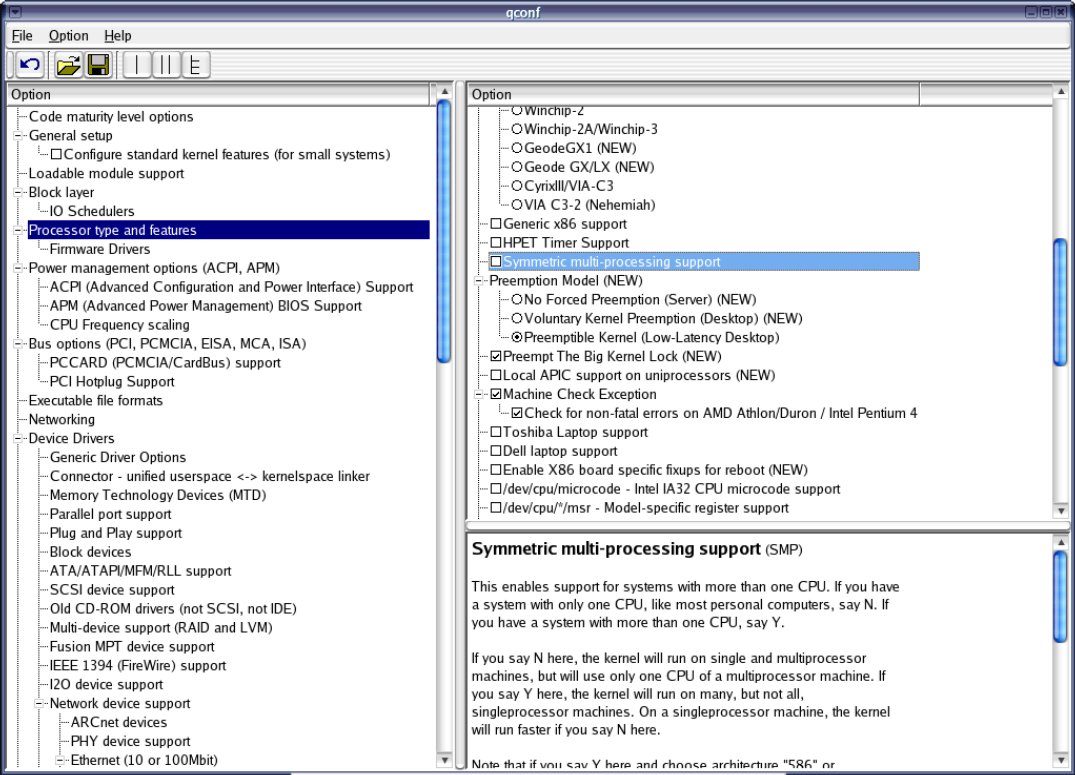
Enable Software Suspend under Power Management Options as shown in figure 1.

You can optionally add your swap partition path in Default resume partition. This step appends a resume parameter to the kernel section in grub.conf. You may also enable Encrypt suspend image that would encrypt the image stored in the swap partition. The key that is used for encryption is stored temporarily and deleted after resuming. swsusp will not work with Symmetric Multi Processing (SMP) enabled in your kernel. So, you will have to disable Symmetric Multi Processing_support under _Processor types and features to enable the swsusp module as shown in figure 2.
As swsusp uses the AES module to encrypt the suspend image, you will have to select Cryptographic API and AES cipher algorithms as built-ins into the kernel (not as modules as they won’t be loaded). Refer to figure 3.

`swsusp` will not work with Symmetric Multi Processing (SMP) enabled in your kernel
Now compile your kernel and if the compilation succeeds, install your kernel.
$make
$make modules_install
$make install
You should also check whether a resume parameter has been appended to the newly installed kernel’s entry in grub.conf. If not, you can add it manually as resume=/your/swappartition. (Refer to figure 4)
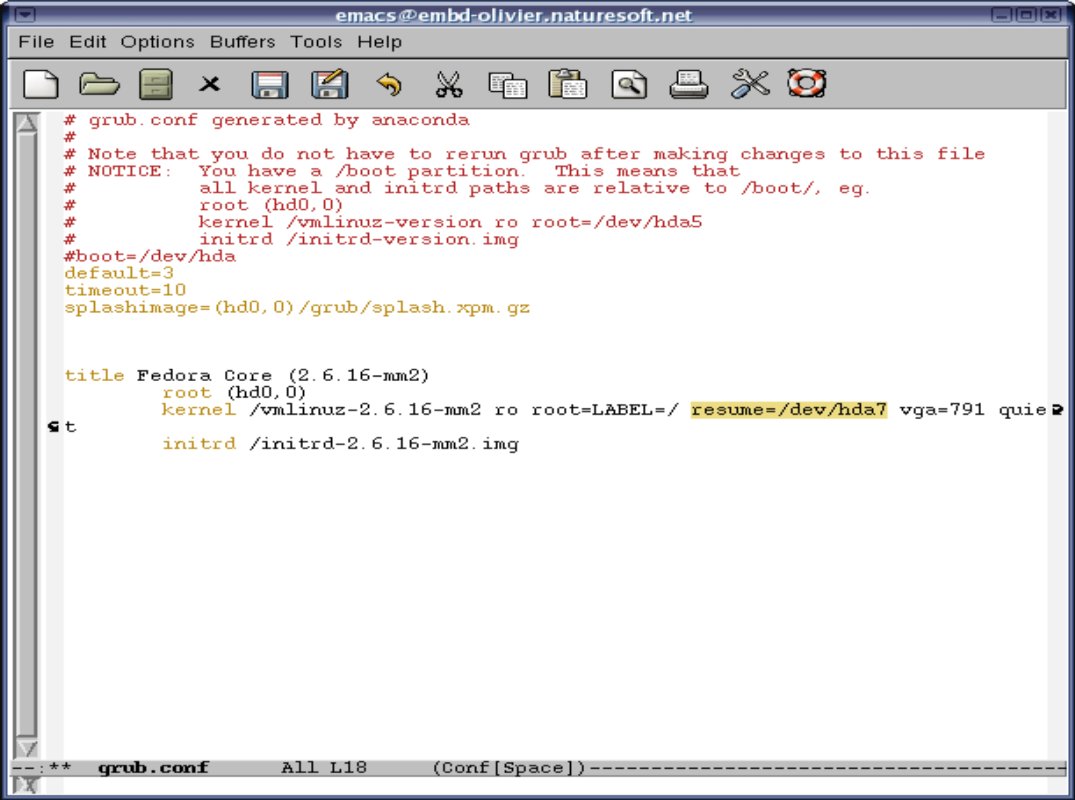
The default location of grub.conf is /etc. It may be different for your system. Finally, to hibernate, type the following command :
$echo platform > /sys/power/disk; echo disk > /sys/power/state
If everything is fine, your system should enter the hibernate process and after saving the image should power off. You should again restart your system to find out if it really worked. The boot sequence should load the suspended image and get back to your previous session.
There are a few other important points worth mentioning:
-
To limit the suspend image size to N bytes, type:
$echo N > /sys/power/image_size
where N is the number in bytes.
- Instead of using
echo platform, you may useecho shutdownto hibernate your system. (Refer to the command above) -
If the system becomes too slow after a resume, you may try turning off the swap and then turning it on again:
$swapoff -a $swapon -a
-
You may try a SysVInit patch that would enable you to suspend using:
$shutdown -z now
The patch is available here
- Append the
noresumeparameter to your kernel if you would like to boot normally but be warned that something might go wrong!
suspend2
How suspend2 works
The fundamentals behind the working of swsusp and suspend2 are almost the same. However, there are some major differences in the way suspend2 does things and the flexibility it provides to the user. suspend2 first saves the lru (least recently used) pages in memory to the disk backstore, then does an atomic copy of the rest of the memory and then saves that. Since it is not doing an atomic copy of the whole of the memory, the process becomes much faster than swsusp and the image size is not limited to just half of the memory. The module sees to it that once we start saving the page lists, no pages are added or deleted, hence maintaining the integrity of the saved data. To summarize the steps:
- User requests for system hibernation
suspend2waits for the number of processes in their critical paths to reach zero- New processes are prevented from entering states that can cause deadlocks or inconsistent states
- The page cache is saved to disk
- Drivers are suspended and the processor state is saved
- The rest of the memory is atomically copied and then saved to disk
- The system is shut down
The resume process is just the opposite of the above steps.
Configuration and running
To enable suspend2, you will have to patch and compile your kernel. Patches for many versions are available on the suspend2 downloads page. However the stable version is suspend-2.2.5 for 2.6.16.9 kernel. Using the stable release reduces the chances of breaking the kernel compilation. First of all, you need to apply the suspend2 patches using the apply script supplied.
$tar -jxvf linux-2.6.16.9.tar.bz2
$tar -jxvf suspend2-2.2.5-for-kernel-2.6.16.9.tar.bz2
$cd linux-2.6.16.9
$../suspend2-2.2.5-for-kernel-2.6.16.9/apply
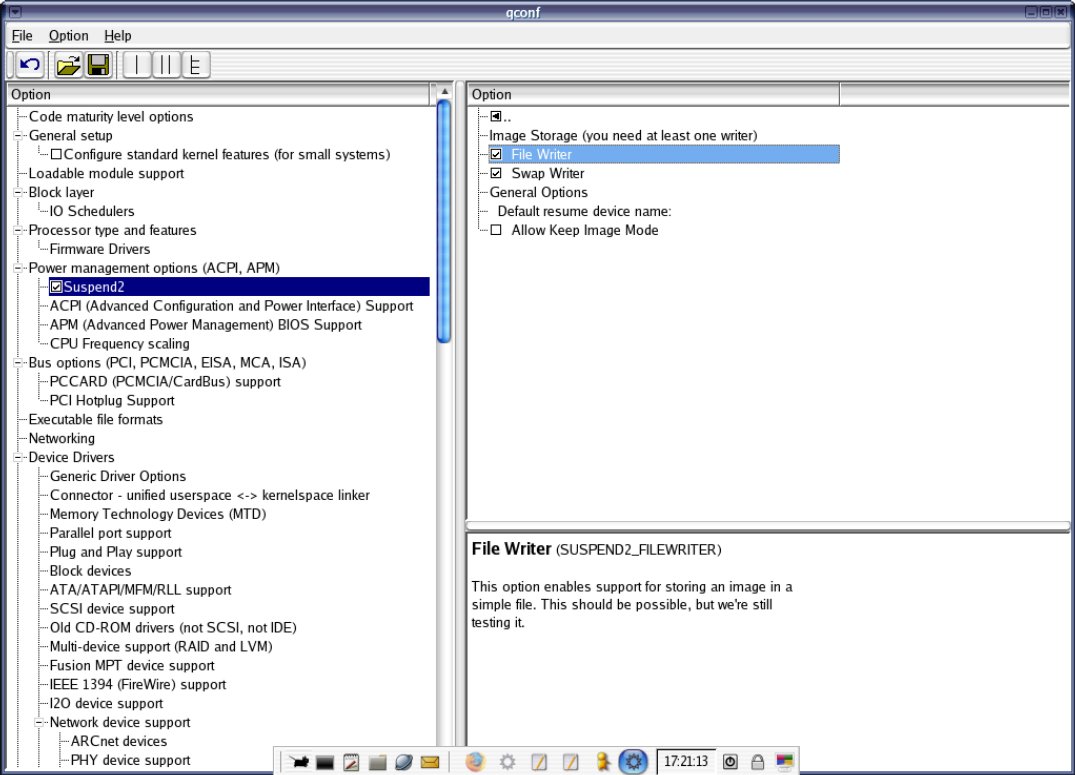
If you have other patches on your kernel (such as the mm patch), chances are that the apply script will fail. In that case, patching the files individually would be a good idea. The patch file that refuses has to be manually applied by looking through the diff file and replacing code at the right places. After patching, you will have to configure your kernel. As shown in figure 5, enable Suspend2 under Power Management Options. From the options that show up in the Option window, enable File Writer and Swap Writer. You may ignore the rest of the options but feel free to go through their descriptions.
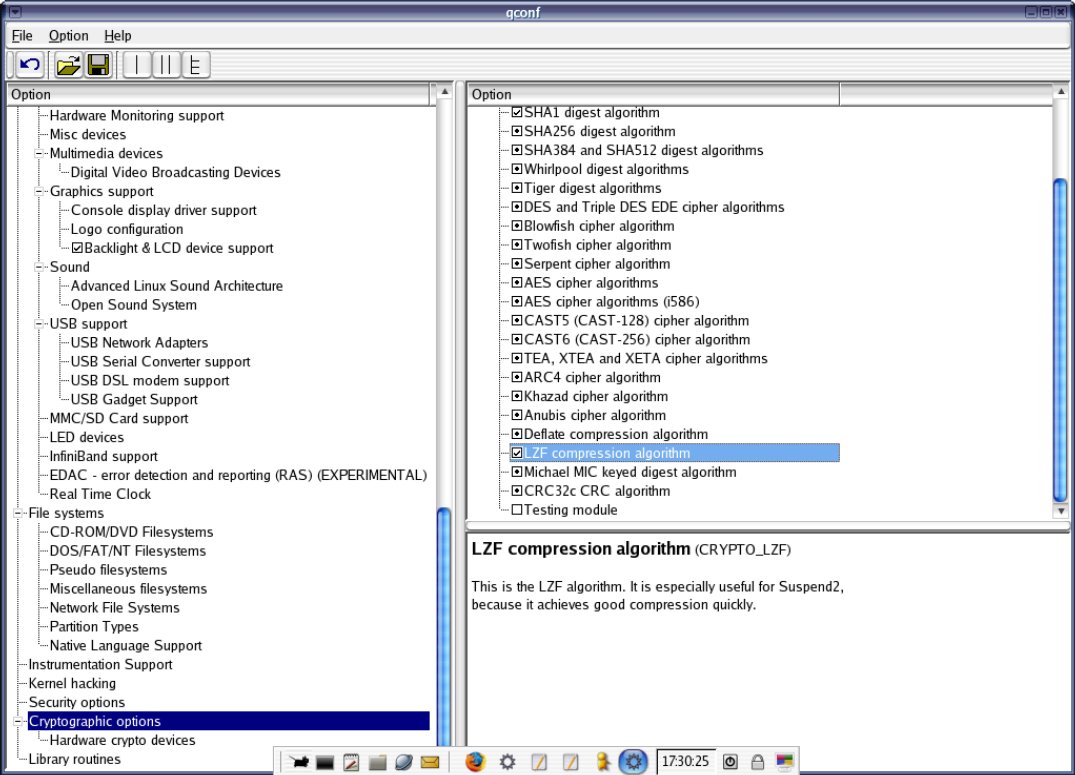
By default, suspend2 uses the LFZ modules for compression and encryption which may be built into the kernel by selecting Cryptographic API and LFZ compression algorithm under Cryptographic Options.
Once you are done selecting all other modules relevant to your system, compile your new kernel and install it.
suspend2 gives you the flexibility to choose the location to save the suspend image. You can either choose the file writer or the swap writer for this purpose. While the filewriter can save the image to a normal file, the swap writer can save the image either to a swap partition or to a swap file. Unlike swsusp, suspend2 can write to any swap partition! It need not be the system’s active swap partition. I’ll cover the above three steps one by one.
Unlike swsusp, suspend2 can write to any swap partition! It need not be the system’s active swap partition
-
Writing to a normal file: First of all create a file that is at least equal in size to your system RAM. Here, I create a 512 MB file called suspend-image.
$dd if=/dev/zero bs=1M count=512 » suspend-image
Next supply this file to the suspend2 filewriter target.
$echo suspend-image > /proc/suspend2/filewriter_target
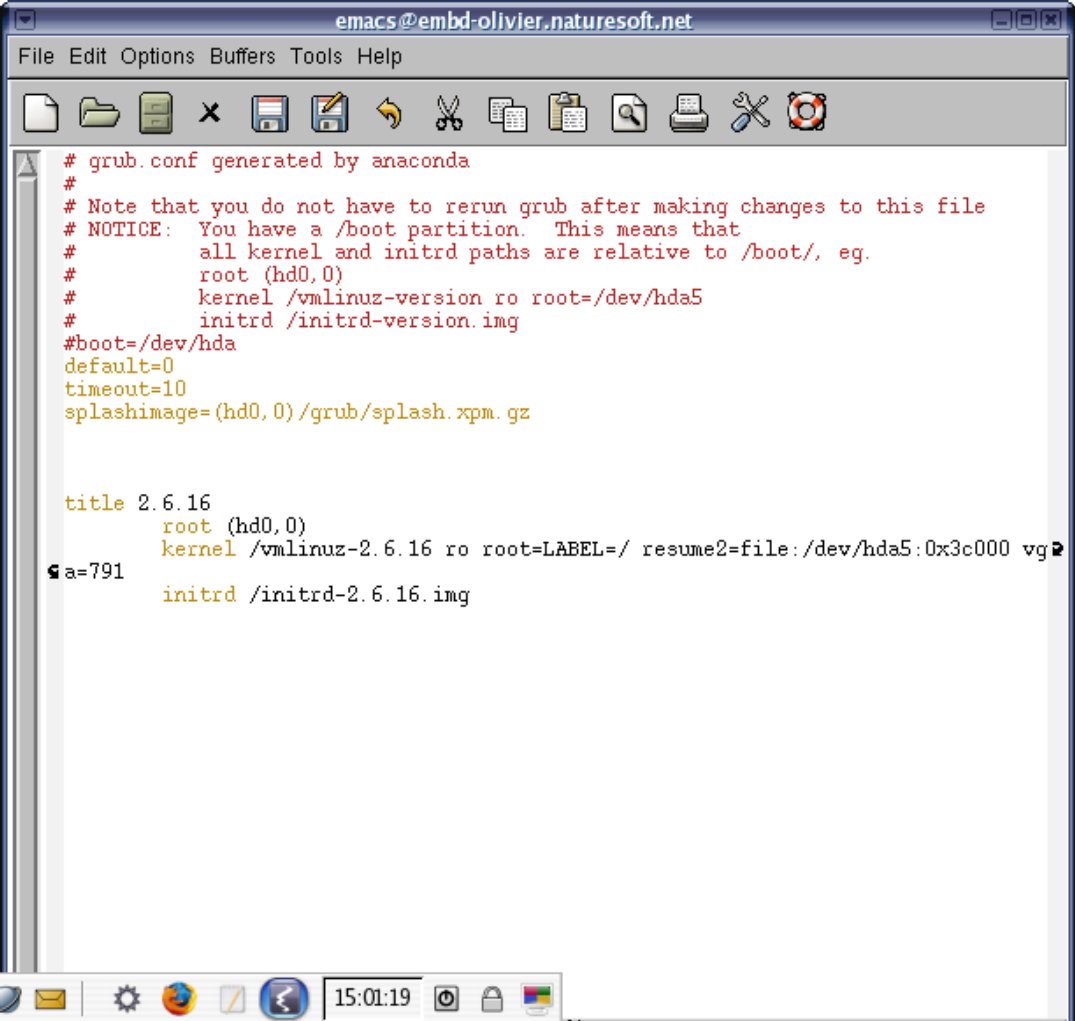
Finally, you will have to get the actual physical offset of this file and append it to the kernel section in grub’s configuration file (grub.conf).
$cat /proc/suspend2/resume2
The above command gave me the following output:
file:/dev/hda5:0x3c000
So I need to append resume2=file:/dev/hda5:0x3c000 in my grub.conf. (Refer figure 7). Don’t just copy-paste the above output as it will definitely be different for your system.
-
Writing to a swap partition: This is the easiest of them all and is recommended for first timers. You just need to append your swap partition path to the
resume2parameter for your kernel. Find out your swap partition:$/sbin/fdisk -l grep "swap"
and edit grub.conf accordingly. (Refer to figure 8)

-
Writing to a swap file: The steps to this are similar to writing to a normal file except that here, you create a swap file instead of a normal one. To summarize:
$ dd if=/dev/zero bs=1M count=512 » swap-suspend-image $ /sbin/mkswap swap-suspend-image 512 $ sync $ swapon swap-suspend-image
The output of the following command tells you what to append to the resume2 parameter.
$cat /proc/suspend2/headerlocations
The following output was obtained:
	For swap partitions, simply use the format: resume2=swap:/dev/hda1.
   For swapfile `/home/bandan/PTPRO/FSM/swap-su`, use resume2=swap:/dev/hda2:0x1d92678
The second output is what you would append in grub.conf.
After choosing from the filewriter and the swapwriter (a combination of both is also possible), you should take a look at the hibernate script. This is a shell script that greatly simplifies the hibernation sequence. Get the latest version from the suspend2 Downloads page.The script is available as RPM, SRPM, deb or tar.gz. Choose one of them and install it. By default, it should install in /usr/local/sbin.
If you use initrd (common in redhat distributions), you need to tell it about suspend2. Open the mkinitrd script in a file editor and go below the line that says:
echo "echo Mounted /proc filesystem" >> $RCFILE
Add the following:
echo "echo > /proc/suspend2/do_resume" >> $RCFILE
The default location of mkinitrd is /sbin.
The advantage of suspend2 lies in the flexibility it offers. A set of configuration files are provided by default in /etc/hibernate. Hopefully, suspend2 will work “out of the box” but it is always a good idea to go through these configuration files if you want to tweak suspend2 to get the best out of it.
Here is a brief summary of all the configuration files suspend2 offers. The verbose commented sections give a detailed explanation of all the available options.
blacklisted-modules: Lists all the modules that have been reported to cause problems while suspending or resuming.hibernate.conf: The file actually read when the hibernate script is executed.disk.conf: Used when using the hibernate script to suspend using swsusp.common.conf: Includes list of common configurable options.ram.conf: Used when suspending to RAM instead of disk. (useful for laptops)suspend2.conf: Configurable options for suspending to disk with suspend2.
Now all you have left to do is reboot into your new kernel. Keep a close eye on the system output while booting up. You should see something like Suspend2 enabled. Finally to hibernate, simply type the following as root:
$/usr/local/sbin/hibernate
The system should enter the hibernate sequence and shutdown. Reboot again to check everything is fine.
If you are having problems with the filewriter, you may switch to the swap writer instead. It is usually convenient to try suspending to the swap partition first because that’s the easiest. Then, you may try suspending to a normal file or a swap file. If the hibernate script doesn’t work for you for any reason, you should try the following:
$/usr/local/sbin/hibernate --bug-report > suspend-debug
Go through the contents of suspend-debug and see what went wrong. The most important information will be towards the end of the file. If you find its contents meaningless, you would be better off sending it to the suspend2 mailing list. Most probably, someone will help you out.
Eye candy
Not only does suspend2 work differently, you can also make it look different. You have the option of a text based user interface or a graphical interface to show during the hibernate sequence. Download and install the Suspend2-User-UI package from suspend2 website. Additionally, obtain a theme from here and extract it to /etc/splash. Create a symbolic link to it and name it as suspend2.
$ mkdir /etc/splash (in case it does not exist)
$ cd /etc/splash && tar -zxf theme.tar.gz
$ ln -s theme/ suspend2
Add the appropriate entry in suspend2.conf depending on what user interface you would like to have.
For text UI
ProcSetting userui_program /usr/local/sbin/suspend2ui_text
For Graphical UI
ProcSetting userui_program /usr/local/sbin/suspend2ui_fbsplash
Now hibernate and see if everything goes as expected. If not, you can use the --bug-report option with hibernate to diagnose the problem. hibernate’s log file also provides a lot of information about what went wrong. Its default location is /var/log/hibernate.log.
Some tips and tricks
-
Using the power button to suspend: First of all, make sure you have compiled your kernel with acpi support. Then install acpid and add it to the default run level.
$ rc-update add acpid default
Edit /etc/acpi/default.sh as follows:
#!/bin/sh
# Default acpi script that takes an entry for all actions

set $*

group=${1/\/*/}
action=${1/*\//}

case "$group" in
   button)
      case "$action" in
         power)  /usr/sbin/hibernate &
           ;;
         *) logger "ACPI action $action is not defined"
            ;;
      esac
      ;;

   *)
      logger "ACPI group $group / action $action is not defined"
      ;;
esac
- If you would like to reboot instead of shutting down your system, simply press “R” during the suspend process.
Conclusion
suspend2 clearly seems to be the successor to swsusp. It provides a lot more features than any other available method and is also very configurable. It allows you to store the suspended image almost anywhere. A more interesting feature which is in the TODO list is suspending to a NFS share! However, kerneltrap reports Nigel as saying that he will devote less time to suspend2 which may prevent its merging into the vanilla kernel.
The three different methods available target three different types of users. If you just want your system to hibernate and have no desire to tinker with your kernel, swsusp is definitely for you. On the contrary, suspend2 gives you greater speed and flexibility. If you are one of those who fancies writing his own userspace program, go for uswsusp. Get set and take your pick!