Quentin Crisp, the infamous, bohemian Englishman, said that he never cared much for dusting. “Why bother”, he observed, “after four years, it doesn’t get any worse”. If only the accumulated detritus of the digital dust on our computers could be treated with such cavalier contempt. Ignore it at your peril and you might just have to call in Kim and Aggie to sort out your cruft!
Note: this article assume that your distribution is based on Apt. For example: Debian, Ubuntu, Kubuntu, and many others
You probably don't know just how much stuff you have actually installed. Try this in a terminal:
cd /var/cache/apt/archives
And follow it up by du -ch which will give you grand totals in human-readable form. My totals came to over 700MBs. If you want the details ls | less will do. There is a lot of trendy talk today about reducing your carbon footprint but that figure tells me (and you?) that it is perhaps time to do something about our digital footprints. So, let’s slip on those fur-trimmed rubber gloves, that pinny and get out of those stilettos and get busy.
Fortunately, you don’t have to suffer the ignominy and scolds of Kim and Aggie to buff up your computer. For Apt-based versions of GNU/Linux, users have at their disposable a number of tools and utilities to give a system a brisk spring clean. This howto will take a tour through those tools -Deborphan, GtkOrphan, Editkeep Synaptic, Apt-get, localpurge debfoster, Aptitude and Orphaner—and see how to use them to best effect. I am assuming throughout that you have not been playing with any nasty, bug-eyed monsters or consorting with any software from the rough end of the trench—in short, that you have not been indulging in promiscuous use of multiple package management tools which can lead often to unforseen consequences. What Apt-get giveth, Aptitude may taketh away. (If you install a package with Apt-get you cannot expect to uninstall its dependencies with Aptitude. In other words, don’t mix your drinks!)
Apt-get on the command line
If you’re using a Debian-based distro Apt-get is present and the most common commands usually concern the installation and removal of applications. Everyone will be familiar with commands like, say, apt-get install Amarok and apt-get remove Amarok. The latter will certainly remove the application but it does not address the matter of dependencies, library and configuration files.
You will have noticed that, depending on the software you are installing, you package manager may decide to also install various other pieces of software. Later you decide either that the application is too buggy to tolerate or that it just doesn’t do what it said on the tin, so you remove it. Apt-get remove followed by the package name (excluding the full version title) will do the trick but it will leave behind its configuration files—and will not uninstall those now redundant dependencies it dragged in either. One of the simplest things you can do, unless you wish to retain them, is to use Apt-get to clean them out. Open your terminal of choice and su (or sudo su for Ubuntu users) to become root and type the following command:
apt-get remove amarok --purge
Obviously, substitute you own application name here. If you like to reduce typing to a minimum, you can abbreviate --purge to the shorter -p. (Don't include the full stop!) Now, once that command has been issued Apt-get will summarize what is going to be done by way of removal. Unlike the unaccompanied, simpler remove command you will see that an asterisk has been added to the name of the item to be deleted indicating the additional removal of the configuration files. Type y at the prompt and both the application and its configuration files are gone too. The space saved, set against the increasing size of hard drives, is small, but every little helps and over hundreds of applications, the space saving adds up as the clutter decreases.
However, you don’t need to restrict yourself to the command line to purge configuration files. Both Synaptic and Adept (the sucessor to Kynaptic in Kubuntu) have this function too as the screenshots below illustrate:
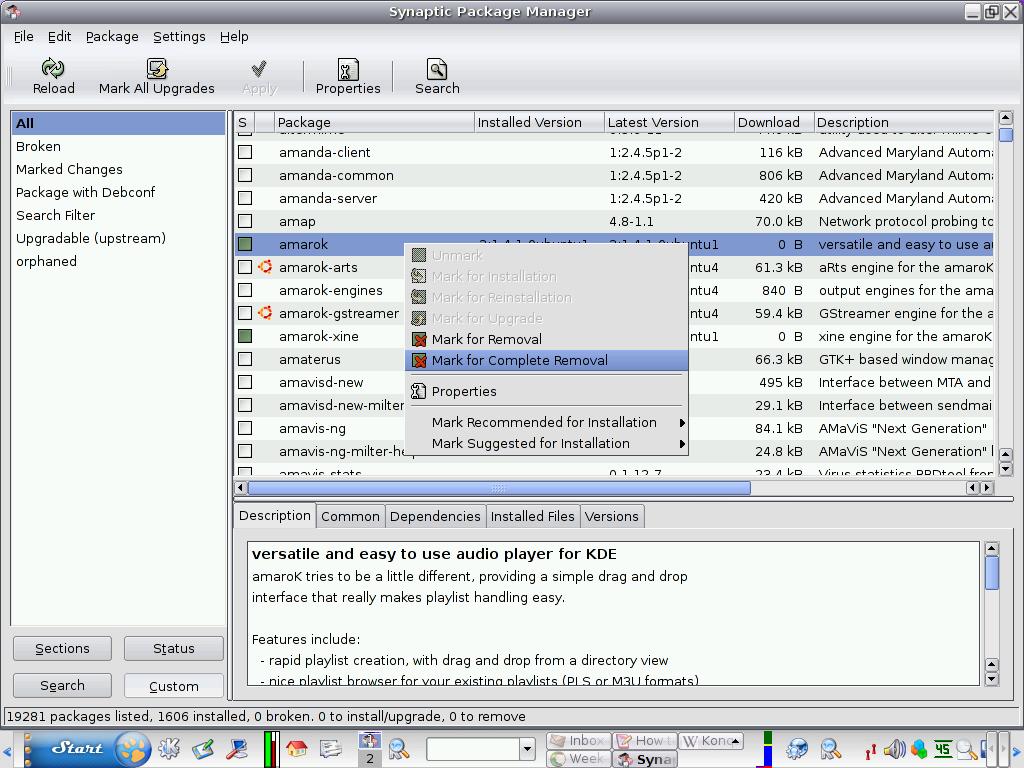
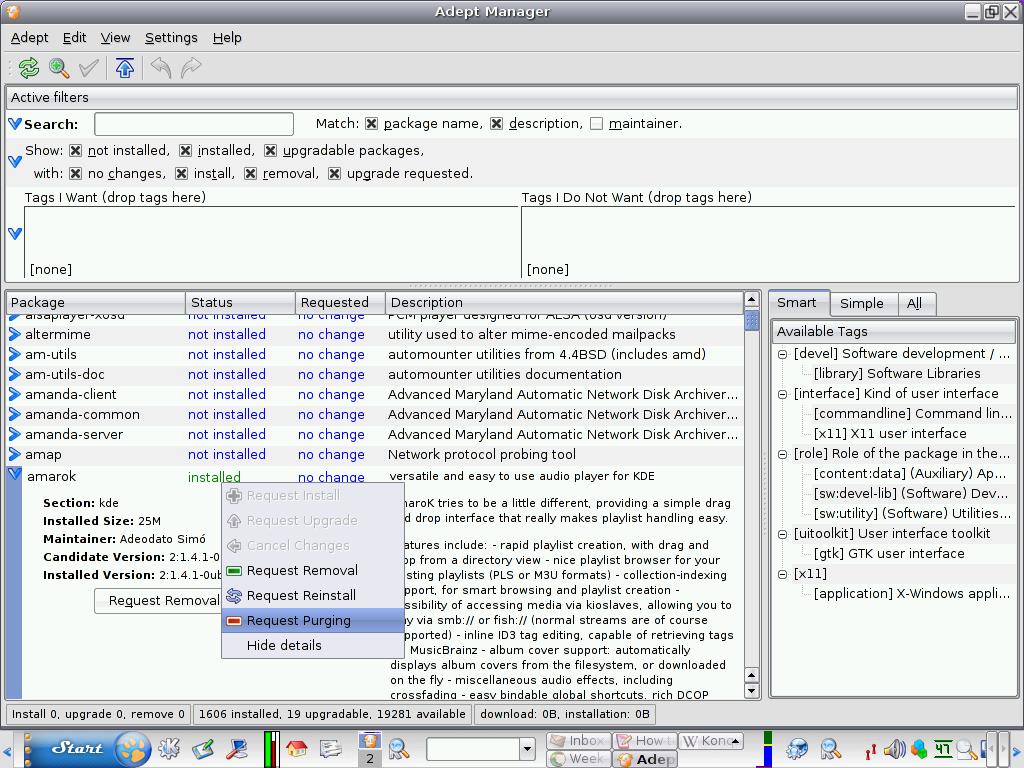
Synaptic’s “mark for complete removal” is Adept’s “Request Purging”. They do the same thing but you can do so much more. Synaptic can also reveal residual configuration files left behind when software has been deleted as this screenshot illustrates (just run Synaptic and click on the status button at the bottom):
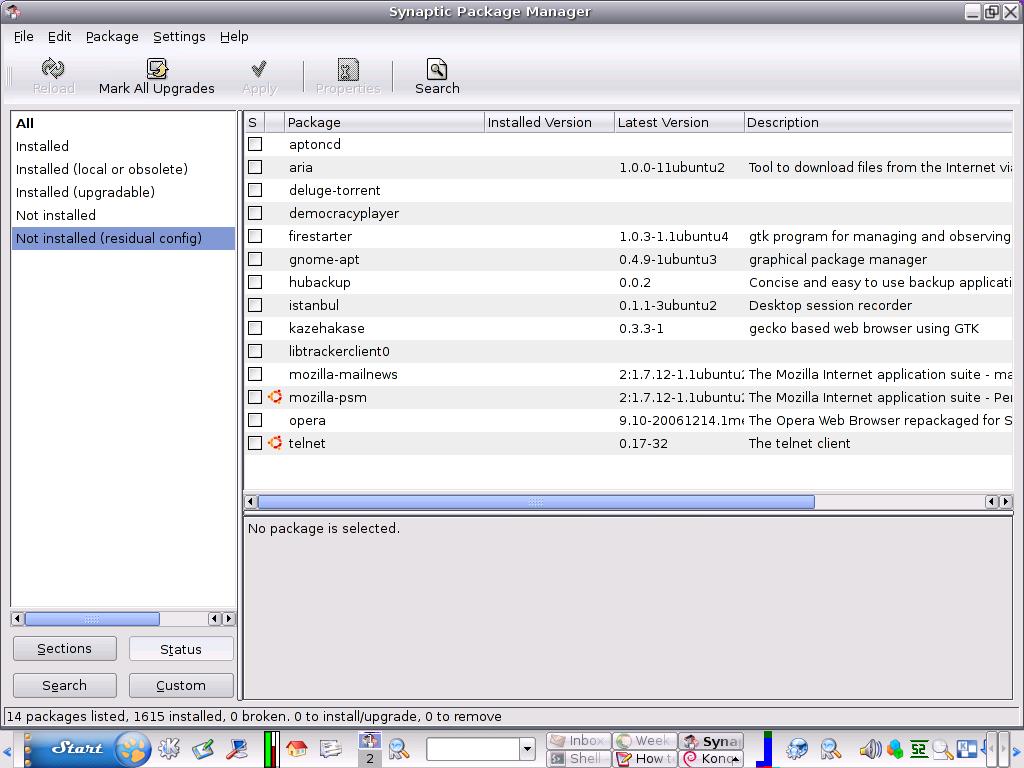
To remove any of these residual files select it by clicking on it, right click on it and choose Mark for Complete Removal. Then click on apply in the toolbar and Apt-get will crank into action.
If you are using Apt-get in Ubuntu from version 6.10 onwards you are in luck as it incorporates a feature called autoremove which, when issued as part of the command apt-get autoremove amarok, will not only delete Amarok but any unused dependencies too. If your version of apt-get does not support this feature all is not lost as you will doubtless be able to use the clean and autoclean commands. The first one (apt-get clean) will flush the cache where downloaded packages have been stored. Normally, when you remove a package and then reinstall it Apt-get does not need to use precious bandwidth to do the reinstall as the package is still in the cache. Unless you are still on dialup, bandwidth is unlikely to be a paramount consideration and therefore you can concentrate on freeing up space with that command. apt-get autoclean takes it one step further. Fortunately, you don’t have to suffer the ignominy and scolds of Kim and Aggie to buff up your computer. For Apt-get deals with “superseded” packages. For example, you may have four different versions of a text editor but how likely is it that you would be using any version except the current one? So, go ahead and autoclean and reclaim some digital real estate.
Deborphan
This is probably the best-known utility for a spring clean. By default it searches in the libs and oldlibs sections to find unused libraries. It is a command-line tool; so, before you delete anything, find out just what it is actually reporting as “orphaned” with the following command: deborphan -sz. Here is my output:
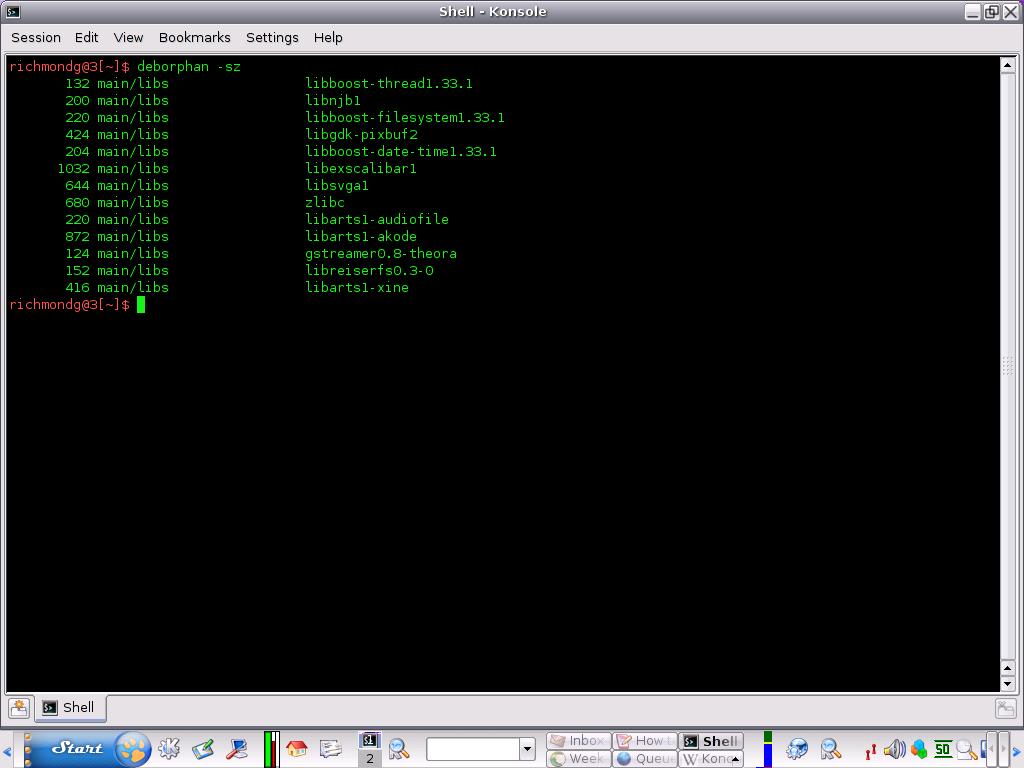
Reading from left to right: size, section and name. You could use apt-get remove one file at a time but that would be a little tedious, especially if you have a very long list. Do it all in one batch with apt-get remove -purge $(deborphan) as root. One of the best features about Deborphan is that if you have been playing fast and loose with Apt-get, Aptitude or synaptic it will act as the referee to deal with orphaned files and dependencies.
Three frontends for Deborphan: Orphaner, Editkeep and GtkOprphan
Orphaner is a frontend for Deborphan, but a simple ncurses interface.. You can launch and run it from within your chosen terminal emulator and you will get a screen like this:
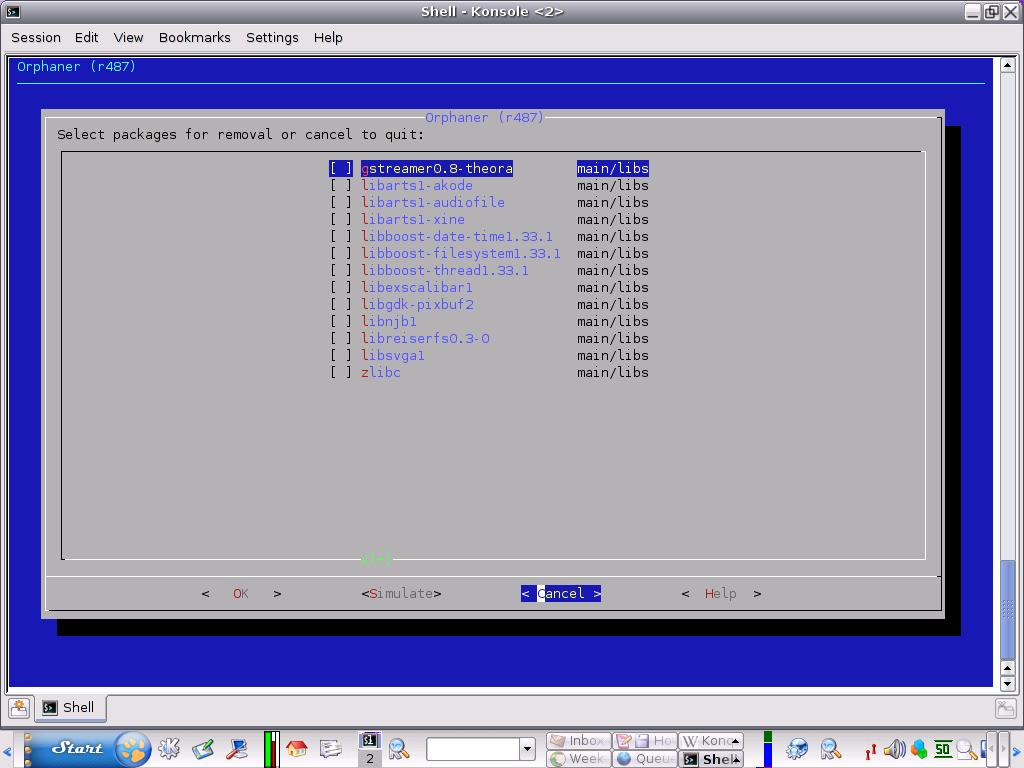
Using the arrow keys on the keypad you can select an orphaned file;if you are the cautious type, select help and details about the item will be displayed . Press Return to exit back to the main screen. If you wish to proceed with deleting a file or files just use the mouse to click between the square brackets on the file(s) selected and click again to remove a selection (or scroll down the list with the arrow key and select the file by hitting the space bar). A nice feature, which will be familiar to users of Apt-get, is the ability to simulate what will happen if you proceed. Select, curiously enough, the Simulate option for the file(s) earmarked for removal. The same result can be achieved by using Apt-get with the simulate option. For example: apt-get remove -s libnjb1 will do the heavy lifting that Orphaner does for you. If all seems well, you can choose to proceed with an actual removal in Orphaner by selecting OK and hitting Return or simply issue the apt-get remove command without the s flag.
Using Editkeep in conjunction with Orphaner
If you are the conservative, cautious type whose keyboard finger trembles when it is time to commit irrevocably to deleting orphaned files then Editkeep could just be your best friend in a shellhole. Its ncurses interface is almost indistinguisable from Orphaner but the details on the titlebar tell a different story and the purpose is to retain, not to delete, as the screenshot testifies:
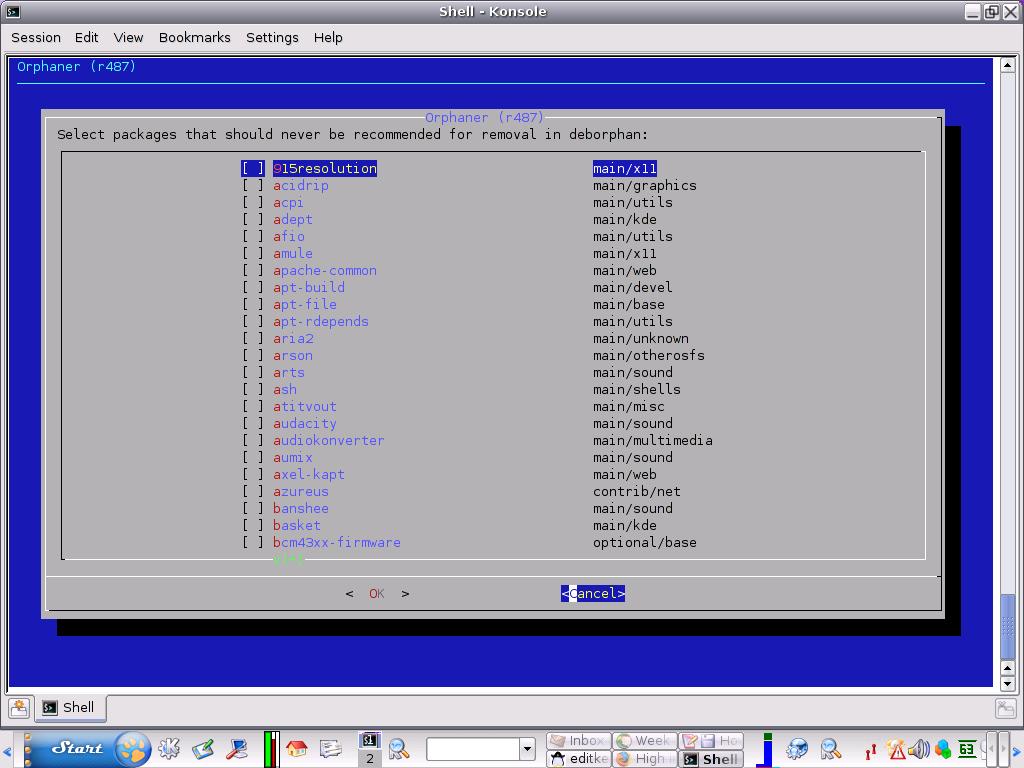
As with Orphaner, selection is by scrolling via the arrow keys, using the spacebar as a toggle to place an asterisk against the desired package and OK your way out to confirm your selection. You can always “deselect” any choices you made by using the same method to remove the asterisk, freeing up the package from a lock on its removal. The big difference between Orphaner and Editkeep is that the latter deals with whole software packages, whilst the former deals only with libraries.
Gtkorphan
Deborphan has a full GUI that goes beyond the ncurses of Orphaner or Editkeep. It a Python-based GTK tool and if it is in your repositories installation should be straight forward. If not (and you have enabled all available repositories)you can get it at this site. You can install it via a package manager like Kpackage or (as root) type dpkg -i gtkorphan_0.4.2-2_all.deb. If you are using Ubuntu you will get the following installation error message:
dpkg -i gtkorphan_0.4.2-2_all.deb
Selecting previously deselected package gtkorphan.
 (Reading database … 175891 files and directories currently installed.)
 Unpacking gtkorphan (from gtkorphan_0.4.2-2_all.deb) …
 dpkg: dependency problems prevent configuration of gtkorphan:
 gtkorphan depends on deborphan (>= 1.7.17); however:
 Package deborphan is not installed.
 gtkorphan depends on libgtk2-gladexml-perl; however:
 Package libgtk2-gladexml-perl is not installed.
 dpkg: error processing gtkorphan (–install):
 dependency problems - leaving unconfigured
 Errors were encountered while processing:
 gtkorphan
In order to fix this you will need to issue a command familiar to anyone who has encountered broken dependencies. As root, type apt-get -f install and it will complete the installation. The default screen looks like this:
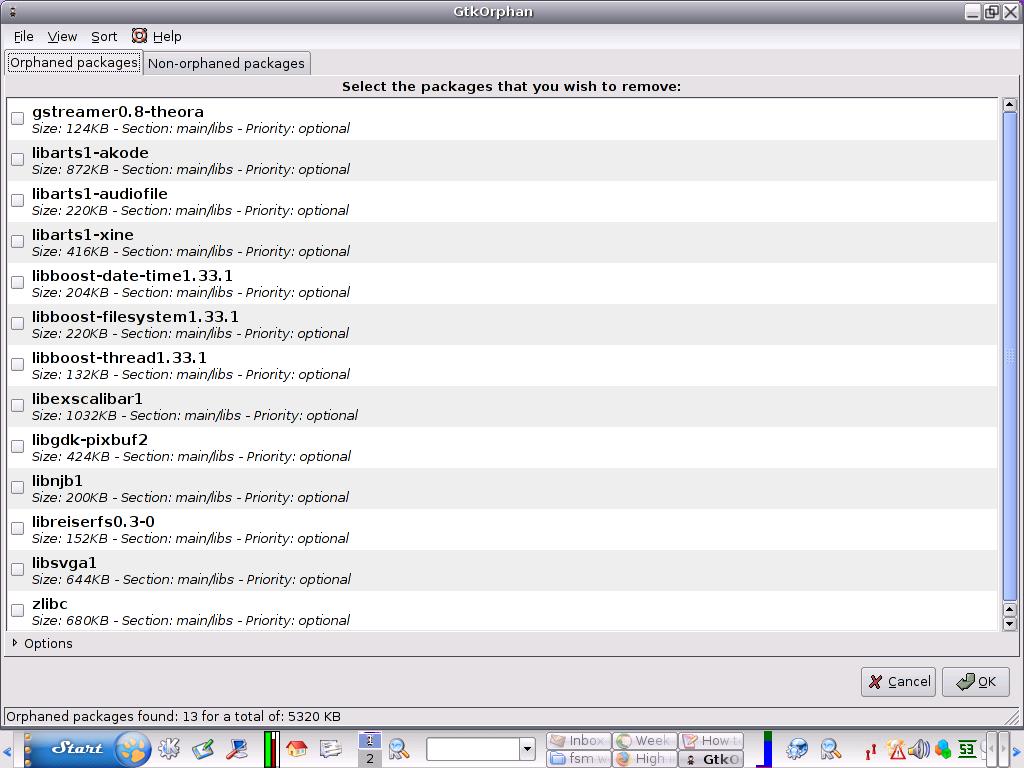
Like Orphaner you are presented with a list of orphaned files. Removing any of them is as easy as clicking on the file to highlight it and then clicking in the checkbox to mark it for removal. In the screenshot below Options has also been chosen which gives the user the ability to show uninstalled packages with orphaned configuration files. The process for deletion is the same:
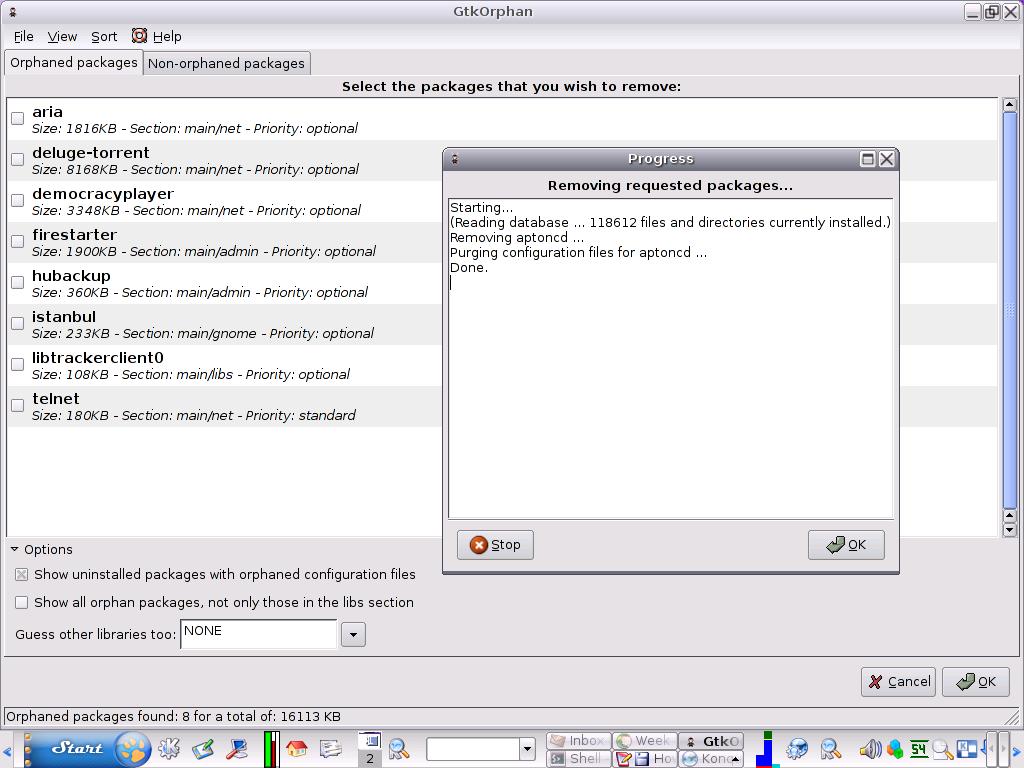
There is a further option to show all orphan packages, not just those in libs section. Check the box and see what comes up. Finally, there is an option to “guess” for certain types of files: perl, ruby, pike, python, docs, etc. An explanation of these can be found in the manpages (just type man deborphan in a console) — which suggests that this is neither perfect or reliable. Use at your own risk.
Debfoster
Like Cruft, Debfoster (essentially a wrapper for dpkg and Apt) has been officially deprecated as Aptitude is deemed to cover that utility, but it is still available in the software repositories. (If you have been using it and wish to “migrate” Debfoster’s database to the Aptitude database you can use this conversion script.) Why bother when all the angles seem to be covered? Well, Debfoster is pure command line and possesses powerful, granular features which confer on the user better control over the system.
The first time you run Debfoster it will interrogate you with a series of questions about your installed packages with the option to retain or remove them. It will remember your choices. You can see what it has in /var/lib/debfoster/keepers. The list of packages is a list of specifically requested packages for installation rather than any dependencies that were pulled in. In brackets beside the prompt there is a series of letters. This is just Debfoster’s helpful way of reminding you of the options (ynpisx.) Typing man debfoster will tell you what they are. It even has the good grace to offer you the opportunity to undo your last answer with the u option. If you want to answer yes or no to all questions, then debfoster -q and debfoster -f respectively will do the job. debfoster -s lists all current orphans, debfoster -d followed by a package name will list its dependencies, as -r will list packages that are installed only because the package alone required them. Incidentally, if you prefer, you can install and remove software with Debfoster too. Use it like Apt-get and Apt-get will do the grunt work for you. - (without any parameters)or -u after a package name will, respectively, remove or upgrade it.
If you’ve got the Aptitude, use it
If you have recently installed Debian 4 (Etch) you may have noticed that the developers have opted for Aptitude as the software installer of choice over and above tools like Synaptic. They claim that it handles dependencies better. I have not used it sufficiently to pass judgement on that claim but, that said, Aptitude, along with deselect, does not exactly have a reputation for being particularly user friendly—but at least no one ever claimed that it could induce a brain haemorrhage! If you are unfamiliar with the ncurses interface but want to explore this utility, then the best thing to do is to run it as a a normal user (non root). Here is a typical screenshot of the interface:

If you get tied in knots just press q to quit the application. (Don’t try to open it with the ampersand option to free up the console as Aptitude will not display the ncurses interface. You can of course launch it as a command-line only tool, just like Apt-get.) If you do control+t a menu will pop up which gives you the opportunity to scroll down with the arrow keys and select either clean package cache or clean obsolete files. Did you notice the nice little Easter egg in the menu? Yep, you can even play minesweeper from within Aptitude! (You can see screenshots and get instructions here).
From the point of view of this article, the most important feature of Aptitude is two-way dependency tracking. Sounds complicated, but all that means is that if you install a package and it has dependencies Aptitude will pull them in; later, when you uninstall the program, Aptitude will check to see if anything else you have installed recently depends on those dependencies. If not, it will advise you that it/they is/are no longer required and will remove it/them. The only caveat is that this will only work if Aptitude was used to do the installation in the first place. As I said earlier, don’t mix your drinks. It leads to falling down syndrome. If you are using Aptitude on the command line you can explicitly request the removal of all unused packages in the libs and oldlibs with the following commands: aptitude markauto ~slibs and aptitude markauto ~soldlibs. Aptitude is also impeccably fastidious and will retain a log of all requested actions (failed actions are not recorded) but its log will get out of sync quickly if you insist in using different utilities to install and uninstall packages.
And finally, something for Gnome users
If you like lots of choice when it comes to tools and utilities, I have one final goody for Gnome users (but it will work in KDE too). Don’t be put off by the name: it’s called Jig. This is made up of Wajig and its GUI, Gjig. If Wjig is installed then so is the GUI. If it is not in your software repository, you can download wjig here..
Simply typing gjig in a console will open a detailed graphical interface:
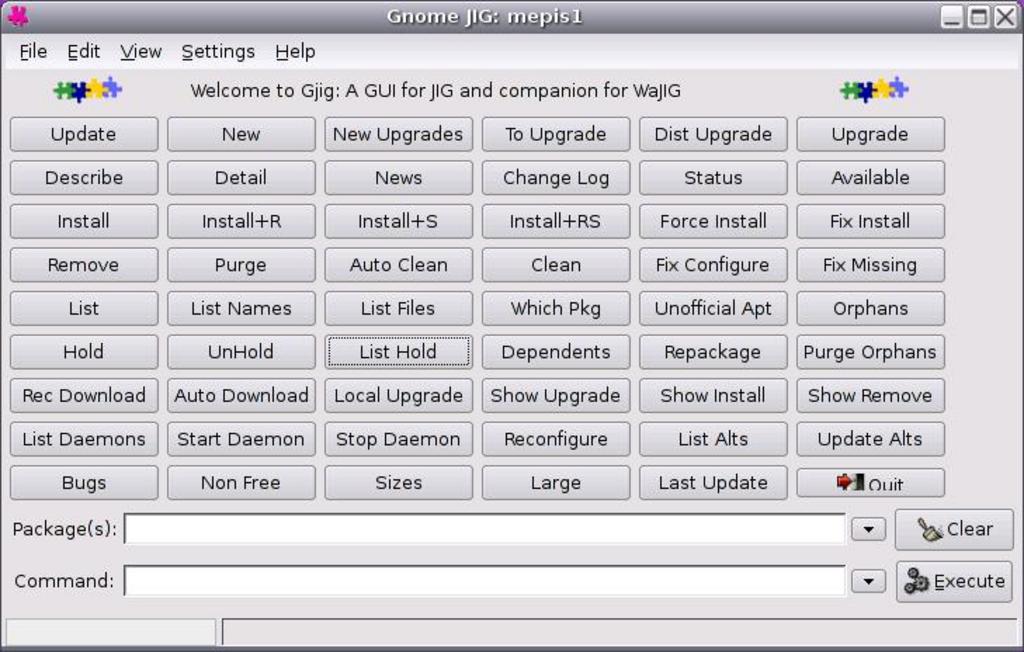
It is a self-documenting interface. Simply hovering the cursor over any button will give you a detailed description of its function; if you want information in depth just click on the help menu and select one of the options. You can view the orphaned files and you can delete them too. The icing on the the cake however is that there are no less than fifty four features in this front end. Many of them are general configuration tools to do with package management and starting and stopping services. Of course these “off the peg” options are convenient but if you like your digital tailoring bespoke, then the command-line options may be more to your taste. In respect of orphaned files and marooned dependencies, wajig remove-depends, wajig purge-depends, wajig purge-orphans, wajig remove-orphans, wajig orphans are the commands to use in a terminal. For a comprehensive list of commands type wajig list-commands or point your browser to Jig's web site for a nice HTML-formatted list of commands which gives a one-line description for each one.
Conclusion
To all lovers and devotees of dselect (surely a dwindling band of hardcore desperados) I’m afraid that it’s very much a case of “move along folks, there’s nothing to see here”. It has been superseded by Apt-get and Aptitude and should be stored with the dusters and brooms in the cupboard under the stairs, to be hauled out when organizing a spring clean. There are enough tools to be going on with in the meantime and hopefully the ones discussed will cover most needs. Good luck.