There are a number of good reasons for installing a virtual machine on your computer -- as a way to run software that isn't compatible with your primary operating system, as a sandbox for development, or as a place to test package installations, new distributions, or new server configurations. Setting one up with VirtualBox OSE is quite easy.
Making Movies with Free Software
This article is part of an on-going series on the challenges I've faced in producing two free-licensed movies, Marya Morevna, through the Morevna Project and Lunatics, which we are working on as Anansi Spaceworks.
My website for the Lunatics project is hopelessly out of date, and I need to start doing something about it soon. The first step in cleaning up the mess is to create a test environment on my local computer so I can try out new configurations. The public server is virtual, so it seems completely reasonable to test it on a virtual system locally, and it'll provide isolation from my everyday work on this computer, without having to set up a whole new computer.
The public server is virtual, so it seems completely reasonable to test it on a virtual system locally
It also seems likely that I will need to maintain a Zope/Plone package for Debian now that the 'plone-site' packages has been withdrawn, and a virtual environment is a good choice for doing the packaging. Finally, there are a few i386 architecture packages I can't run on this (AMD64) system, and so it'd be useful to have an i386 architecture available.
Installation
VirtualBox OSE is a very easy-to-use virtualization tool. It has a GUI interface and installation wizards to help you through the process, so it really doesn't feel like you're doing anything as complicated as setting up a virtual host system on your computer.
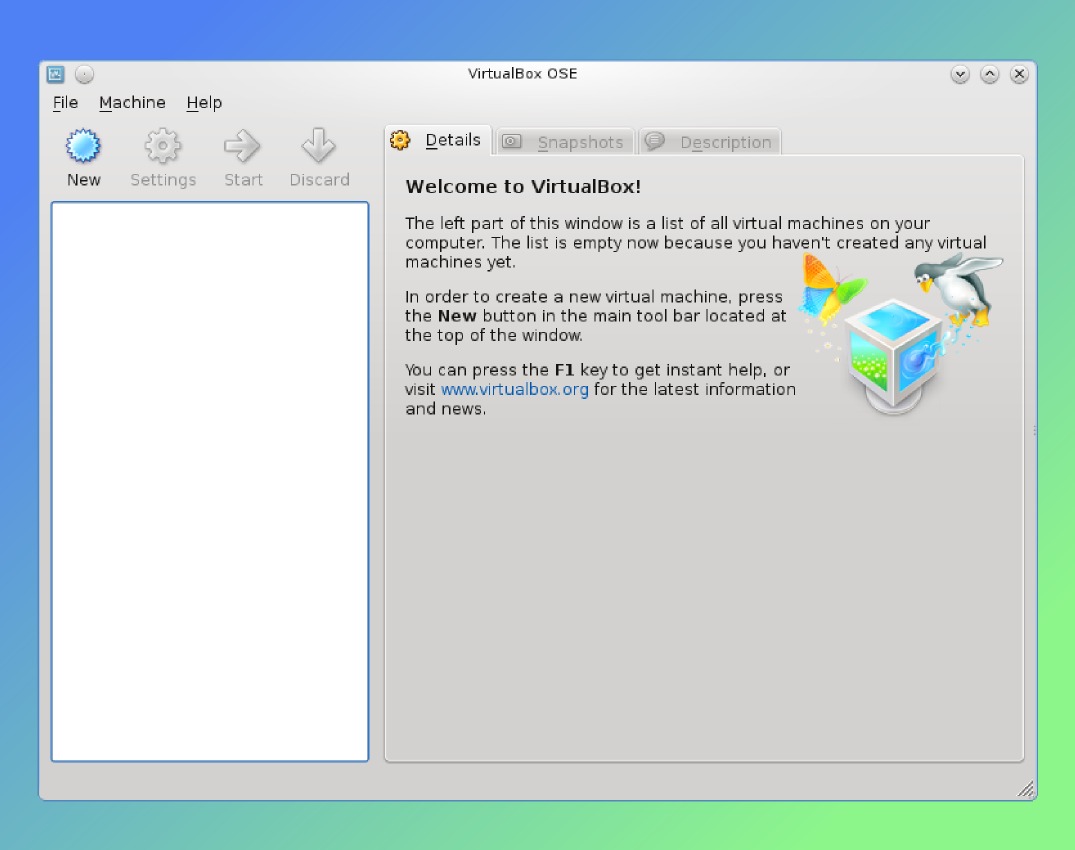
To start, I simply launch the VirtualBox application. On my Debian "Squeeze" system, this is under "Debian"->"Application"->"Emulators." the exact location may vary on your system depending on distribution, version, and/or desktop environment. I then see the empty VirtualBox application, just as in Figure 1.
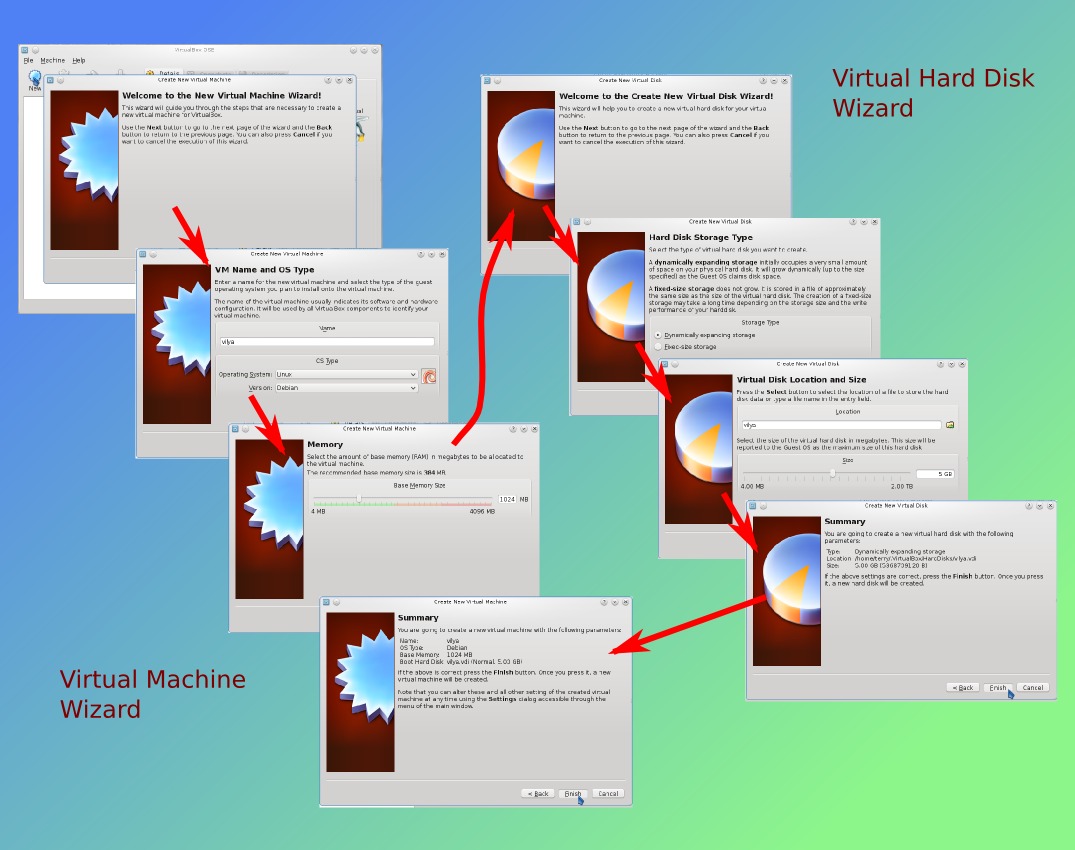
A configuration wizard takes me through the steps
At this point, I can create a virtual machine by clicking "New". A configuration wizard (see Figure 2) takes me through the steps. I name my system; decide how much RAM I want it to use; how much disk space I want; where I want to store the disk space; and so on. The default location for VirtualBox disk images, by the way, is $HOME/.VirtualBox/HardDisks/. This is where the image will go if you enter a plain name in the box (but you can specify an absolute path if you want to put it someplace else). I'm happy with the default, so I leave it as it is.
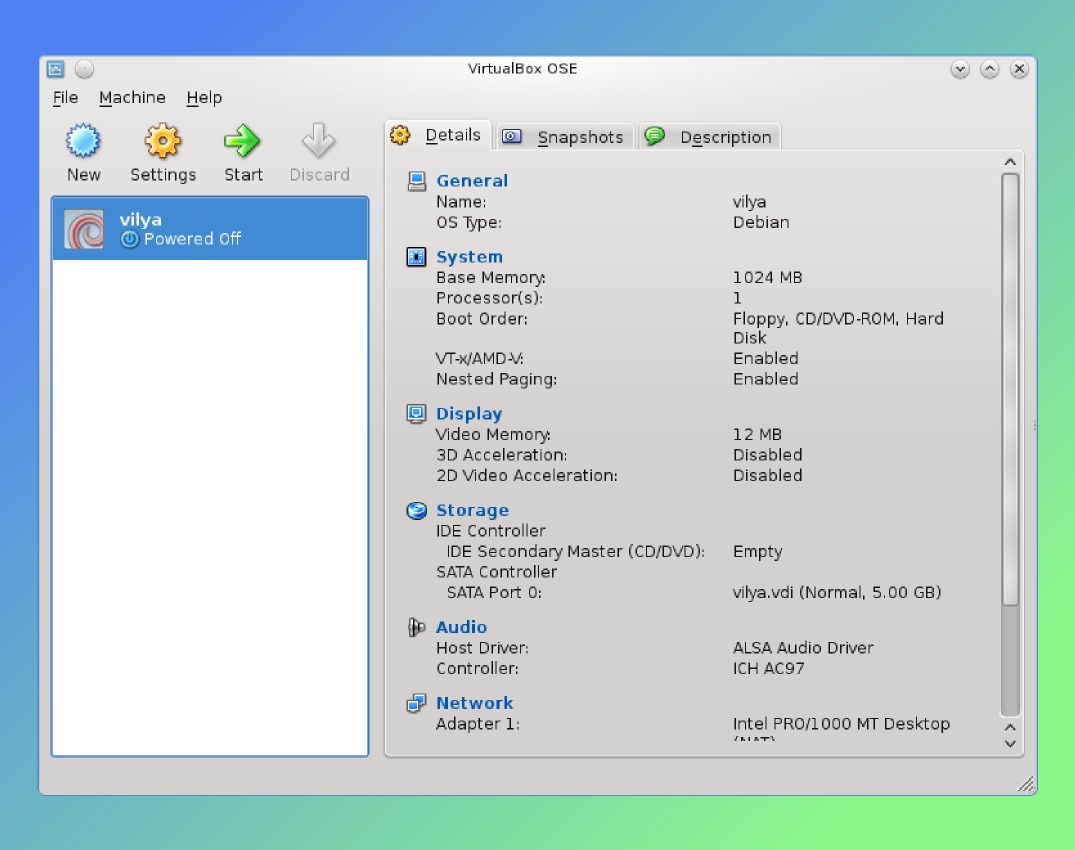
The newly created virtual machine will now appear in the VirtualBox menu, with an appropriate icon (the icon is based on the choice of operating system -- in this case, I've selected "Linux" and "Debian"). Of course, at this point, the virtual system is empty, the equivalent of a newly constructed computer. So the choice of operating system is just a statement of intent at this point.
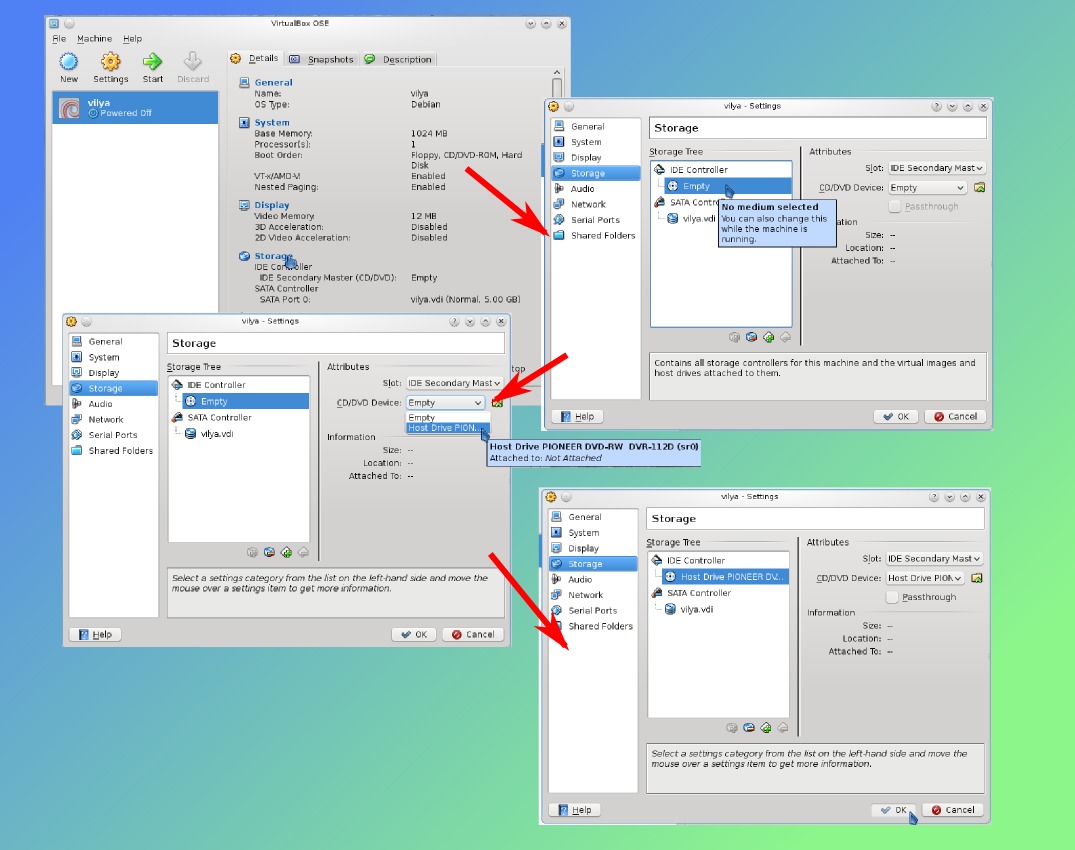
To actually install the operating system, I'll need a way to boot the installation medium, so I first need to set the machine up to access the Debian "Lenny" installation CD which I've inserted into the host system's CD-ROM drive. I open the "Storage" settings for the new virtual machine, and on the virtual IDE bus (which initially shows "empty"), I select the host drive from the pull down menu (see Figure 4).
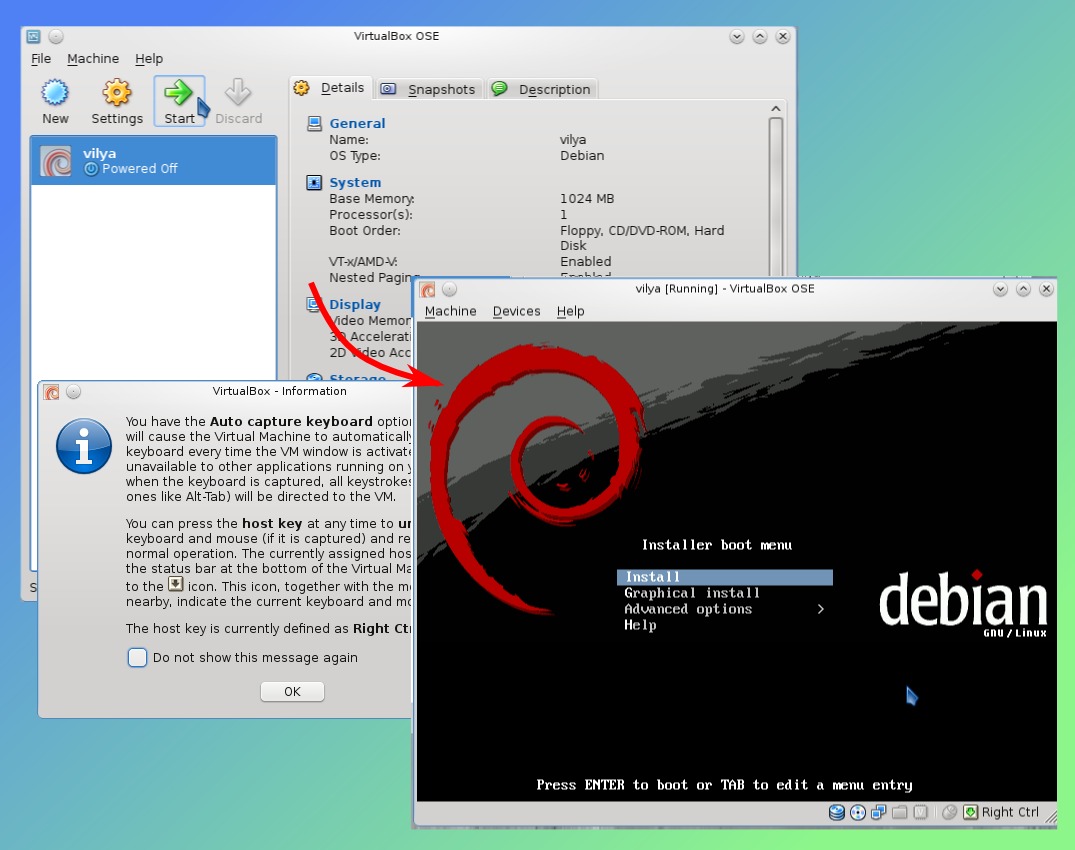
Once this is done, I can now "boot" the virtual system by clicking on the "Start" button beside the icon for my virtual host. When I do this, the CD-ROM spins up and a few moments later, I get the Debian installation menu (Figure 5).
Once this is done, I can now "boot" the virtual system by clicking on the "Start" button beside the icon for my virtual host
Installing the Debian system at this point is exactly like installing it on a real machine. A few points worth noting:
- It reports that there is no other system on the disk and allows me to partition the entire disk. Remember, the installer has no way to know it's on a virtual system -- it's talking about the virtual disk I created earlier
- Similarly, the Grub bootloader is installed on the virtual disk's master boot record. The messages here may be a little scary, because it sounds as if it's going to wipe the whole system, but of course it's only the virtual machine that it's talking about
- I get some warnings about screen color depth settings -- the machine will work better if the color depth matches the display on the host system
- I get warning notices about the "Mouse Integration". These are just to let me know how to regain control of the mouse if the virtual machine takes it over
In my case, I'm planning to set up a test server. So I choose options for the machine that are just like the virtual machine my real server runs on. I also want to install a minimum "standard" installation of packages so that I can control the packages that are installed. As usually, I actually use Debian's "Expert Install" process which asks lots of questions, but gives me more control.
Obviously, if I didn't care about such details, I might be better off to simply use the simple "Install" button which will set many options to appropriate defaults.
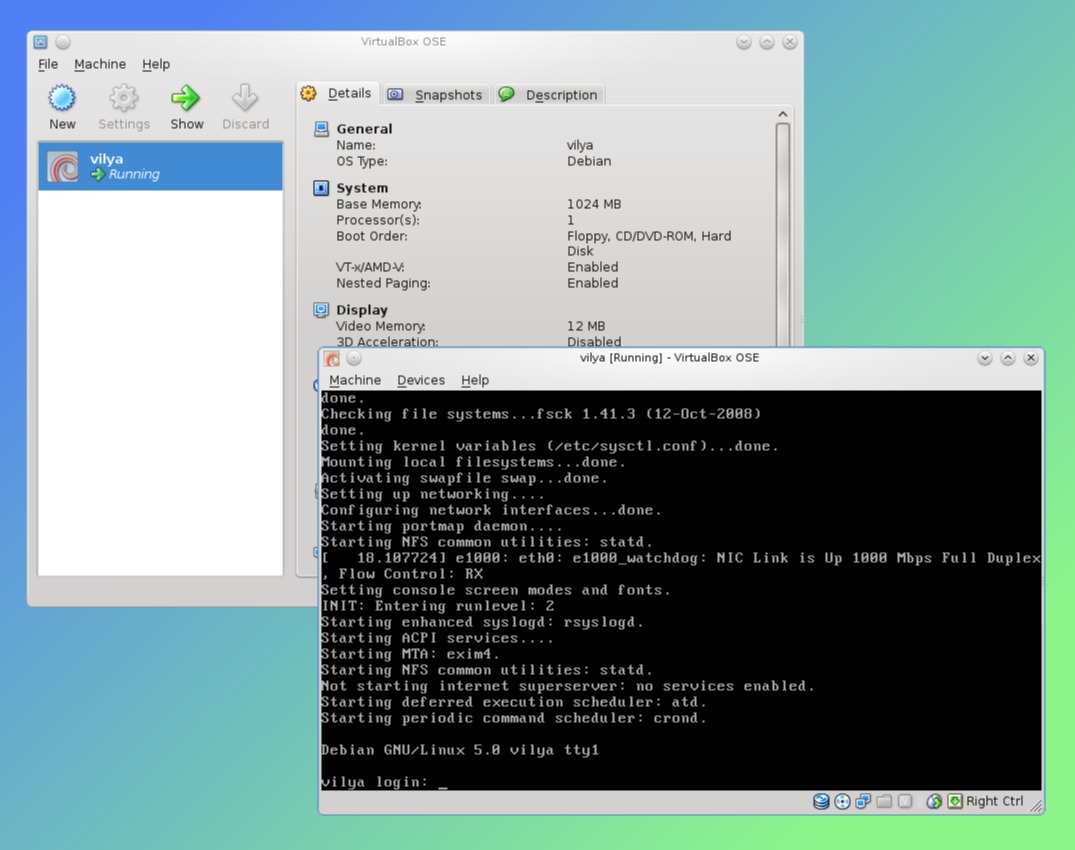
And voila! I have a Debian system, exactly as I would normally get on a real computer. What I've installed is Debian "Lenny" for an i386 architecture. This will let me run a few packages that are not available for the Debian "Squeeze" AMD64 system that I have installed natively on this system.
It also will let me set up an uncluttered system for testing what I want to install on my server (and the version will match, since I run the stable installation on my public server). This makes it much easier to avoid accidental dependency problems.

The last thing I do as part of the virtual installation is to take a snapshot (see Figure 7). VirtualBox will let me revert the system back to this snapshot, so it serves as a quick way to recover from problems if I screw something up after installation (or if I just need to start over to check something).
The last thing I do as part of the virtual installation is to take a snapshot
In a testing environment, this kind of perfect repeatability is highly desirable. I'll save snapshots before each major configuration change. That way, I can back up and make corrections if I think they're necessary.
Naturally, I can run as many virtual systems as my host system's resources will allow. When they aren't running, they don't consume RAM, so I can easily have several stored systems for different applications. That will allow me to keep separate virtual systems for separate tasks -- such as the web server prototyping I'm planning to do, Debian package development, or running software that requires a different system than what is installed on the host.
Virtualization is much more convenient than other options, such as multiple boot, and VirtualBox makes it even easier to set up.
Licensing Notice
This work may be distributed under the terms of the Creative Commons Attribution-ShareAlike License, version 3.0, with attribution to "Terry Hancock, first published in Free Software Magazine". Illustrations and modifications to illustrations are under the same license and attribution, except as noted in their captions (all images in this article are CC By-SA 3.0 compatible).