This is a collection of tips&tricks written by Gary Richmond and Andrew Min. In this article:
- How to get the best out of the history command in GNU/Linux (Gary)
- How to close down GNU/Linux safely after a system freeze with the SysRq key (Gary)
- How to find .debs (even if you think they don't exist) (Andrew)
- How to kill processes (Andrew)
How to get the best out of the history command in GNU/Linux (Gary)
Anybody who has used the command line extensively to navigate, understand and configure GNU/Linux will know that in the course of a few months’ work it is possible to build up an extensive history of used commands. This necessitates some pro-active management to get the best out of it. Here are some tips to make the most of the history command.
Please note, from the outset, that command history is only saved in interactive shells and does not, therefore, work with shell scripts.
By default, the shell Bash is designed to retain the last five hundred commands you entered. If you want to see them, just open ~/.bash_history and scroll through it. Or, by simply typing history on a command line the terminal will list them.
If you know there will be a lot of output, then it makes sense to pipe it to less: history | less; with less, you can see the command history one screen at a time (by pressing the spacebar) or one line at a time (by pressing the down arrow).
If you’d rather not even be bothered with piping with less, just specify the number of commands you want (if you are pretty sure it was a quite recent one): history 25 or history | tail to output the last ten commands.
Helpfully, if you want to rerun a command and can’t quite remember its format, the history facility allows you to simply step through them one at a time by pressing the up arrow (or Ctrl + P) continuously from your command prompt until you find the one you are looking for; you can also use the down arrow (or Ctrl + N) to go to the “next” command. When you find the command you want to run, hit the return key to run it.
If you think you know the command but can’t quite recall the command exactly, then you can pipe it with grep and the first few letters of that command: history | grep -i. The i should be followed by the first letter(s) of the command you are attempting to find. Again, use less to step through them and or combine it with the down arrow: history | grep -i | less.
Another useful feature related to history is to use Ctrl + R. This will output a prompt called a reverse-interactive-search. All you then need to do is to start typing the command and it will complete the command with the most recent matching command from the history file. If there is more than one relevant command in the history file and the one you need is not the most recent, then just type a few more letters to distinguish the command. Once you see the one you want press the return key to run it or press the right arrow key to edit it.
Stop repeating yourself
Statistically, it is very likely that you have used the same command more than once, however small or large. If it is a long list why not simply skip the duplicate entries and speed thing up a bit? Add the following to either your personal bash file (~/.bashrc) or to the global bash configuration file (/etc/bash.bashrc):
export HISTCONTROL=ignoreboth
This change, made in your favourite text editor, must of course be done as root. For it to take effect you must restart the bash shell: you can simply log out and log in again. If you now type env you should see that configuration listed: bash will, from now on, skip the duplicate entries.
Cut history down to size
If you are not a big user of the command line and want to make history slimmer, then specify it permanently in one of the two bash files listed above. It takes the form of export HISTSIZE=X where “X” is replaced with the number of commands you want to keep in your history (setting X to 100 will store 100 commands). If the value is set to zero, history is disabled. Keep in mind that you will need to restart the shell in order for the changes to take effect.
These changes may help to make you more secure. As an added measure it is possible to set up Bash to clear history upon exit by adding the following configuration in your ~/.bash_logout file: /usr/bin/clear_console. In some GNU/Linux distros this setting may already be the default. More radically, if you want to delete history altogether just type history -c but be aware that there is no way to retrieve that history once it is gone.
Security is a huge subject for computers and rightly fills many books. Apart from the obvious things such as setting up a root password, running virus and rootkit scanners, keeping security patches up to date and IDSes like Snort, a quick hack (amongst many) is to check the output of the history command. If you know that you did not disable the history, and yet it’s empty and, therefore, ~/.bash_history is empty, then it may be that you have been hacked and that the Bash history has been wiped out. Run this command: ls -l ~/.bash_history and the result (unhacked) should look like this (mine):
-rw------- 1 richmondg users 7228 2007-07-23 23:22 /home/richmondg/.bash_history
If your history is unexpectedly empty, you will know that your computer has probably been compromised and you should probably reinstall it.
Conclusion
Well, there you have it. The history command is powerful and versatile. Like alias, it can save keystrokes, aid security and save time. It helps you to work smarter and reveals yet again the true power of the command line. So what are you waiting for? Fire up that terminal!
How to close down GNU/Linux safely after a system freeze with the SysRq key (Gary)
Despite jeering at Windows for the infamous system freezes and blue screens of death, there are and will be times when your computer just locks up: the cursor is frozen and even invoking a console by Ctrl + Alt + [F2, F3, ...] to close down the X windows session running on F7 is non-functional.
My fellow blogger, Andrew Min, has given excellent tips when faced with stubborn processes and applications that just refuse to terminate. This tip may be of assistance to those whose entire system has frozen and aren’t happy to just do a hard power off and trust to luck that data will not be corrupted. Fortunately GNU/Linux has journalled filesystems so the chances of this happening are reduced and you will not suffer the indignity of being told that you performed an illegal operation or having to drum your fingers waiting impatiently for scandisk to complete.
Like Ctrl + Alt + Delete this tip is a three fingered Vulcan neck pinch. It consists of Alt + SysRq and a selection of one other key (of which there are thirteen!), the choice of which will determine what operation is performed. This has been described as a way to communicate with the Kernel. It used to be that you had to enable this “magic key combo” when compiling a kernel but this is no longer necessary. (If your computer does not have a SysRq key then look for the “Print Screen” key—usually abbreviated to Prt Scr Normally, after certain key combos you will see “OK” and “Done”. If your kernel is really locked up you might not see them at all. If you have a file called /proc/sys/kernel/sysrq then you are okay and man proc should list it and it will be enabled if there is a “1” in it.
Alt + SysRq + B
If you’re not running any crucial, scheduled tasks or in the middle of composing a letter or an e-mail then this key combination may be the one to use. It will reboot the system immediately without bothering to sync or unmount disks.
Alt + SysRq + R
If you cannot get to a terminal window by using Ctrl + Alt + F2 then use this key combination (pressed altogether) to get a keyboard (this is because this key combination turns off what is called keyboard raw mode. Pressing these keys allows keyboard input even after your X-Windows session has crashed/frozen). Now, try Ctrl + Alt + F2 again and you can close down from the terminal. If that fails move on to the next option.
Alt + SysRq + S
This key combo does just what it says on the tin: it (S)ync’s all filesystems which reduces the possibility of losing any data and possibly obviating the need for the system to run fsck upon reboot.
Alt + SysRq + U
As you might guess, this one tries to unmount disks and remount them as read only.
Alt + SysRq + O
Not so obvious, but this will power off your machine without syncing or unmounting disks (but it won’t reboot. See above).
If in doubt use a mnemonic
If you are not sure about the sequence to use or just can’t remember, why not use a memory aid like: Raising Elephants Is So Utterly Boring (REISUB) or Everything Is Superb (EISUB) or So Everything Is Unusual - Boot (SEIUB). If even that was too much effort for you, just do Alt + SysRq + H which will bring up a helpful list of the command above.
How to find .debs (even if you think they don't exist) (Andrew)
One of the biggest strengths of Debian (and derivatives like Ubuntu) is support for the .deb package. After all, it provides a one-click method of easily installing programs. Best of all, these programs are automatically updated via the official Debian repositories.
Unfortunately, the official repositories aren’t always the best. Some programs aren’t always up to date (the latest version of Thunderbird is 2.0. However, the latest version in the repositories is 1.5). Worse, some packages aren’t in the repositories at all (Glest is a good example). True, you could build the program from source, but there are a number of reasons why that is undesirable (finding the dependencies, having to download the program again to uninstall it, not automatically adding itself to the menu, etc.). How do you find good Debian software?
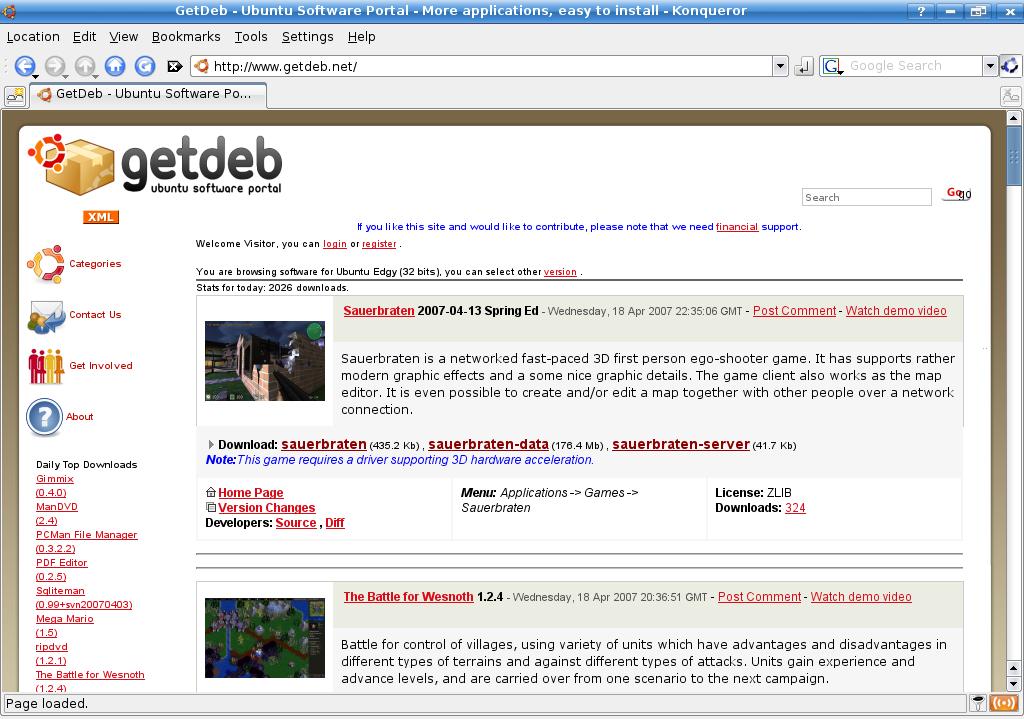
GetDeb
I first stumbled across GetDeb when looking for a Kompozer .deb. A kind Ubuntu Forums member pointed me towards the site, calling it the go-to place when the official repositories don’t have the program. Boy was he right. Not only have I used it for Kompozer, but I have used it for Glest, Pidgin, ActionCube, and many more programs. All of them are in tidy .deb packages for easy (un)installation.
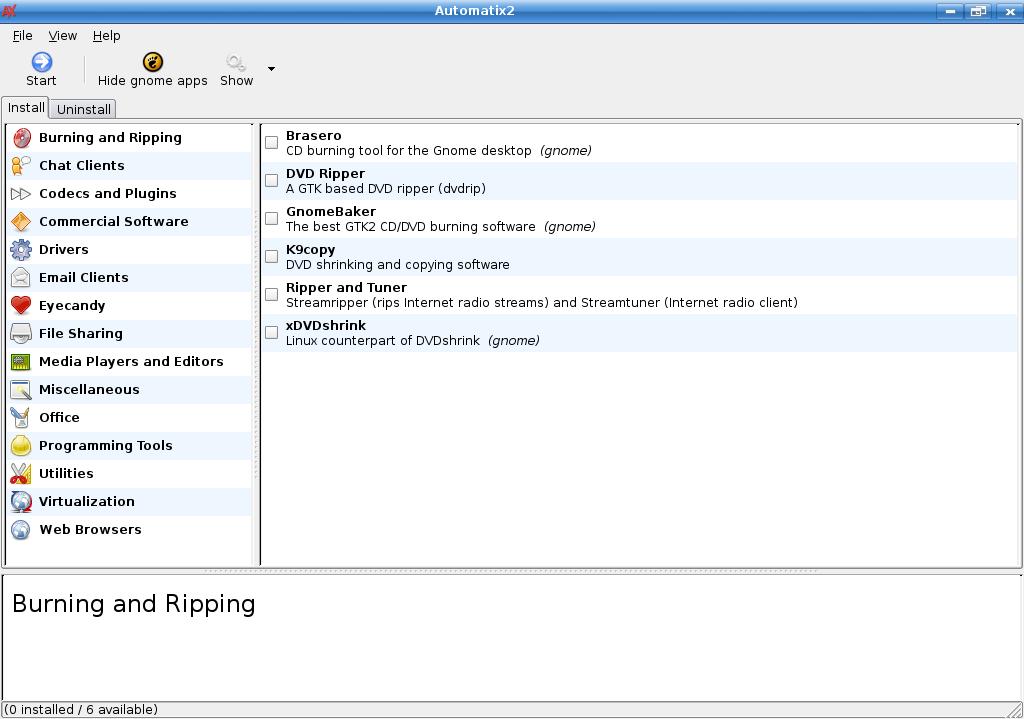
Automatix
There’s another option available. It’s called Automatix. It offers pre-compiled binaries of many popular programs and drivers, including Swiftfox, xdvdshrink, Nvidia drivers, and many more. However, there are two problems with it. First, it doesn’t distinguish between free (as in beer) and free (as in speech). Even worse, many users have reported problems with Automatix, occasionally creating problems only remedied by a live CD rescue. I personally have used it without trouble, but many people recommend NOT using it. If you’re still feeling adventurous, follow the instructions on the Automatix site on how to install it.
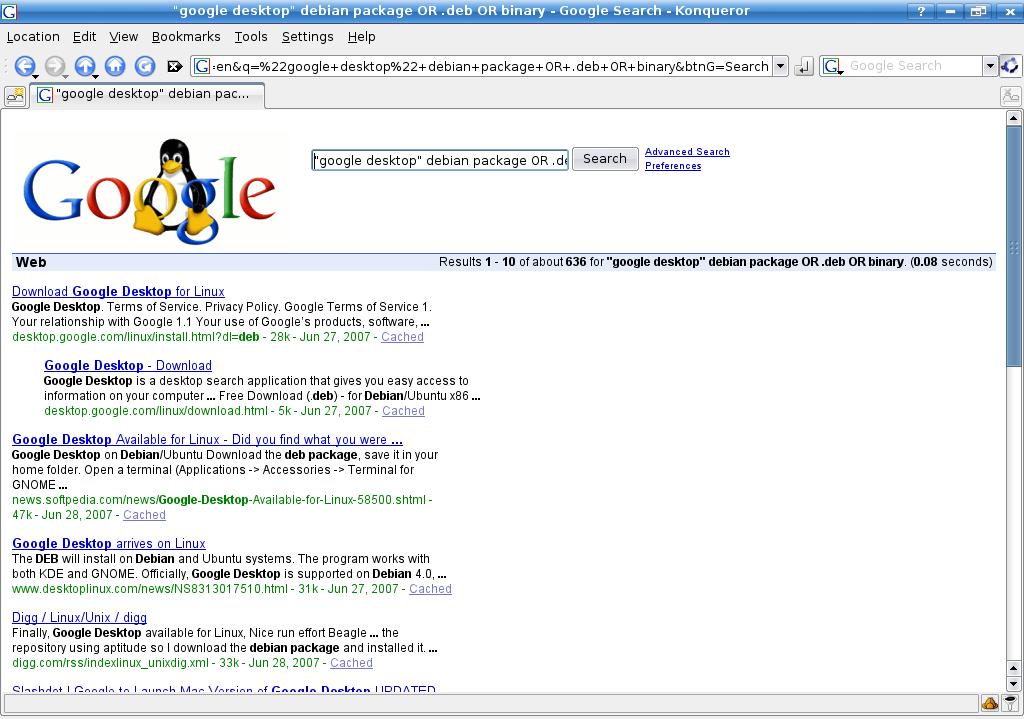
Many people have created third-party .debs and just haven’t submitted them to GetDeb or the official repositories. So it makes sense to search for the packages online. But why Google (besides the fact that it is the king of search engines)? The main reason is that they have a special search site called Google Linux which only searches GNU/Linux-related sites. Go there, then do a search for [INSERTPROGRAMNAMEHERE] debian package OR .deb OR binary, replacing [INSERTPROGRAMNAMEHERE] with the name of the program, e.g. kompozer or "thunderbird 2".
Converting RPMs to DEBs
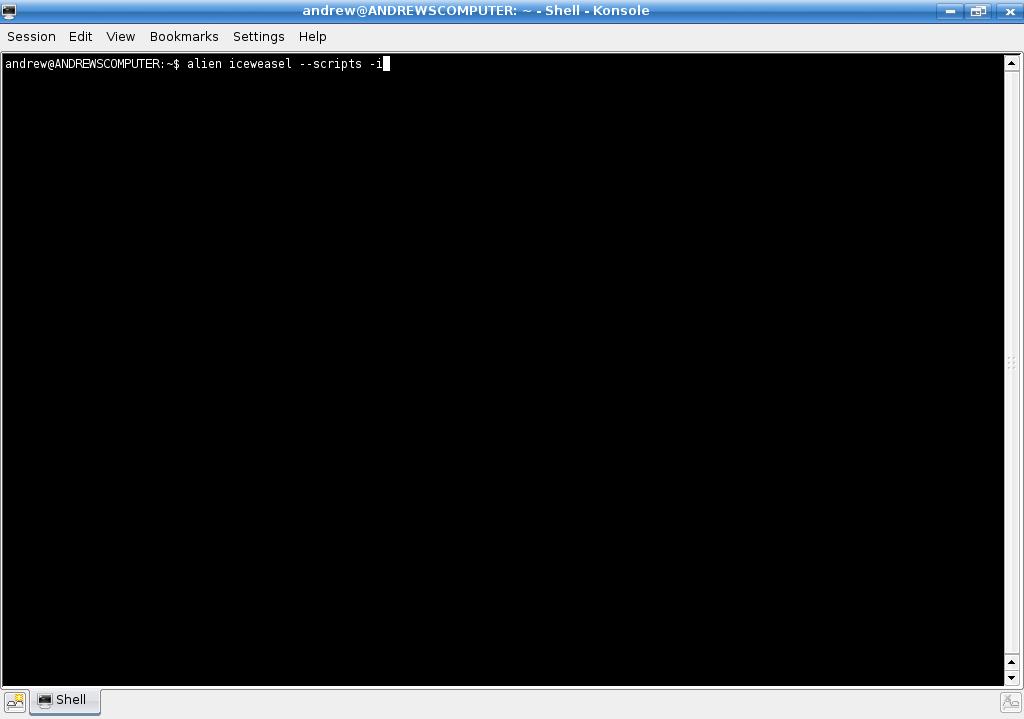
One of the biggest competitors to the .deb format is the .rpm package (used by Red Hat, Fedora, Mandriva, SuSE, ArkLinux, and many more). Luckily, there is a tool that will convert many (but not all) RPMs to DEBs. It is called Alien. Just install the alien package with apt, aptitude, or a package management tool like Synaptic. Then, open a terminal window, cd to the source package you wish to install and type alien [INSERTFILEHERE] --scripts -i, replacing [INSERTFILEHERE] with your RPM (e.g. amarok.rpm). The package will be converted and installed. If you use KDE, use Chad M’s RPM Installer for Konqueror or Dolphin, which lets users just right-click on an RPM and install it without having to remember Alien’s syntax.
Last resort: making your own
Sometimes, none of the above will work. Luckily, if the program is open source and uses make to compile and install, it might not be as bad as you think. All you need is two utilities called AutoApt and CheckInstall. What you do is download and install the auto-apt and checkinstall packages using apt, aptitude, or a package management tool like Synaptic. Then, open a terminal and cd to the location of the program you want to build from source. Type auto-apt run ./configure. This will (hopefully) download all the requirements for the program. To finish, type make and then sudo checkinstall to create and install a .deb. Obviously, Checkinstall won’t work with every single program, and AutoApt won’t find every single dependency. Still, they’re viable alternatives to using apt-cache search to search for every dependency, then compiling the program itself.
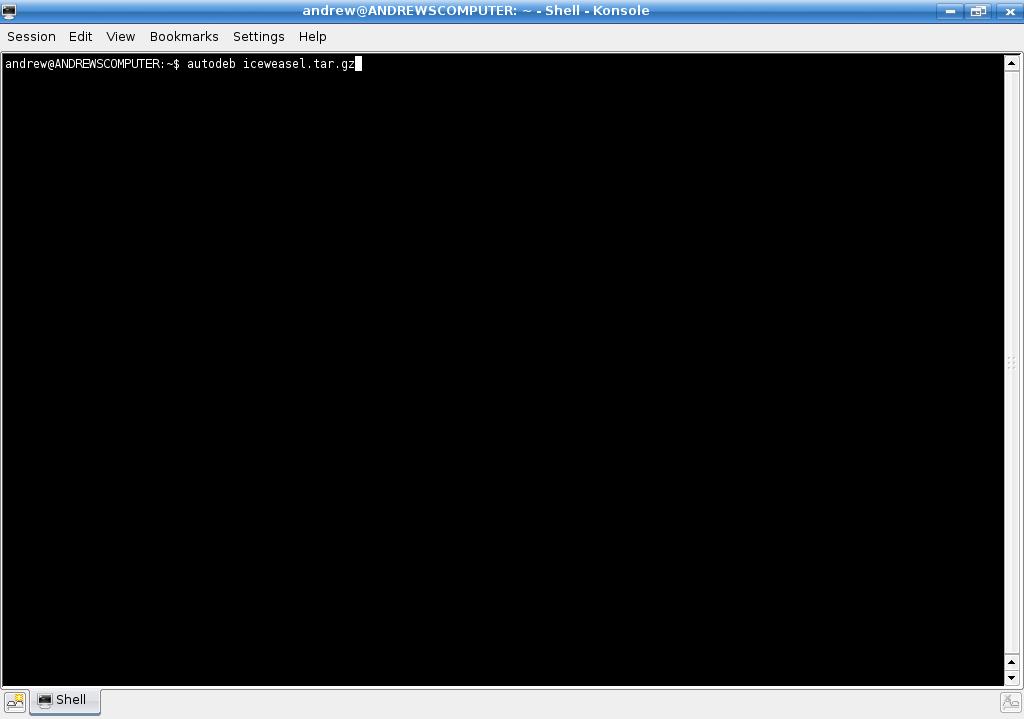
Feeling experimental? Then you should try AutoDeb. It’s an experimental bash script that combines a modified version of AutoApt and CheckInstall. Installation is a breeze: just download the binary file here, and make it executable (chmod +x ./autodeb). Then, you’re set! You don’t even need to unzip (or untar) the source archive, just type autodeb archive.tar.gz.
Killing processes (Andrew)
One of the things I hate about Windows is that there is no good way to kill frozen processes. Theoretically, you type Ctrl-Alt-Delete, wait for Task Manager to pop up, and kill the process. But in reality, the process doesn't always die immediately (it usually takes multiple tries and a very long time). GNU/Linux users don't have this problem. Here's how to end processes using the terminal, a few GUIs, and even a first person shooter.
Killing processes in the terminal
The terminal (also known as the command line) is the most powerful tool for virtually any job. So let's look at how to kill processes with it. First, open your favorite terminal program (konsole for KDE, gnome-terminal for Gnome, and xterm are some good ones). Then, type ps -A (not ps -a). This gives you a listing of all the programs currently running and their PID. To kill a program, type kill PIDHERE, replacing PIDHERE with the PID of the program as shown by ps. See figure 1a for an example. Note that sometimes you will get error messages when trying to kill a program. If you do, you must kill the program as root (sudo kill PIDHERE or su and then kill PIDHERE depending on the operating system).

Often, the searching through ps's output is like searching for a semi-colon in a 5MB source file. Luckily, if you know the name of the program, it's easy to find it. Instead of typing ps -a, type ps -A | grep NAMEHERE, replacing NAMEHERE with the string you want to find. For example, if I typed ps -A | grep fire, all the processes with the string fire in them would be listed. You can also add the -i flag to grep (so you'd type ps -A | grep -i fire) to make the search string case insensitive.
How to kill processes with GUIs
Both KDE and Gnome provide their users with GUIs for killing processes. In KDE, run KSysGuard (many distributions also use Ctrl-Esc). Just click on the tab, "ProcessTable", select the item, and click "Kill". In Gnome, open System Monitor (aka Gnome System Monitor), select the "Processes" tab, select the item, and hit "End Process". If you can't kill the process, try running the KSysGuard or Gnome System Monitor as root (see previous paragraph for more).
If you just want to kill an inactive window without having to dig up a PID or running a bloated GUI, there's an option called xkill. Just open a terminal, and type xkill. Click on a window, and it will be killed (right-click to cancel). KDE users can also type Ctrl-Alt-Esc to bring up xkill.
A bonus: killing processes and having fun
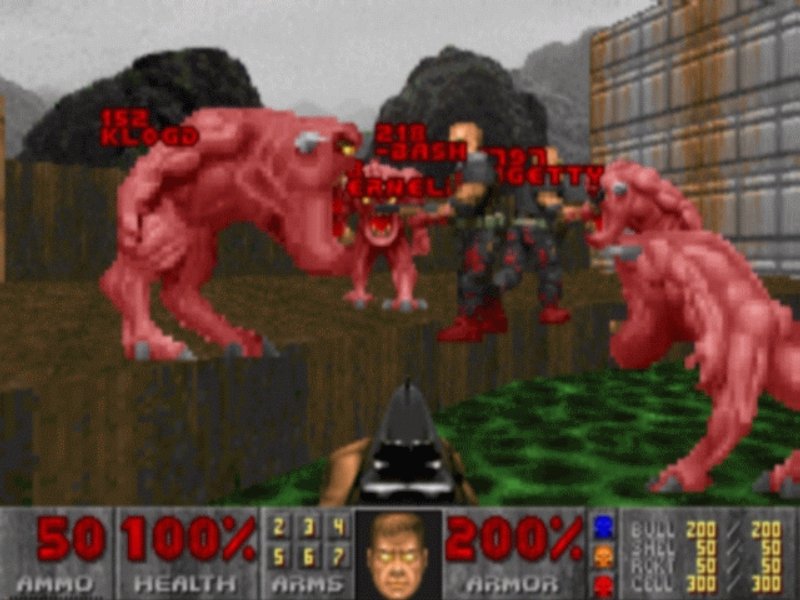
If you really want to "kill" a process, then you need to try psDooM (figure 2a). Download (make sure it isn't a patch, but a source or a binary) and install it, copy an IWAD (Freedoom has a few available) into wherever you installed psDooM (usually /usr/local/games/psdoom), and then run one of the executables located in the folder. Now, when you get mad at the world, all you have to do is open up a Microsoft product in WINE, and then shoot it.
Conclusion
You now know how to kill a process with the terminal, kill a process with KSysGuard, Gnome System Monitor, or xkill, and even shoot a process! Next time a Microsoft user complains about his system freezing, all you have to do is grin and show him GNU/Linux.