In my recent article on QDVDAuthor, I skipped over the task of making a videoloop for the main DVD menu. Here I'm going to show you how I did it. The goal is a short loop of video that smoothly transitions through five different video segments and back to the beginning again. The audio is shaped and lowered to make it more or less even and not so distracting (loud menus can be obnoxious if they are left running).
The videos used here are all from the same NinaVision collection that I used in my QDVDAuthor tutorial. For the best results, download the higher quality "mpeg" versions. All are licensed Creative Commons Attribution-ShareAlike, so you can freely copy and share the resulting files. I have in fact already put the completed loop up on the NinaVisionDVD page at the Internet Archive.
By comparison with QDVDAuthor, Kino is much more mature software, and it is available in all the major GNU/Linux distributions. I am simply using the version 1.3.0 which is included in Debian's "Lenny" release (the current Stable).
Kino internally uses digital video (DV) format which is high-quality, but takes up a lot of room on disk
You will need to allow plenty of workspace. Kino internally uses digital video (DV) format which is high-quality, but takes up a lot of room on disk. You may need as much as four gigabytes free to follow this tutorial.
Load the videos
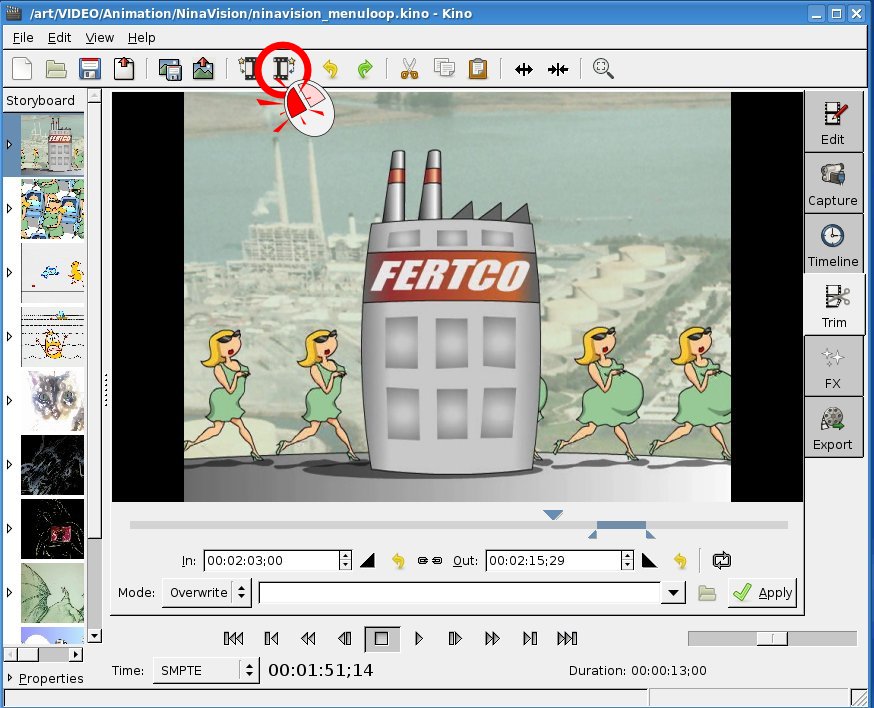
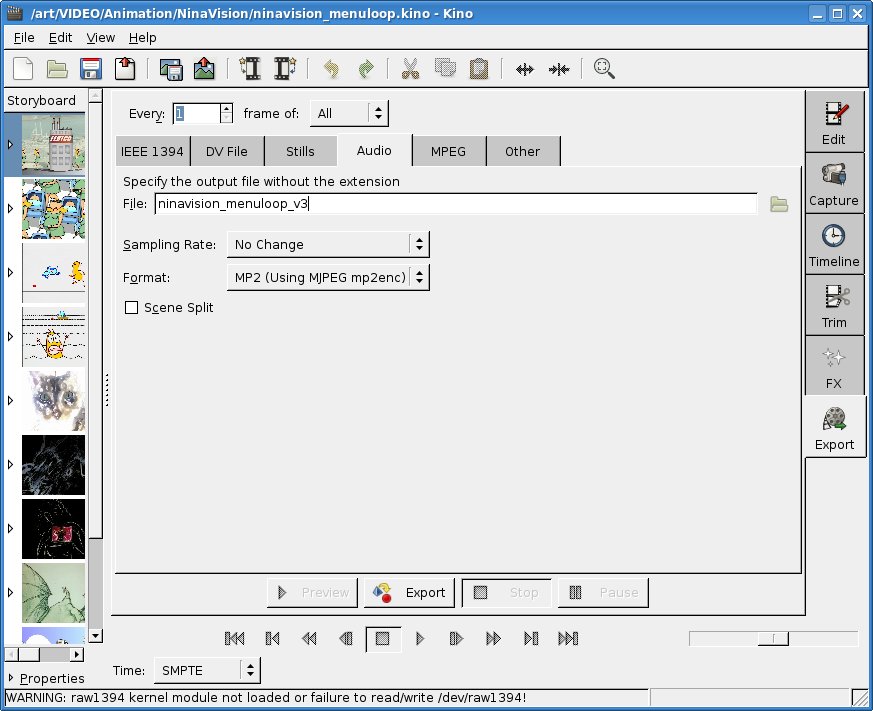
First, we'll start up Kino. In KDE, it's usually on the "Multimedia" menu from the launcher menu. Use the "Insert file after current scene" button (see figure 1) to add each of the videos you want to use. Kino will read the mpeg file and offer to convert it to DV format (which is what Kino uses internally). Affirm this and load the resulting file into your workspace.
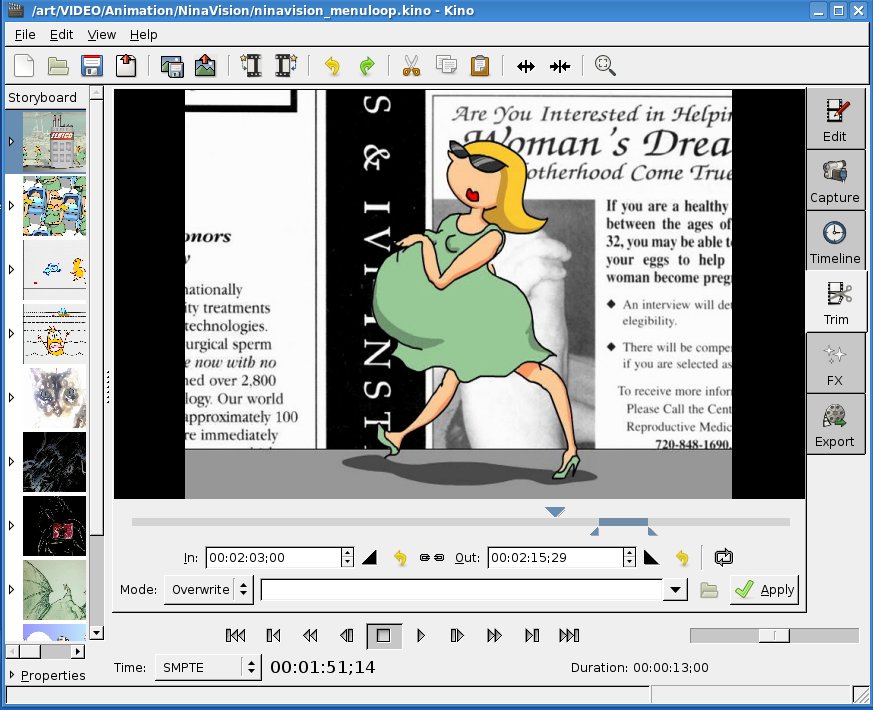
We don't actually want to use any of the videos in their entirety, so use the "Trim" tab to find good snippets from each. I picked snippets about 10-20 seconds long for this project. You could also use the "split scene" tool, and then delete the unwanted portions – this may be more efficient for large scenes, because Kino won't keep track of the deleted parts anymore.
Aesthetically, I tried to choose my transition points with the following video in mind. So, in general, I tried to cut from dark scene to dark scene and light to light, and I generally tried to match the direction of the action (so if characters are moving left-to-right at the end of video 1, it's good to have them moving left-to-right at the beginning of video 2). This is not essential,but it will make the transitions feel smoother.
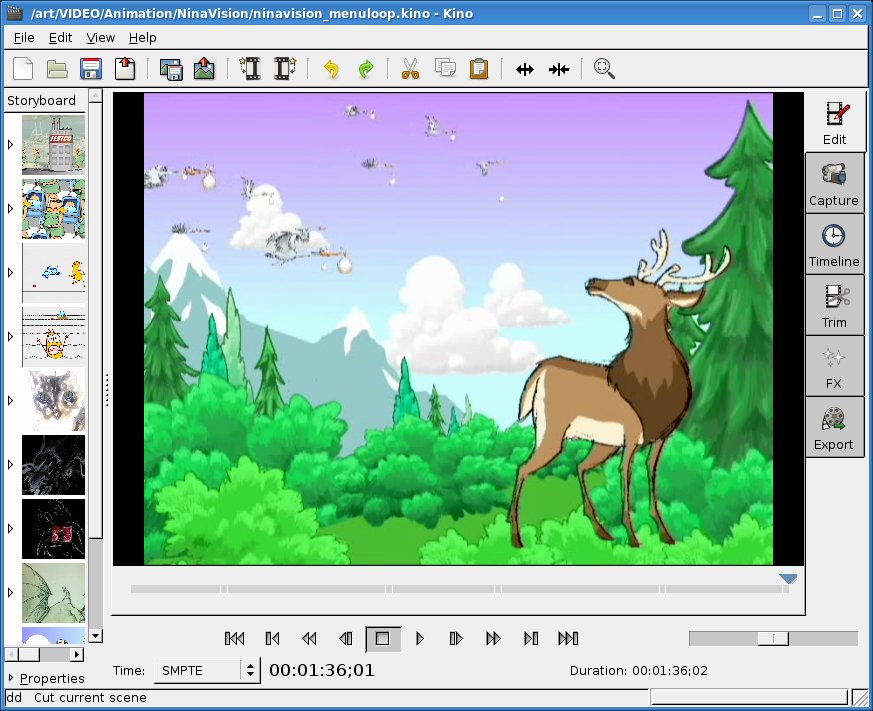
Note that for exact timing you might want to use the "Mode" selector (look to the lower left of the video to find this control) to select "Frames" or "SMPTE". Either of these will give you frame-accurate positions in the video. For NTSC video, there are 30 frames per second; for PAL, 25.
For exact timing, you might want to use the "Mode" selector to select "Frames" or "SMPTE"
When you select the first frame, be aware that we are going to lose one second of video at the beginning. So set the trim point to about one second before the point where you actually want the loop to begin (I know this sounds strange, but it will make sense further on).
Create the dissolve/cross-fade effects
At this point you should be able to play the video and see a rough approximation of the final loop. However, you'll notice the transitions are rather jarring cuts. We'd like to smooth that out just a bit, which we'll do using a "dissolve".
There are other options for transition effects from one video to another. These can be used as creatively as you want. With moving action, you can use a "wipe" which follows the action, for example, and there are many other choices. A dissolve, though, is a good "invisible" general purpose transition that depends very little on the content, which is why I'm using it here.
The closest audio transition is called a "cross-fade". It means that the audio from the first scene is being faded out at the same time that the audio from the second scene is being faded in. This, combined with the dissolve, can make a very smooth, relativley unnoticeable transition.
Each of these transitions will be one second long for this video loop. I found this to be a very good size – short enough not to interfere with the action, long enough not to seem jarring.
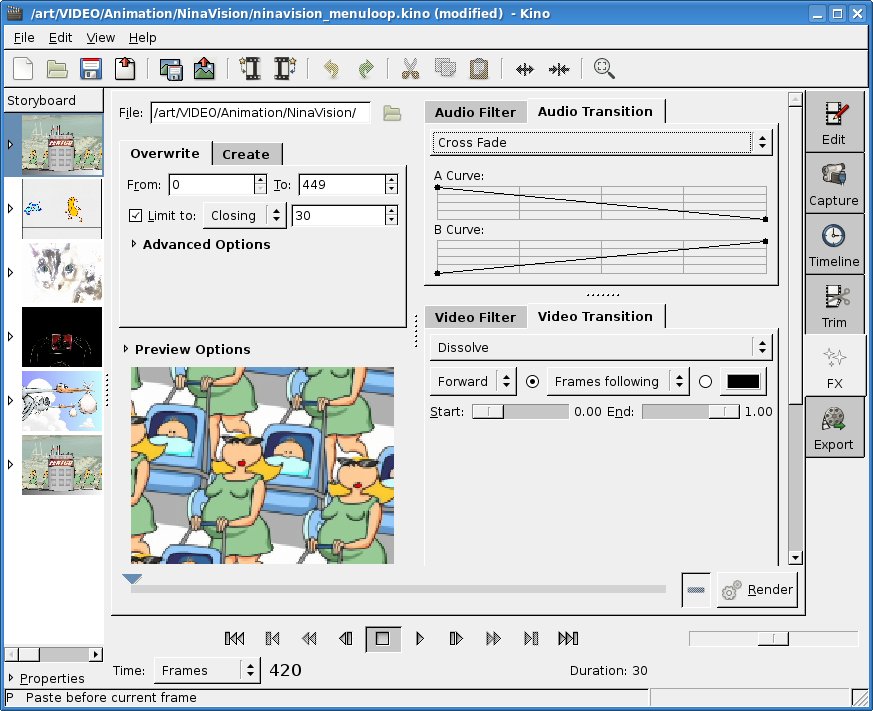
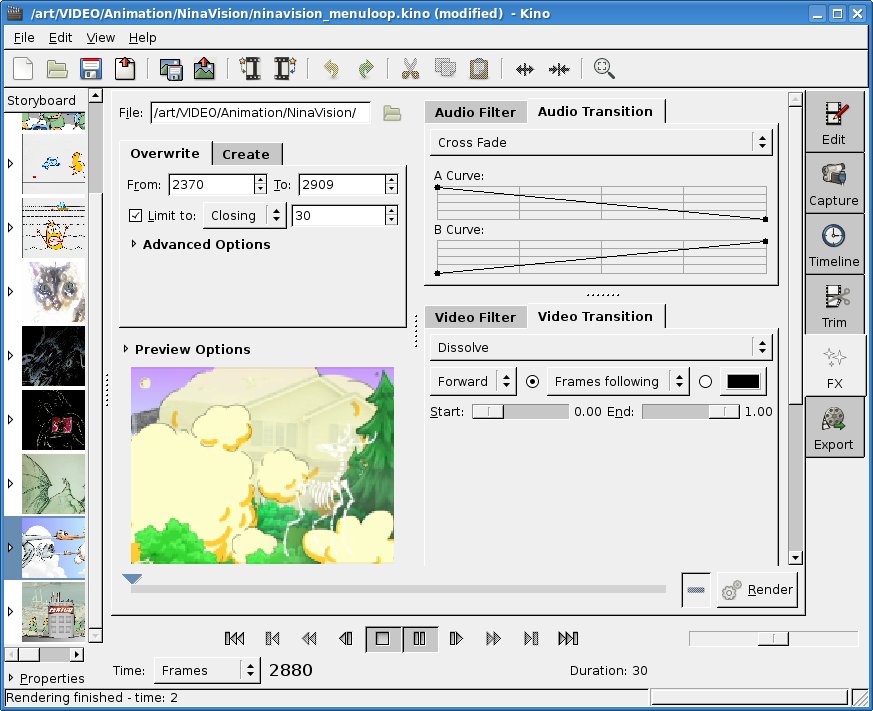
Select the "FX" tab to create transitions. Pick the first video (the one you want to dissolve FROM). Check "Limit to last" and pick 1 second or 30 frames (for NTSC, 25 for PAL). Select "audio transition" and "crossfade" to set up the audio transition, then select "video transition" and "dissolve" to set up the video.
Select the "FX" tab to create transitions
This process will trim one second (30 frames NTSC) off the end of the first track; it will trim one second off the beginning of the second track; and it will create a new one-second "FX" track in between. You need to remember this for the next section. For now, just repeat this process until all of the videos have transitions.
Looping the end to the beginning
This is meant to be a continuous loop, so in addition to the transitions between each video and the next, we also need to have a smooth transition from the end back to the beginning.
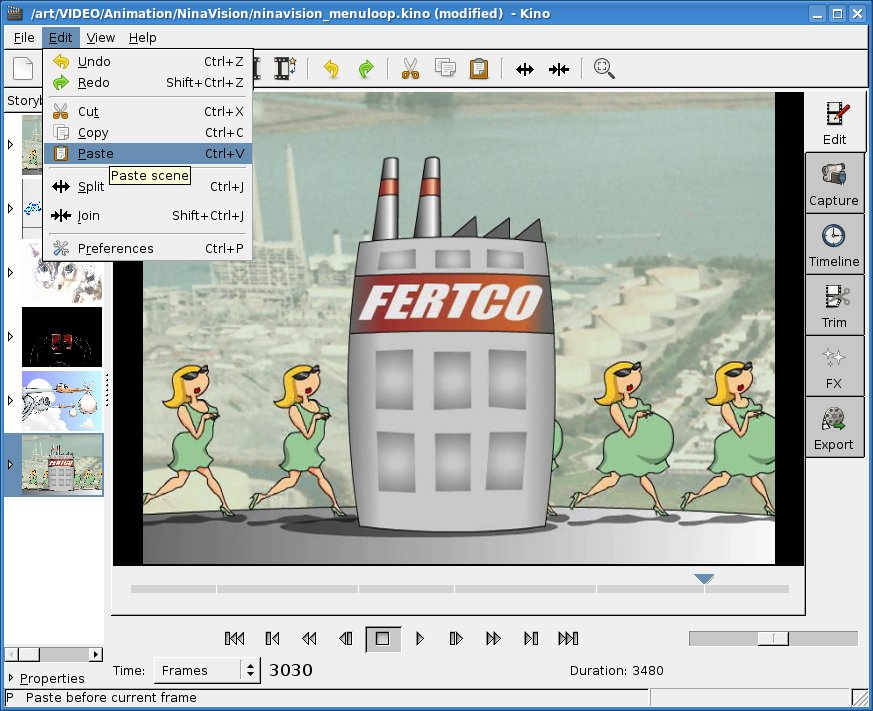
To do this, we'll copy the first track to the end, create a transition the same way we did before, then move the modified tracks back into their proper positions, deleting the extra track.
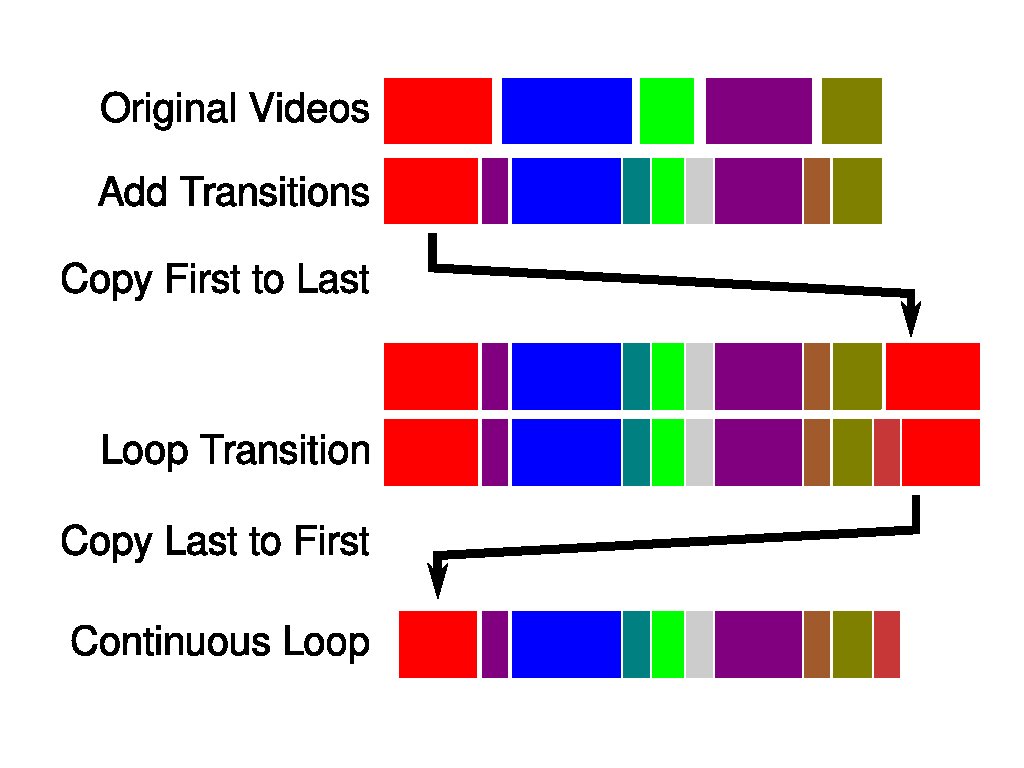
Copy the first video segment and paste it to the end of the project. Now create a dissolve/cross-fade between the last track and this copy, just like we did in the last section. Note that after you do this, the final track has been modified and now starts one second (30 frames NTSC) later than it originally did. You must transition to this track, or the video will appear to "jump" back one second when it loops.
So, delete the original first track in the project, then move the last track (now a modified copy of the original first track) back to the beginning of the project. If this confuses you, take a look at the diagram in figure 5.
Exporting to MPEG format
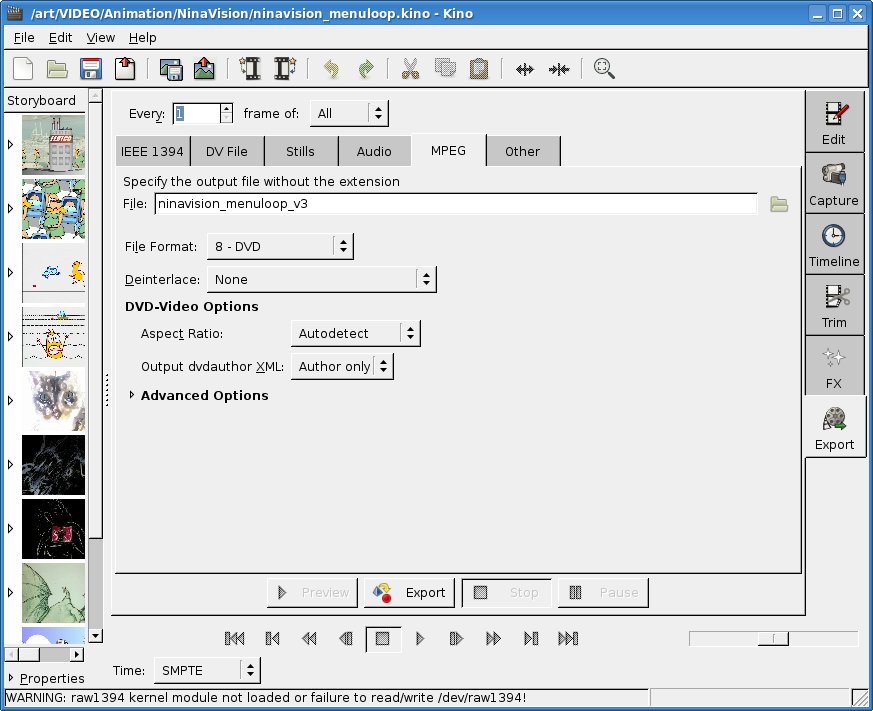
Check your result by playing it back in the editor. When you are happy with it, select the "Export" side-tab and the "MPEG" tab to export it to an MPEG video. Choose "8 - DVD" as the application (because we do want to use it in a DVD). The other options can be ignored. When you give it a name, don't use an extension. Kino will append ".mpeg" regardless. Click "Export", and be prepared for a bit of a wait as Kino renders the video (good time for a tea refill).
Similarly, you can export the audio track by itself to an MP2 or Ogg Vorbis file. Simply use the "Audio" tab (instead of "MPEG"), then select the format to be "MP2" (or "Vorbis"), and click "Export" again.
This might be a good time to test the results with another viewer, such as VLC. Set the player to loop and watch the transitions to make sure they behave the way you think they should. You may notice a delay at the end of the track as it loops back to the beginning – some players will need to take some time to seek the beginning of the file again. This is also typical of consumer DVD players, though, so it's likely what the final result will look like. You might notice that the audio is more disturbing than the video, because of the lost timing. We'll take that into account below.
Editing the audio with Audacity
At this point, I'm going to switch over to using Audacity, which is a sound file editor, also quite mature and available in all major GNU/Linux distributions. I am using version 1.3.5 from Debian "Lenny" here.
From Audacity, load the Ogg Vorbis sound file. You should see something like figure 10 at that point.
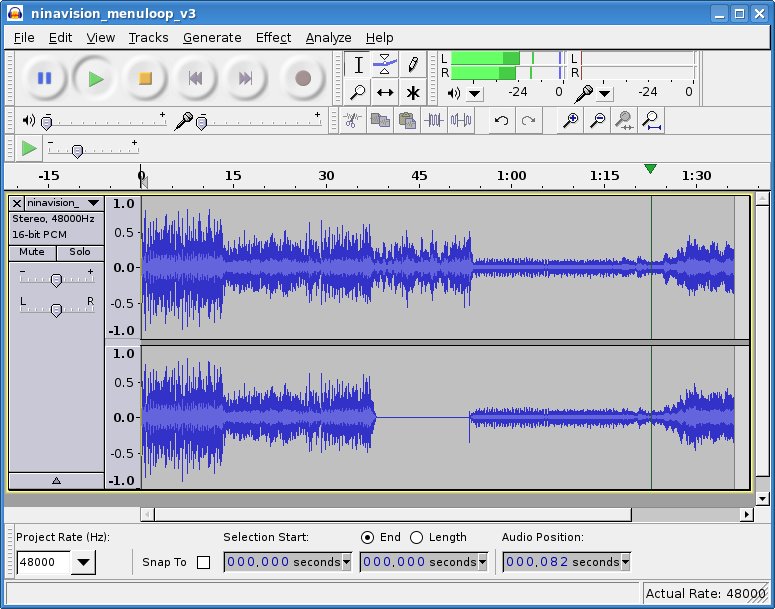
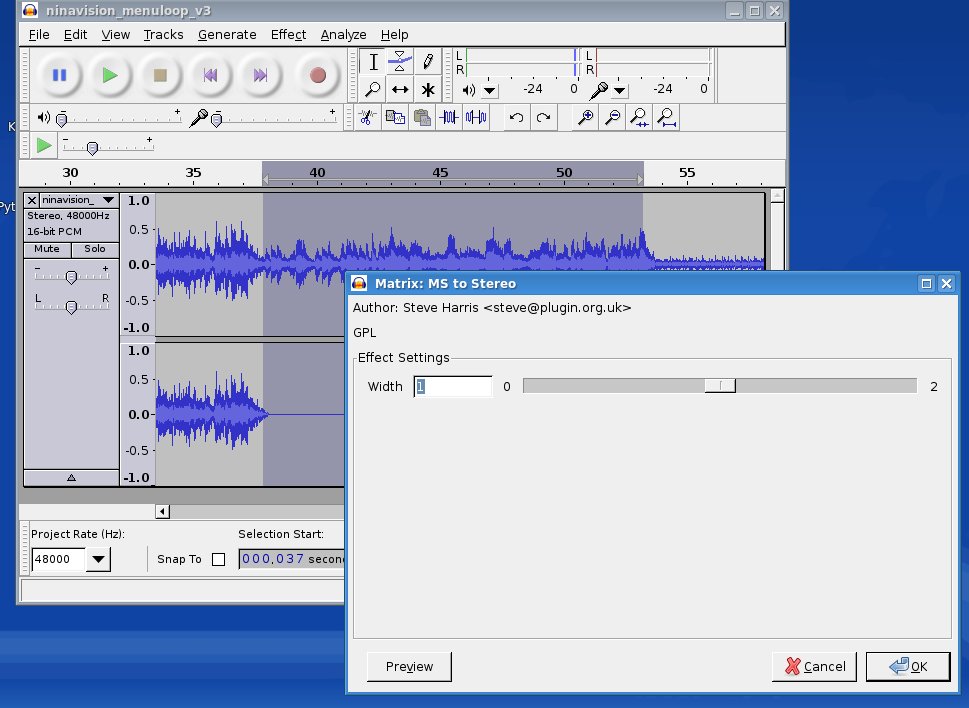
The first thing to notice is that one of the tracks was apparently recorded in mono, so it only shows up on the left stereo track. This is potentially annoying (depending on how the watcher's sound system is set up), so we'll use the "Matrix MS" filter to convert this track to Stereo. It'll still sound mono, of course, but it will come out of both speakers. For this we simply select all of the track and use the "Effect" menu and select the "Matrix MS" filter (see figure 11).
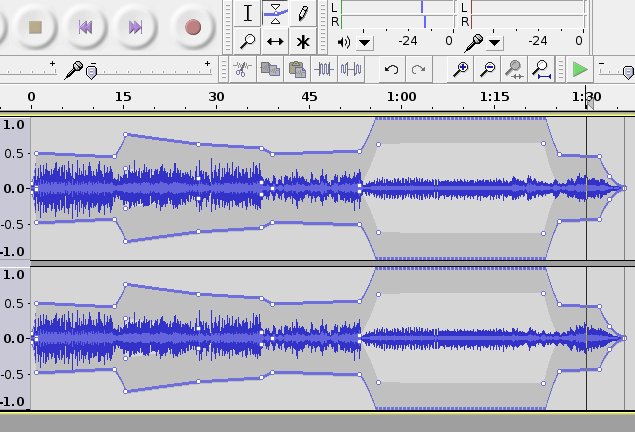
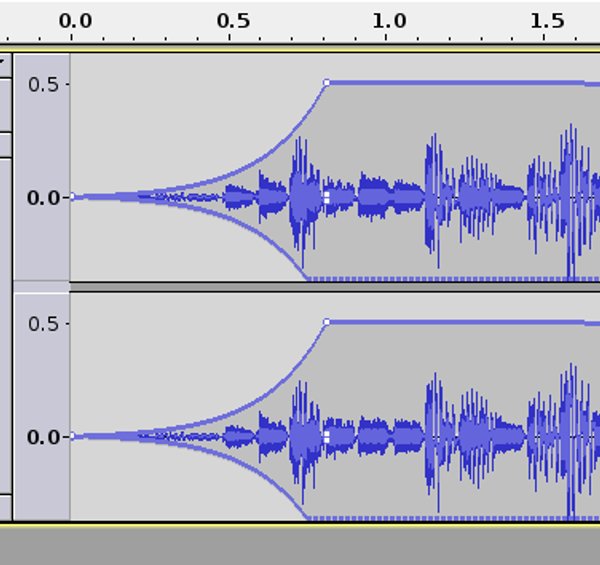
The next thing to notice is that the sound level is inconsistent between tracks ("FERTCO" was much louder than "Lexi" or "Pandorama"). This is understandable in the videos, but we'd like them to be closer together for the menu. So we'll used the "envelope" tool to shape the sound the way we want. See figure 12 for how this looks.
This is also a good time to deal with that delay during the transition. A pause at the end of the loop is expected from most players (which will need to seek back to the beginning of the file to replay the video). This causes the video to pause and the audio to cut out briefly. The paused video is not so disturbing for the instant it happens, but the audio throws off the timing.
One way to make this less noticeable is to simply have no audio at this point. We can do that by introducing a rapid fade-out at the end of the track and a fade-in at the beginning. If its quick enough, you'll hardly notice it, and yet it will smooth over the loop transition. Figure 13 shows the result of using the envelope tool to "pinch out" the end of a track to produce a rapid fade-in or fade-out effect.
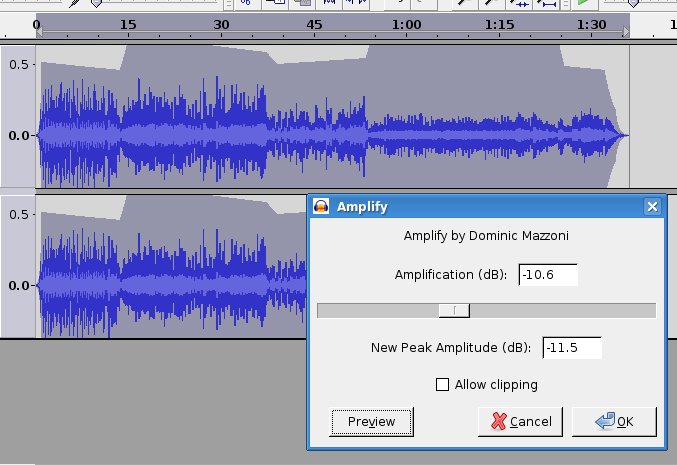
Finally, the whole track is a little loud. Menus should usually have quiet background music, especially since they are sometimes left running (I'm sure you've been annoyed by DVDs that don't follow this principle before). So we'll select the entire track and apply the "Amplify" filter from the "Effects" menu.
Menus should usually have quiet background music, especially since they are sometimes left running
Despite the name, "Amplify" does both amplification and attenuation. We'll want the latter in this case: set the slider to about -10 dB (decibels) to make the track noticeably quieter (remember that decibels are on a logarithmic scale which approximates the response of your ears). Apply this, and we are done editing the audio.
Save the Audacity project if you think you might want to tinker with the track some more in the future, and then export the result as an Ogg Vorbis file.

Putting it back together
It's possible to use the separate audio and video tracks directly in QDVDAuthor (indeed it appears to be essential), but you can also assemble the sound and video together in Kino.
To do the latter, simply load the final MPEG video into Kino (import it), then select the "FX" tab. Make sure no video effects are selected (Kino will remember the last effect you used, so be careful). Then, select "Audio Effect" and "Dub". Then select the newly-edited Ogg Vorbis audio track. Render the effect, and the video will be overdubbed with the audio. This can be exported as before, and viewed with any video viewer you want to use. It can also be used in a DVD menu with QDVDAuthor or other DVD authoring software.
The final result: