There are not a lot of free software options for mastering DVDs. One of the more complete solutions is QDVDAuthor, although it still has a number of rough spots. It's a front-end to a collection of command-line free software tools that do each of the individual steps involved in going from a collection of digital video files, audio files, and images to a DVD with menus. As such, it's quite complicated, and not as stable as some software. Still, it is a rewarding experience if you stick with it. Here I'm going to walk through creating a DVD for a collection of animated videos by my new favorite free-culture artist, Nina Paley (partly because the CC By-SA 3.0 license eliminates any questions about copying the material here, and partly because they're pretty cool in themselves).
First a caveat: if all you want to do is burn video to a disk so you can watch it, and you don't care about the menu structure, QDVDAuthor does have a couple of "wizards" which you can use. This tutorial is for those who want to craft a professional-looking DVD with custom-designed menus.
Installing QDVDAuthor
QDVDAuthor is probably a little more "bleeding edge" than most applications that you've used, so it's important to get an up-to-date version. Also, the mere fact that it depends on a variety of command line utilities to do most of its work makes its dependency-tracking somewhat treacherous.
Your best bet is to install from a package designed for your distribution of GNU/Linux, if you can find one:
Getting Your Video and Other Media Together
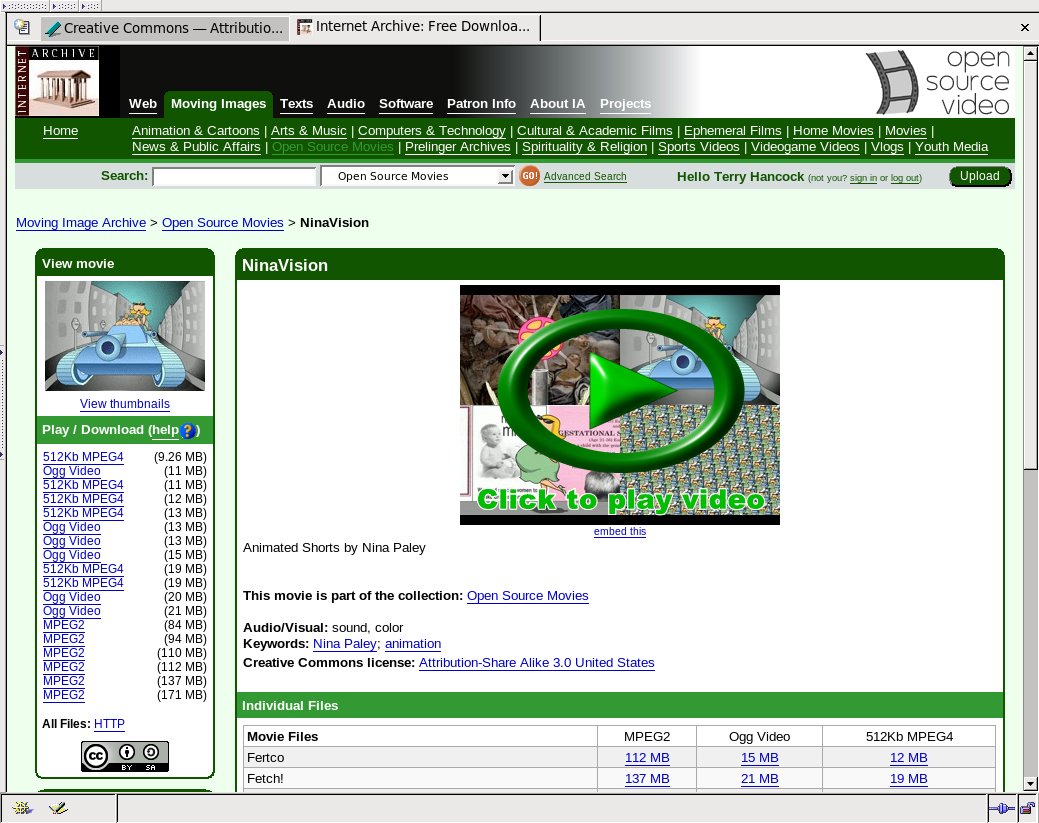
The videos for this project are available online under the CC By-SA 3.0, at the internet archive. These are older animations by Nina Paley (Sita Sings the Blues).
We'll be using all of the NinaVision videos and one other (just-released) track from her "minute memes" project with QuestionCopyright.org, called Copying Is Not Theft[2], and a trailer for "Sita Sings the Blues".
I used VLC to generate snapshots from these videos, which I will use below as graphic elements in the menus. Two of them will become my "Select" and "Extras" menu backgrounds. Six will be used as icons for each of the six main movies (after reducing them to 80×80 pixels with Gimp), and two more will be used for the other extras.
For the main menu background, I wanted to use a video loop. For this, I cut together snippets of several of the NinaVision movies, with cross-faded audio and dissolved video, using Kino (This is not hard, but out-of-scope for this article. I'll try to cover Kino in a later article). Note that this file should be saved as an MPEG2 file, and should use the extension ".mp2".
Creating and loading this video loop was the trickiest part of this project. If you don't want to bother with it, you can simply use a screen capture as the background for this menu as well. Possibly, you might want to add an audio loop over it, such as the Chris Korda audio track "Buy" used in the film "FERTCO"[3], using Audacity.
Starting the DVD Project
Start by opening QDVDAuthor (see textbox 1 for installation information). Create a new project with "File→New Project". A dialog will ask your for your desired temporary storage directory and the target DVD directory. Bear in mind that video files are large and need to be accessed quickly – try to pick a local drive with plenty of room on it (ideally, several gigabytes).
Organizing Videos
Next, we'll load up the video files that we downloaded in the previous step. To do this, use the "Add / Organize Videos" button near the lower left side of the QDVDAuthor window. This will open up a dialog that will allow you to arrange the videos for use on your DVD.
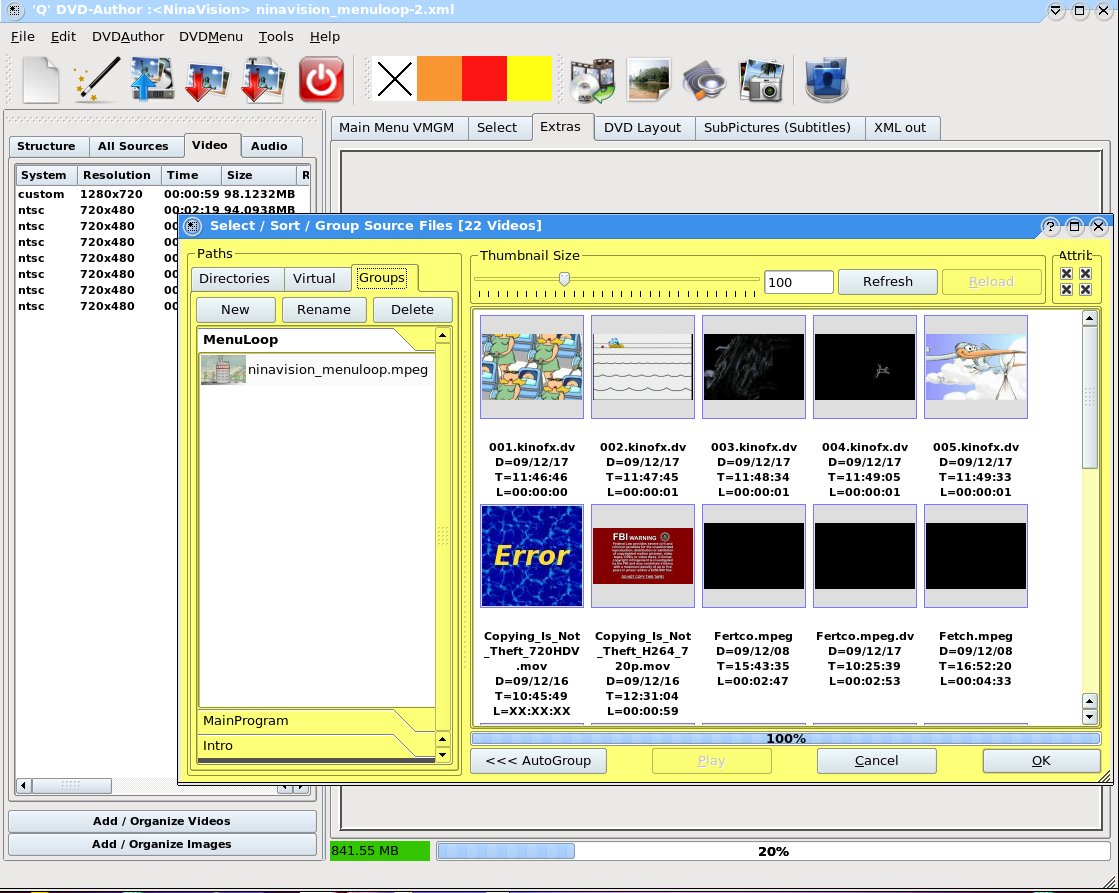
Using the "Directories" tab, you can browse to the directory where you've stored the videos. Once there, you should see thumbnails begin to render in the box to the right (this takes awhile, and occasionally it will produce an "Error" thumbnail – you'll need to right click on these and re-render them if they are files that you will be using. Unless there's something seriously wrong, they will usually work on a second attempt).
Now, select the "Groups" tab, and create some sensible groups for the videos (I'm using "MenuLoop", "MainProgram", "Extras"). These can be overridden later on, but they help you organize the files.
Drag and drop the videos you want into the appropriate groups on the left. The order is significant, but you can alter it by dragging videos up and down in the list.
The Main Menu
Now we can start setting up the main menu (which should already be selected). Select "DVDMenu→Add Intro." This is where we will select a video file to play right at the beginning, before the menu loads. Some videos might use this for an anti-copying warning of some kind, but we're going to send that up a bit by using Nina Paley's just-released "Copying Is Not Theft" animation.
After you click on the "Add Intro" option, a dialog will come up, allowing you to select the video you want. Browse to the file, and select "Open".
Next, we'll use "DVDMenu→Add Background" to add a movie loop that will play behind the menu. Note that you must set the filter to be able to browse video files (by default it selects only static image files). Once you have selected the loop video, it will appear in your the workspace (as a static image of the first frame).

Because of the way QDVDAuthor builds the menu loop, this will use only the video from the file. If you also want the sound, you will have to add it separately, but you can use the same file. Make sure the file ends with an extension such as ".mp2", so that QDVDAuthor's file browser will let you access it as audio. This time, use "DVDMenu→Add Sound" to load the same file as an audio track.
If you select the "All Sources" tab in the main workspace window, you should see the file as a "Sound File". I'm not certain it's necessary, but I was not able to use this file until I enabled transcoding. To do this, right-click on the entry in the "All Sources" tab, and choose "Proprties". Check the "Enable transcoding" box and click "OK".
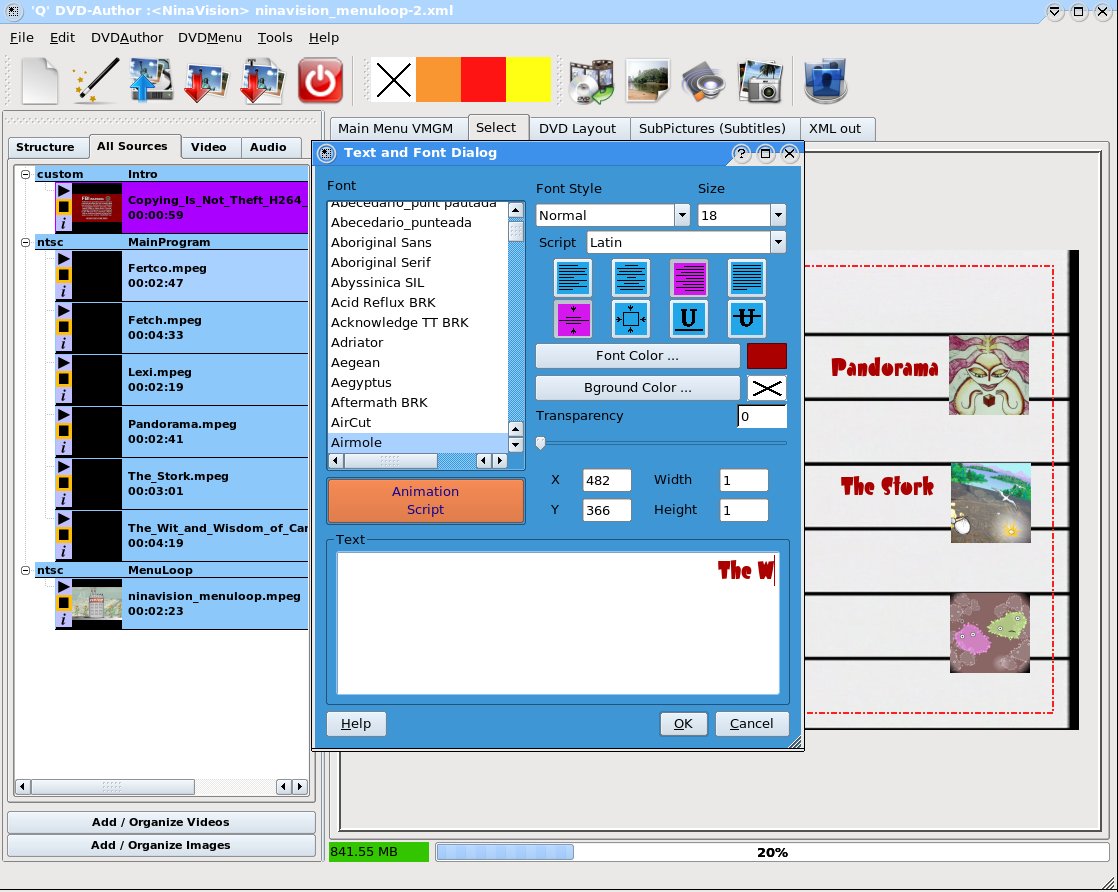
Now, we'll add the title. Right click in the workspace menu, and select "Add Text". You will get a dialog allowing you to set the font, size, and color of the text as well the text itself. I used a green color and the font "AirMole" at 48 points for the text "Nina Vision" and somewhat smaller text in the same font to say "Six Short Animations by Nina Paley". This is only for appearance, by the way, the text will simply appear in front of the background movie loop.
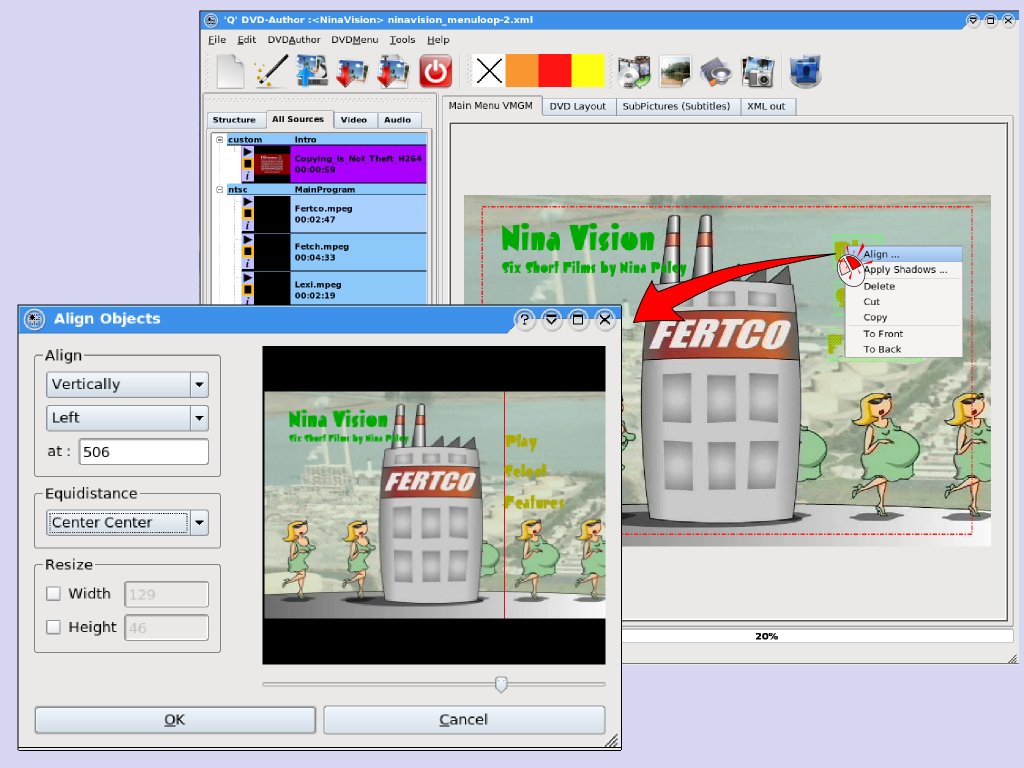
Next we'll add three more text elements – "Play All", "Select", and "Extras" – in the same way. Chances are, they won't be straight enough, so we'll select the buttons, then right-click, and choose "Align and Distribute". This will bring up a dialog that allows us to control the positioning via constraints.
Be warned: the interface in this dialog is a bit dodgy. What it calls "Vertical" alignment is what every other program calls "Horizontal" and vice-versa. Also, you can't grab the alignment line – use the scroll bar at the bottom to position the line. The distribute options work in the perpendicular axis from the alignment options (so if you are aligning vertically, you'll be distributing horizontally).
Then we'll right-click on each and select "Define As Button". For the "Play" button, we'll want to play the collection of videos sequentially. So we'll set "jump" to the "MainProgram" video group, then select "Multiple Files" to get finer control over how the files will be played. Note also the "final destination" selector – this allows us to determine where the viewer will wind up when the video has finished playing (we'll want them to come back to the main menu). Click "Ok" from the multiple files dialog, and a red note will appear saying "Play 6, to Menu" (briefly summarizing what we set). Assuming this is okay, click "Ok" again, finishing the definition of the "Play" button.

Other Menus
Since the other buttons require additional menus, we'll create them first. Select "DVDAuthor→Add Menu" to create a new one, then right click and choose "Rename Menu". We'll call this menu "Select." Select "DVDMenu→Add Background" to select the appropriate background image.
Repeat the same procedure for the "Extras" menu.
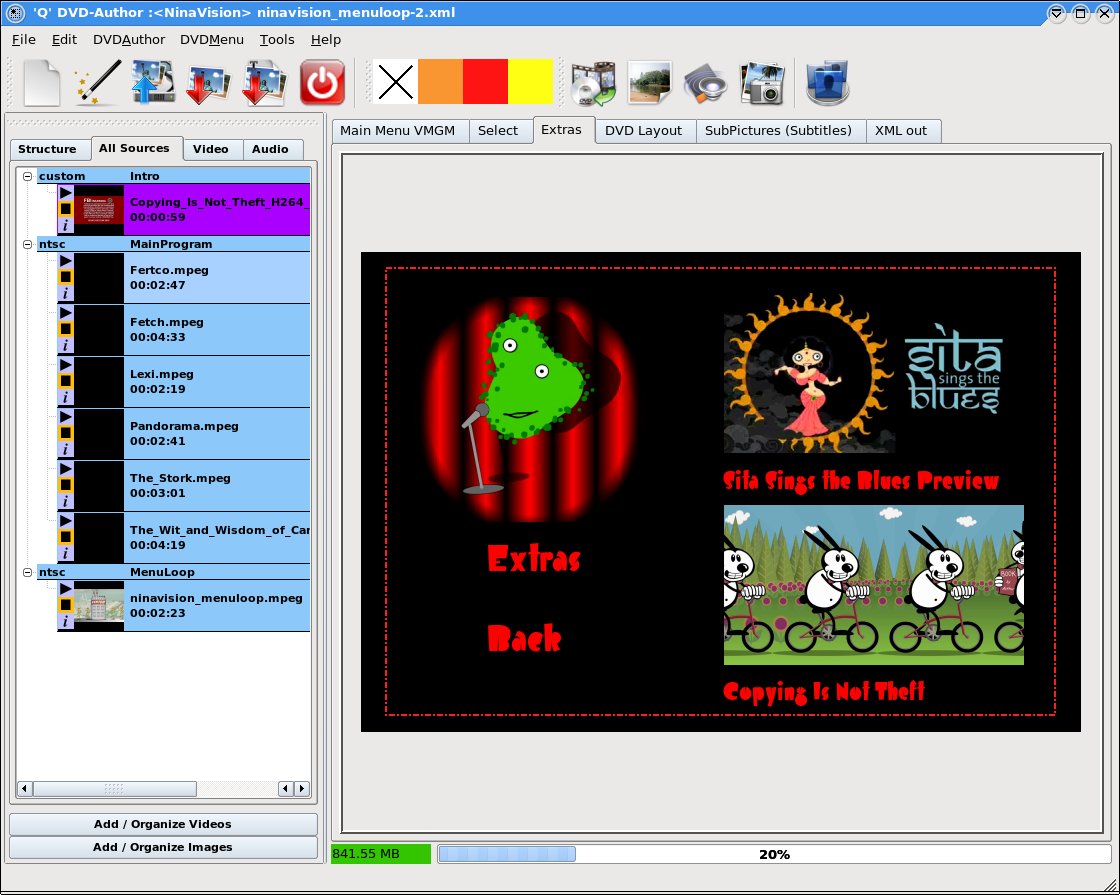
Using "Add Image", I will now add icons for the various videos I want to make available from these pages. Note that you can carefully set the dimensions of the imported image if you click and drag to select the location you want the icon to be in.
For each video on the "Select" and "Extras" page, I will define a button. The idea is that each of these will play just the one selection and then return to the calling page. To do this, I will use the same procedure I did above for the "Play" button, explicitly noting the video to play, and setting the appropriate menu as the "final destination".
I'll also place a text button on each of these pages, called "Back" (you might also use "Main"), to jump back to the main menu. This is the default setting for a button, so you won't have to do anything in the dialog except to give the button a unique name (you don't want to name the buttons on the "Select" and "Extras" pages the same name).
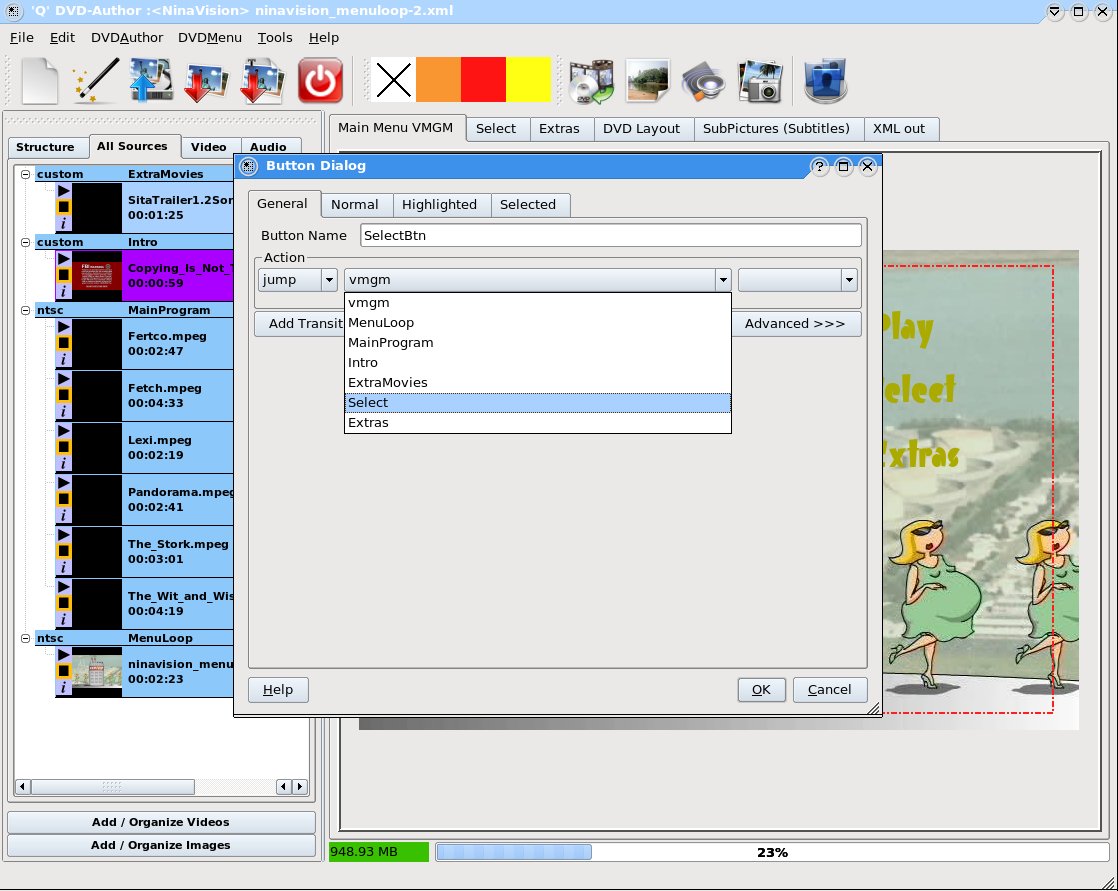
Once these menus are finished, we then need to attach the buttons from the main page to them. So return to the main menu, and select "Define as Button" on "Select" and "Extras" and select the appropriate menu name from the pull-down list.
Generating and Testing the DVD Image
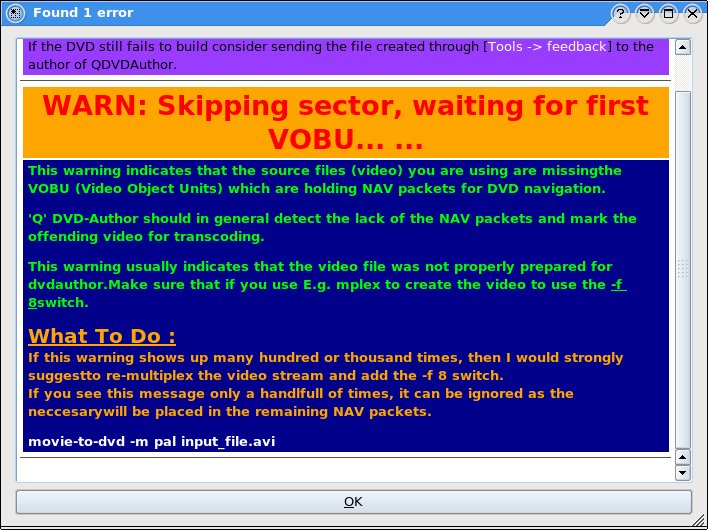
At this point the design work is finished. Now we just need to write out the DVD structure and make sure it's doing what we want. To do this, either select "DVDAuthor→Create DVD" or click on the appropriate toolbar icon. A fairly terrifying multi-colored dialog window will come up at this point, explaining exactly what the program is about to do. If you really knew the command line tools well, you could tweak them at this point, but we don't need to.
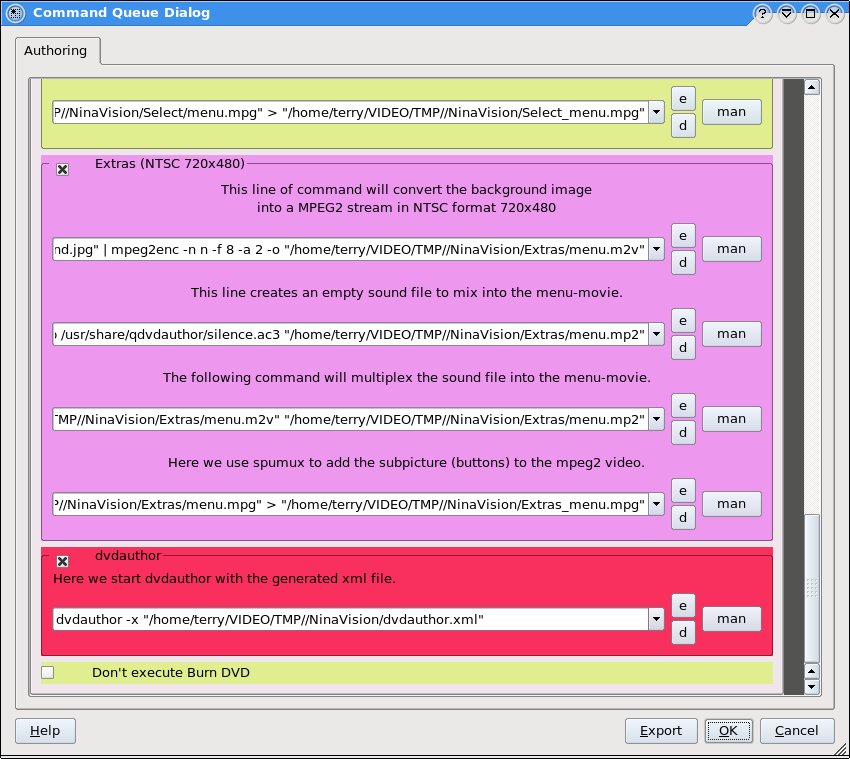
You'll note that the very last item says not to burn the DVD. This is the default and recommended approach – it's easier to burn the actual DVD from another program such as K3B. In any case, we want to test the DVD file structure on disk first.
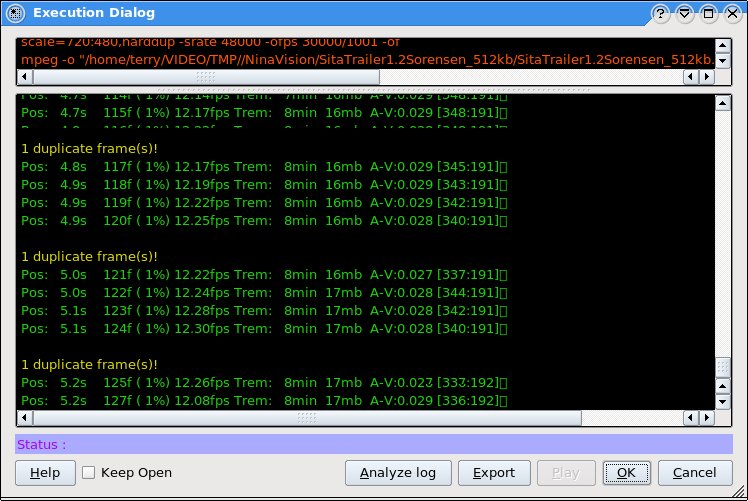
So at this point you can just click "Ok". Another odd-looking dialog will pop-up. This is actually a pretty nifty status window, which shows the DVD build progress in detail as it is working. If one of the underlying tools has a problem, you'll see a message here. Actual rendering time for DVD varies a lot – for one very large and complex DVD I found I had to leave it overnight. For this NinaVision DVD, rendering might take as much as two or three hours on a slow machine. This is mostly due to the transcoding and rendering processes.
Once the DVD files are created, you can open them in VLC. In version 1.0.1, this is done from the "Media→Open Disc" option. Instead of selecting a device, click on "Browse", and browse to the location for the DVD files that you selected at the beginning of the authoring project. Be sure to select the top-level directory (not the "VIDEO_TS" subdirectory) when you do this. In this configuration, VLC should recognize and use the menu structure of the DVD.
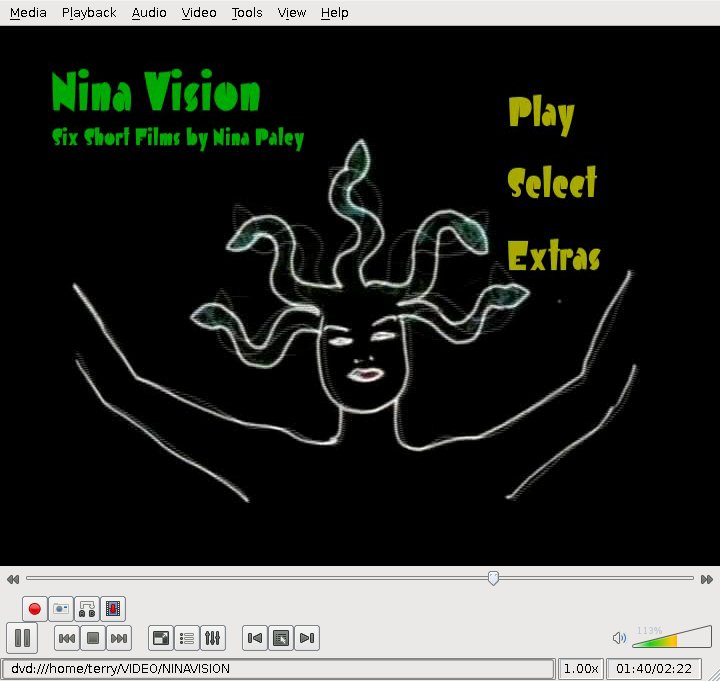
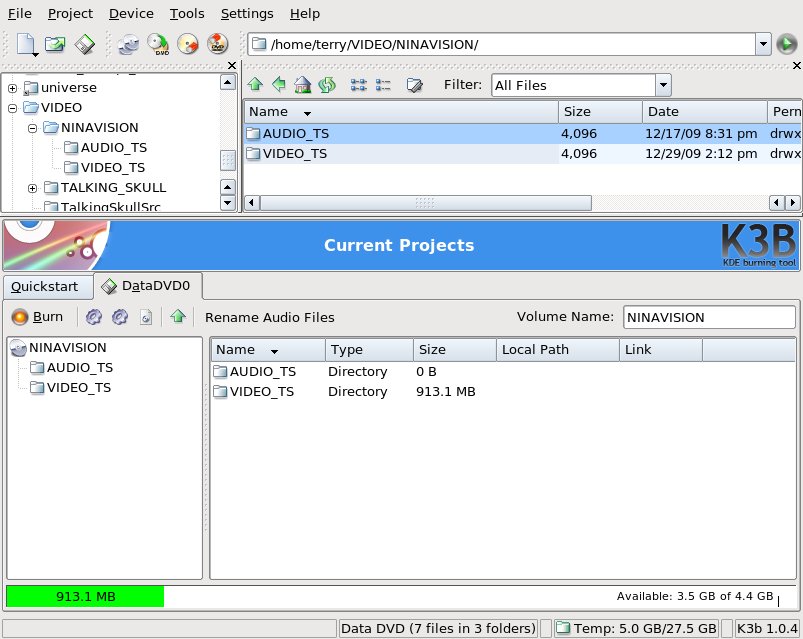
Navigate through all of the menus and play the videos here. VLC supports nearly everything a normal DVD player will do, although it apparently doesn't support main menu "intro" videos (you won't see it here, but it should show up when you put the burned disk into a regular player). When you are satisfied that the disk is correctly authored, then you can burn the files to a data DVD using K3B:
- Insert a writable DVD-R in your burner
- Start K3B (this may happen automatically)
- Start a "Data DVD" project
- Label it appropriately
- Drag and drop the
VIDEO_TSdirectory into the project - Select "Burn"
- On the filesystems tab, select the large-file "UDF" option
- Click the "Burn" button in the dialog
After a few minutes, you should have a DVD you can watch using an ordinary DVD player!
Why I like it
The truth is, I have not tried other DVD mastering tools for GNU/Linux, so my main attraction to QDVDAuthor is simply that it can do this! There are a few others, such as DVDStyler and DeVeDe, but I can't really compare them, since I haven't used them. My impression from other people's reviews is that they are probably easier to use than QDVDAuthor, which does have a very arcane interface.
However, I am very impressed with the range of capabilities of QDVDAuthor, and so far, at least, the DVDs I've mastered with it have played well on ordinary DVD players. I find the highly verbose dialogs in the generation process to be very useful in sorting out problems with complex DVD designs, and with enough determination, I've been able to create just about any design I wanted to make (for example: more advanced features in the button dialog make it possible to hide "easter eggs" in the interface by altering the button selection order; transitions can be added between menus; you can create slide shows; and so on).
I will probably make an effort to try some other tools, but so far, I've found QDVDAuthor to be a useful, if occasionally frustrating tool.
[1] Resources for getting QDVDAuthor installed.
[2] There is more than one version of this video. The original video with "scratch track" bravely sung a capella by Nina Paley herself is here. The link in the article is to a YouTube remix with music added by Norman Szabo. There may be a better source, but this was the best link I could find in time for the article. Flash for Linux stores video on the /tmp drive, so the usual trick for capturing a flash video from YouTube is to look for a new temp file beginning with "Flash" in the /tmp drive once you begin playing the file in your browser, then move that to a named file, as in "# mv FlashXXXX copying.flv".
If the copyright maximalists have convinced you that you should feel guilty about this, I direct you to the video itself for why this is ethical, and to the Creative Commons license in the end titles for why it's legal.
In any case, VLC, QDVDAuthor, and a number of other programs can read the resulting .flv file. I recommend leaving it in this format for use with QDVDAuthor – this seems to produce the fewest artifacts.
[3] "Buy" by Chris Korda, from the album "Six Billion Humans Can't Be Wrong." I'm not really certain about the licensing status of this track, as I couldn't find a notice (So you've been warned).
Licensing Notice
This work may be distributed under the terms of the Creative Commons Attribution-ShareAlike License, version 3.0, with attribution to "Terry Hancock, first published in Free Software Magazine".
Illustrations and modifications to illustrations are under the same license and attribution, except as noted in their captions (all images in this article are CC By-SA 3.0 compatible). The film images included are all from animations by Nina Paley, under the same CC By-SA 3.0 license, and should be so attributed.