Mail merges are a great way to save time, since they pull information from the same fields, over and over again with each new record in your database. There’s only one problem—all records aren’t created equal; they don’t all have, or all need, the same fields. This article solves that perpetual problem with labels. If you’re already familiar with the problem, you can go straight to the solution entitled: Suppressing blank lines with sections step by step.
The problem of blank [Address2] lines
Some people live in houses; some in apartments. Some work in enormous campuses with mailstops or buildings in the address; others receive their work mail at a post office box.
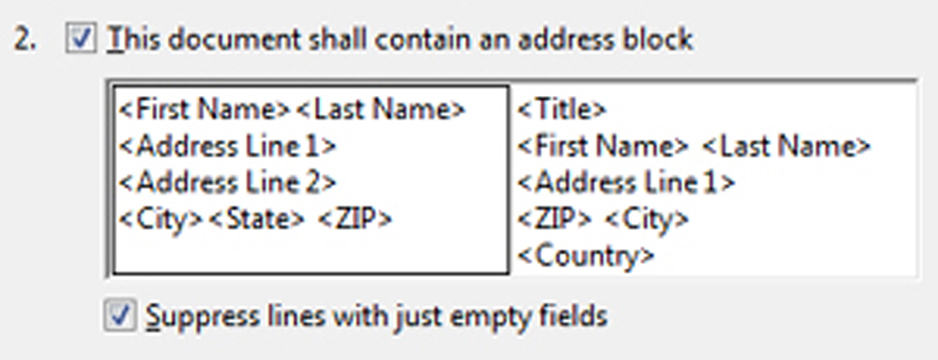
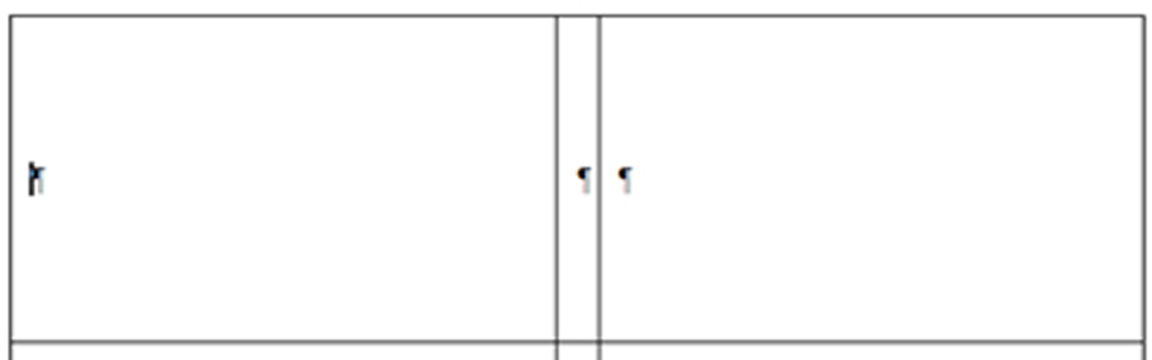
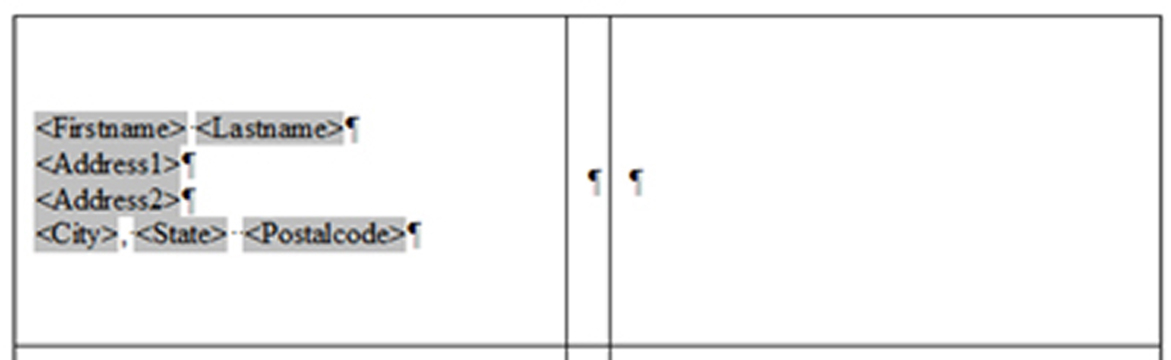
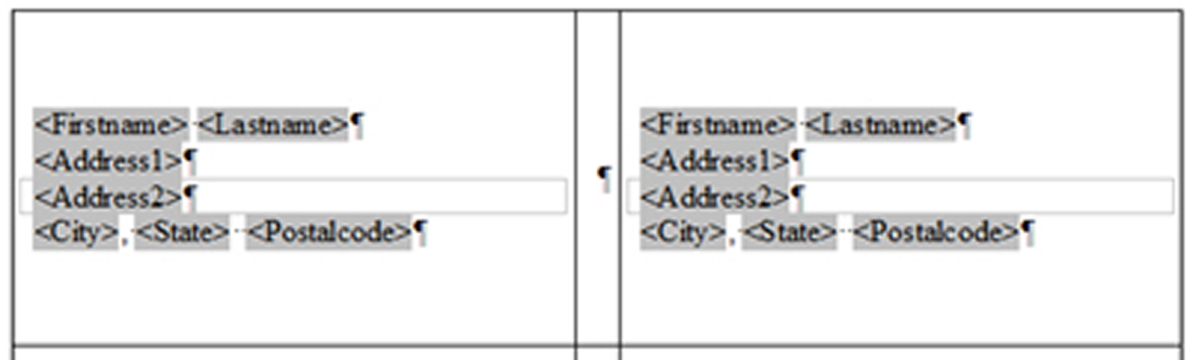
Everyone knows this, of course. So why is this worth mentioning? Because it affects how you do mail merges when you send mail to these people. You’ll need all the relevant information for their addresses to print out on labels, or in the header of form letters. You want them to look like figure 1.

Some have a second line for the address; some don’t. That’s just the way that addresses are. This is reflected, of course, in the database. You create your database and, for each person, fill in the Firstname, Lastname, Address1, Address2, City, State, and Zip fields as appropriate. If there is no value for the Address2 field, you leave it blank.
So far so good.
Figure 2 shows what the labels template looks like when you set up your mail merge.

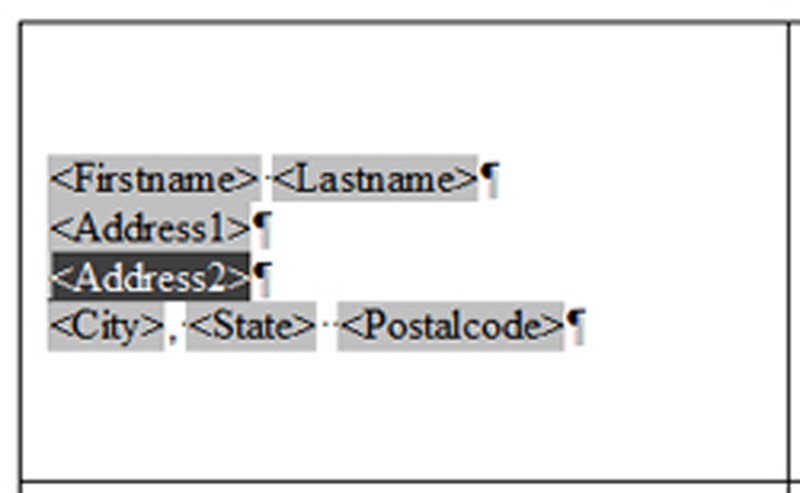
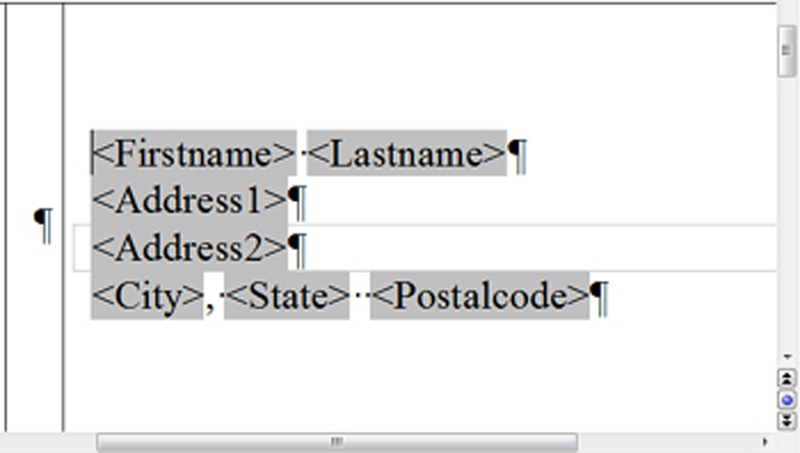
However, this is how your labels will look when they come out of the printer. And, while the post office certainly will deliver letters and packages addressed like this, it does look kind of goofy. (Think how much goofier if you had three address lines in your database.) See figure 3.

Nothing shows up where the empty Address2 value is. At least OpenOffice.org hides the empty Address2 field. That’s good. But OpenOffice.org doesn’t hide the empty carriage return, the empty line reserved for that field. That’s the problem: the carriage return is still there.
The solution to the blank address line issue
Anyone who’s researched how to suppress the blank Address2 line knows it’s a frustrating process. There are some solutions, but they don’t work that well, or they’re complicated, or they only work for letters, not labels. I haven’t tried them all but I concluded from the comments on various forums that we, as OpenOffice.org users, have not yet reached the promised land for this issue.
Here are two solutions. The first one is okay if you’re already using the mail merge wizard. The second one works under any circumstances for any templates.
An adequate solution for suppressing empty lines
Choose Tools→Mail Merge Wizard. In window 3, you’ll see this section (shown in figure 4) that lets you suppress any blank lines in the address block.
However, there are two disadvantages: 1) this is a very complicated, yet powerful, wizard; and, 2) it only works for letters, not labels.
The other solution is more elegant and simpler, if not blindingly easy. And once you’ve done it once, it’s very easy to repeat.
Overview of the best way to suppress any blank line
When I say “the best way”, that is of course my own opinion. But I think once you do it, you’ll see it’s reasonably slick. You can also use it for dozens of other purposes.
The key thing, remember, is to suppress the carriage return that’s associated with the empty field, not the empty field itself. The field is empty so it’s not going to show up, period.
You need to hide the carriage return after the
I have tried to do this with the Fields window but couldn’t find a way to express a carriage return.
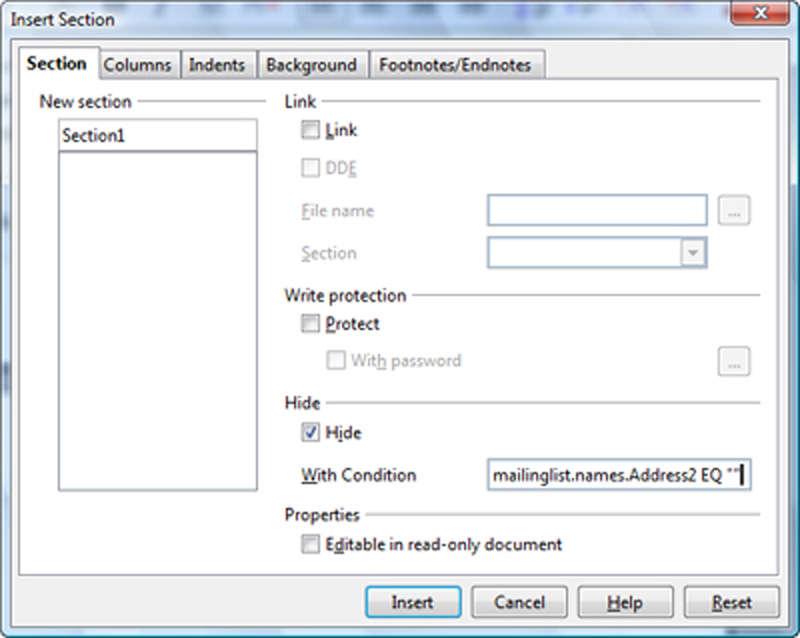
My solution is to use sections, as shown in figure 5.
Suppressing blank lines with sections step by step
I show how to do this in a WorldLabel template, template WL-OL1125.ott. You can download OpenOffice.org templates for free here. However, the principle applies to anything. You can use this in mail merge letters that you create yourself; you can use it in the templates you get from using File→New→Labels; and, of course, you can use it in other WorldLabel templates. The key thing is to simply create the mail merge the way you usually do, then put the field that might be empty in a section with the right condition.
A. Get a database.
I’ll assume that you know how to do this or that you already have created one.
B. Create the mail merge.
I’ll show how to do it in the most straightforward way, using the WorldLabel template WL-OL1125.ott.
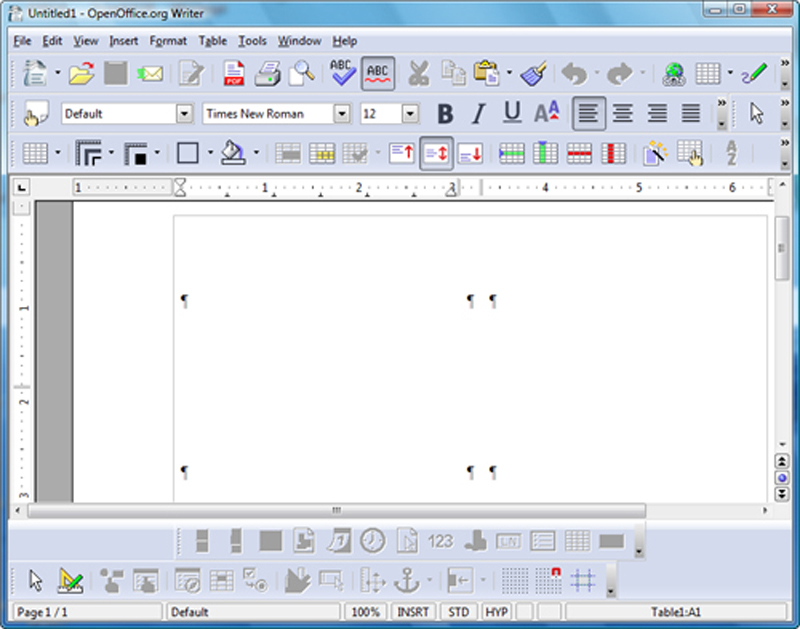
- Open the template. See figure 6.
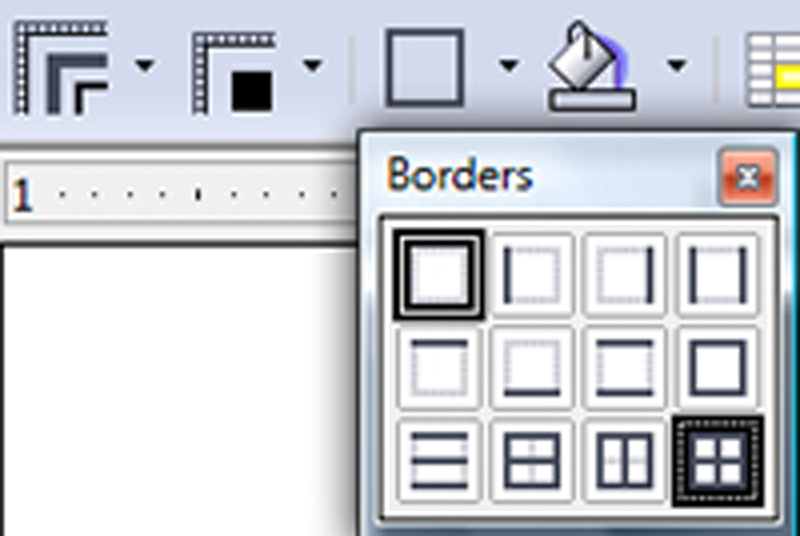
- Optional: The templates are made of tables. I like to add visible borders to the table so it’s easier to tell what I’m doing. Select the whole table and click the indicated icon to put borders on. You can turn them off again before you print. See figure 7.
- Click in the first label area. See figure 8.
- Choose
Insert→Fields→Other, then the Database tab, and select Mailmerge Fields. See figure 9.
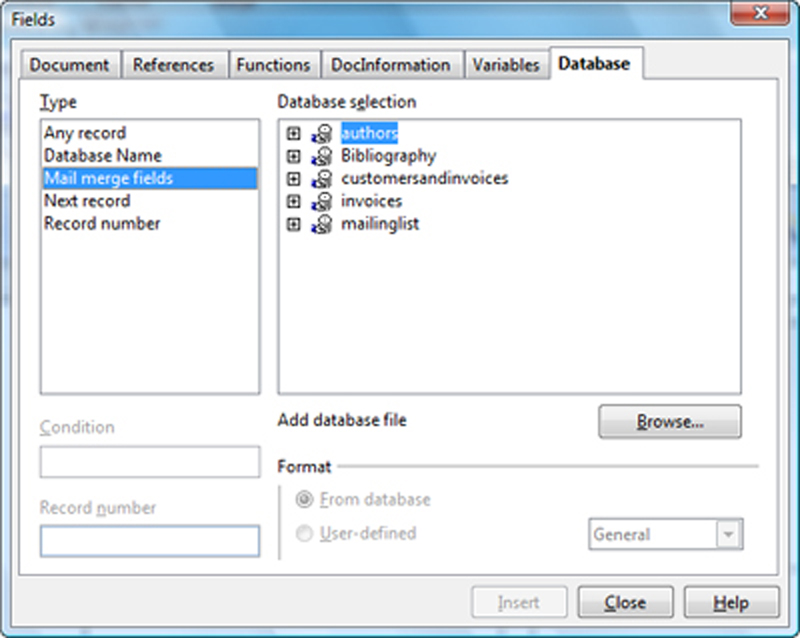
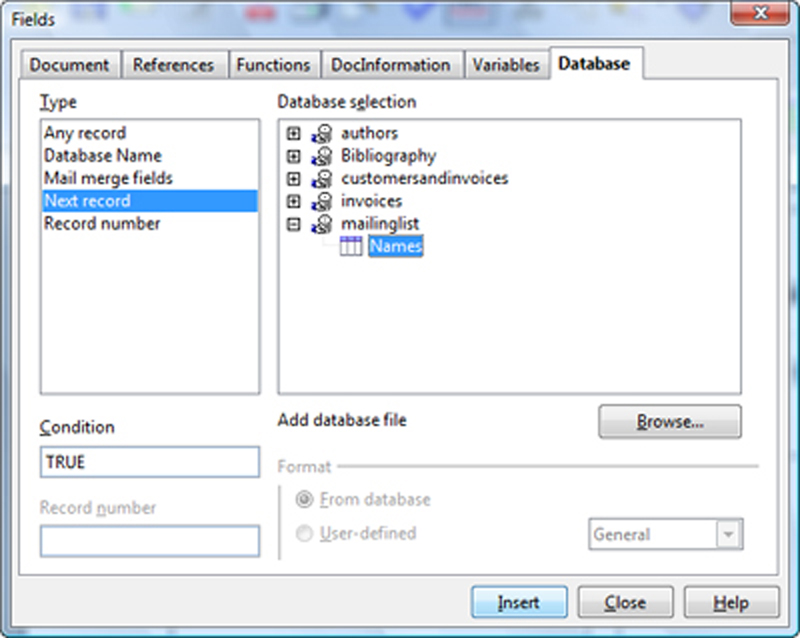
- Select the database and expand to see the table you want to use. See figure 10.
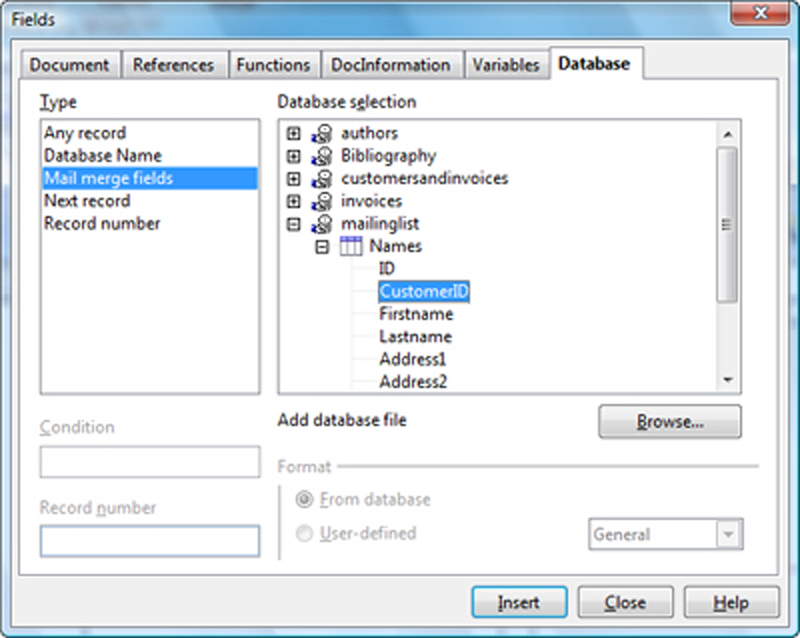
- Select the first field, then click Insert. It will appear. See figure 11.
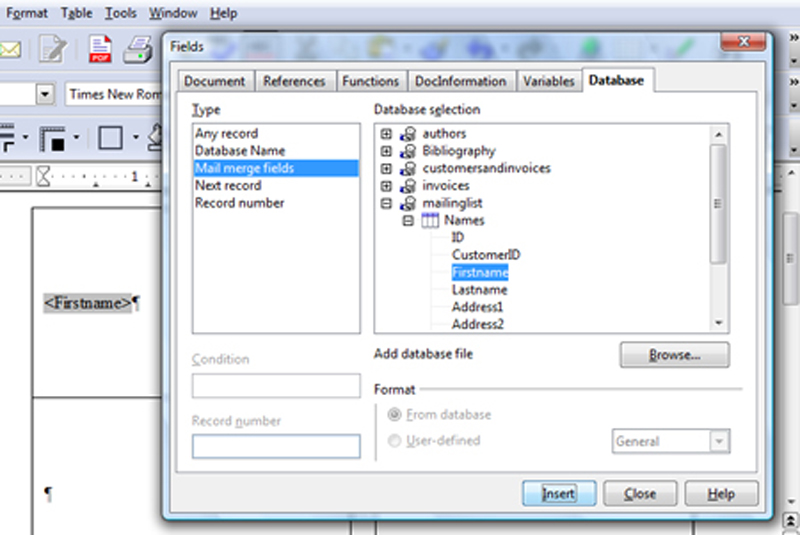
- Type a space after that field in the label, then insert the next field. Press Enter in the label, insert the next field, and so on. It should look like figure 12 when you’re done.
- Select the Address2 field or whatever field you want to suppress if it’s empty. (Select the field, as shown, without the carriage return—I know, it doesn’t make sense but it works correctly this way.) See figure 13.
-
Choose
Insert→Section. The Section window will appear. -
Select the “Hide With” field and type the condition. This condition just says “Hide this part that the user selected whenever the contents of the field I’m referencing are blank”. See figure 14.
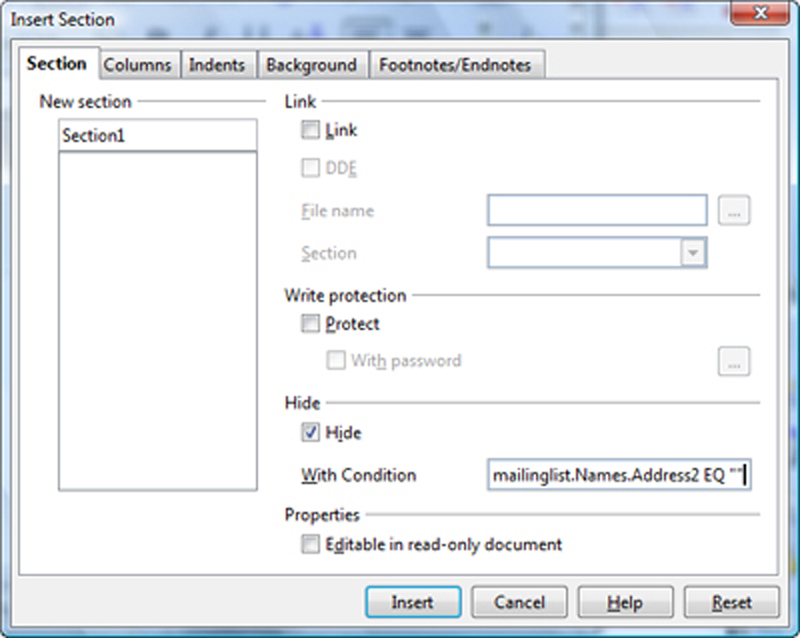
The following are the syntax and an example.
Syntax (replace the italicized values with the real values):
databasename.tablename.fieldname EQ ""
Example:
mailinglist.Names.Address2 EQ ""
Note: You could hide anything depending on whether any field or variable is blank, or is equal to Montana, or any other value. The possibilities are tremendous.
-
Click Okay.
-
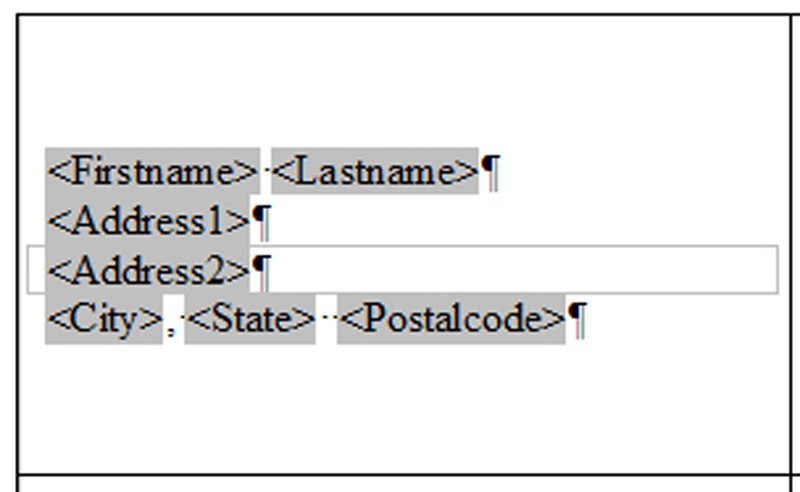
The address block will look like figure 15.
-
Format the address block the way you want it to look: select the font, font size, style, etc.
-
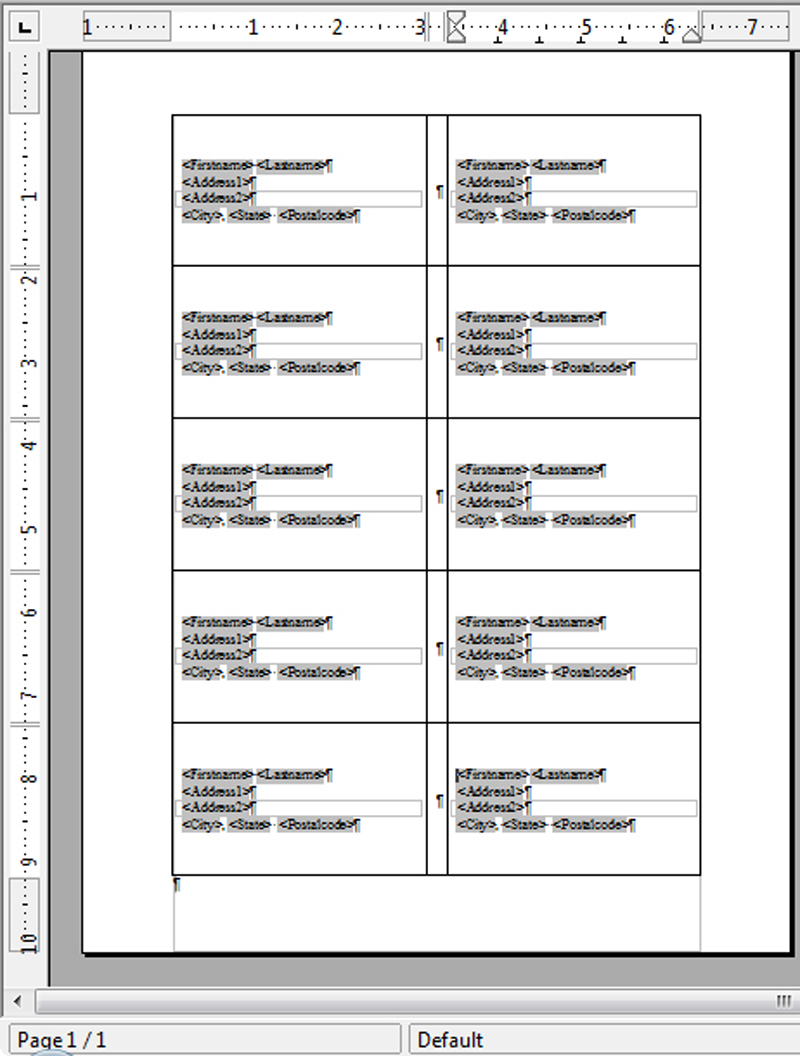
Copy the whole address block and paste it in the next label area, or to wherever you want to use it again. See figure 16.
- You only need to do this step if you are using a document you’ve created from scratch yourself, or a template you’ve downloaded such as a WorldLabel template. It triggers the next record to appear in the next label.
- In the address block that you just pasted, click immediately to the left of the first field, as shown in figure 17.
- In the Fields window, select the Next Record field and in the right-hand column of the Fields window, select the table you’ve been using. Click Insert. You won’t see anything appear, but the field will be there. This is the field that makes the next record’s values appear in the new label, rather than the data for the same record being reprinted in every label on the page. See figure 18.
- Copy the second address block, with the Next Record field in front of it if you added it. Paste it into all the other labels in the page. See figure 19.
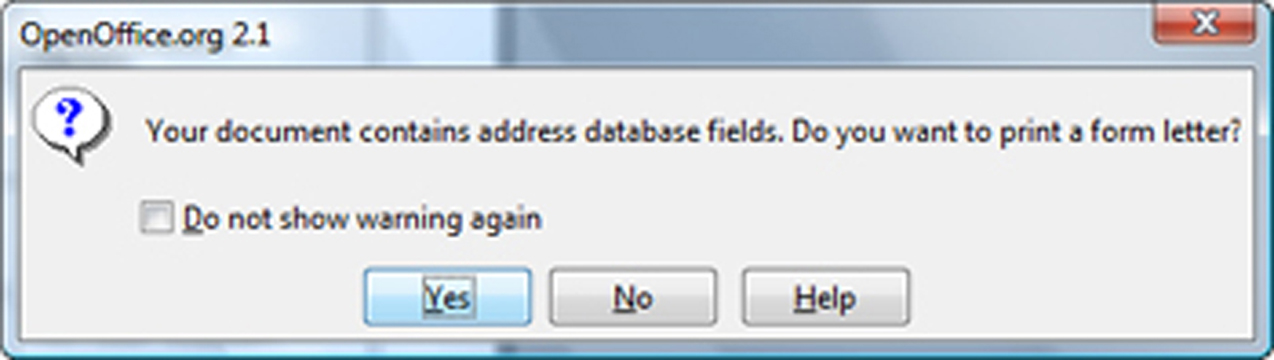
- To print your mail merge, just choose
File→Printand click Yes. Leave the checkbox unmarked. See figure 20.
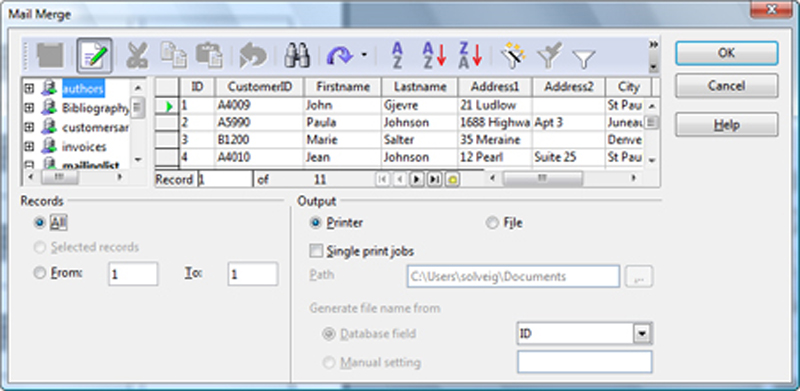
- Choose what range to print, and whether to print to a file or to the printer. If you print to the file, you’ll get one document for every piece of paper; if you have 25 addresses on a 10-per-sheet template, you’ll get three documents. See figure 21.
- With the hidden section, you’ll get results that look like figure 22.

Conclusion
This isn’t a very easy, wizardy sort of solution. For a beginner or user with “core” skills, it’s not really possible. For an average user with some tech skills, it’s workable, and of course you SQL programmers out there are looking at each other saying “This is hard?” For the first two categories, though, let me emphasize a couple things.
- If you’re an IT director or have any sort of authority within an organization, set this up as a template. Do whatever you can to make this easier or invisible for the people using it. Don’t just send out a link to this article.
- You do have the option of using the big mail merge under
Tools→Mail Mergeto accomplish the same goal; however, it’s not for labels, just letters. - And on a different note, the conditionally hidden section is extremely powerful. You can use it with mail merge fields or user variables under
Insert→Fields→Other, Variables tab, User Variables item.
As with nearly everything in OpenOffice.org, suppressing a blank line in a mail merge is possible—but, in this case, it’s just not obvious.