Recently I've seen a resurgence in chatter about Tilt-shift effects in photography. I think it has stemmed from the use of tilt shift in the introduction videos for the 2011 Eurovision Song Contest. Here I outline a brief tutorial in achieving tilt-shift miniaturisation effects using GIMP
Where possible in this tutorial I'll give keyboard shortcuts or menu options rather than describe various tools and button. When writing these kinds of articles it's less ambiguous if you do this.
What is Tilt-shift?
Tilt shift has been around long before digital effects came about, and means different things to different people. What I'm referring to is primarily the use of digital effects to make a photograph of a real place appear to be a photograph of a small scale model. Anybody who visited and taken photographs of a model village (or LegoLand) will know what I mean: high viewing angle and shallow depth of field are give-aways here.
Choosing your photograph
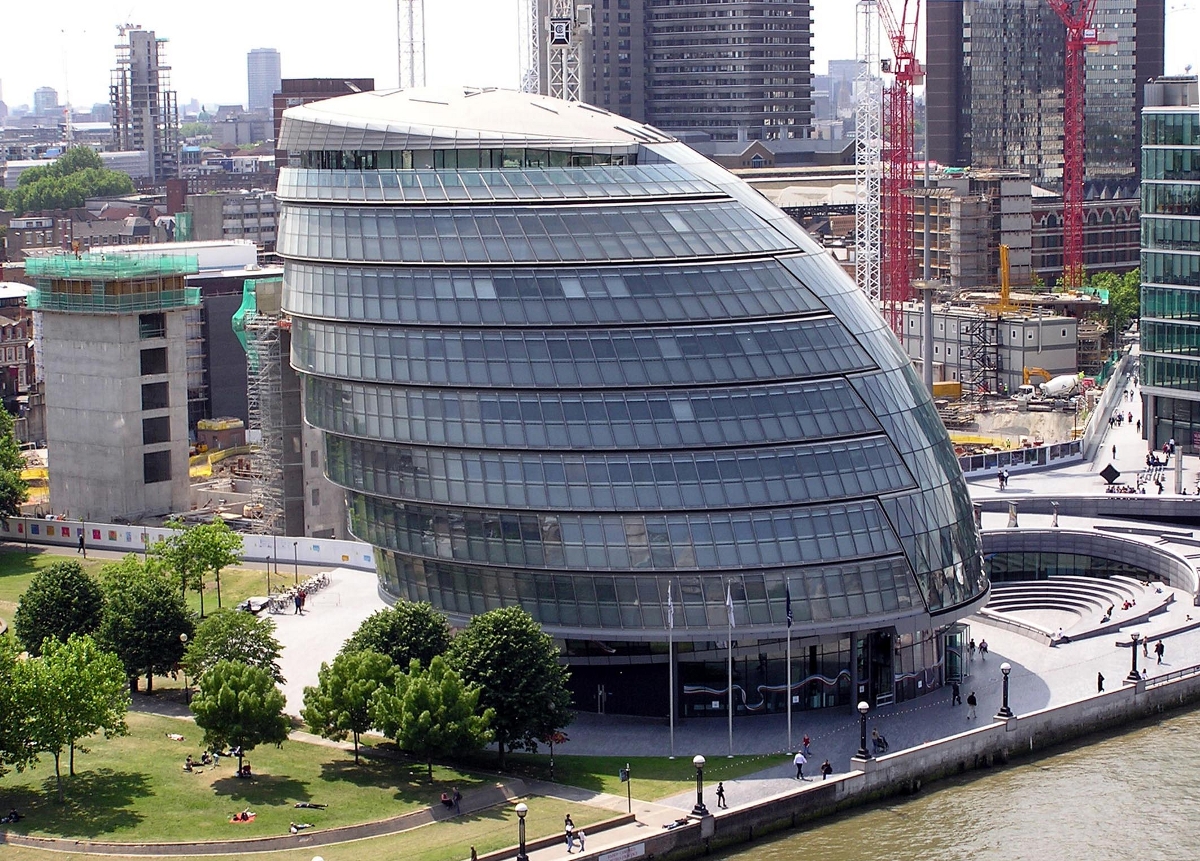
Photograph selection is important here. A family snap at a local picnic spot might not work unless that spot is high up and you are looking down. What you are looking to do here is create a scene which looks like the photograph was taken from above and close to the subject. Lanscapes work well, as do cityscapes – particularly if they are looking downwards on the scene. Inclusion of smaller subjects such as people, animals or cars will help add to the illusion. I've chosen a public domain photograph of City Hall in London (taken by Andrew Pingstone and found on Wikipedia). The original can be seen in figure 1.
Open up GIMP and load your photograph.
Make it more vivid
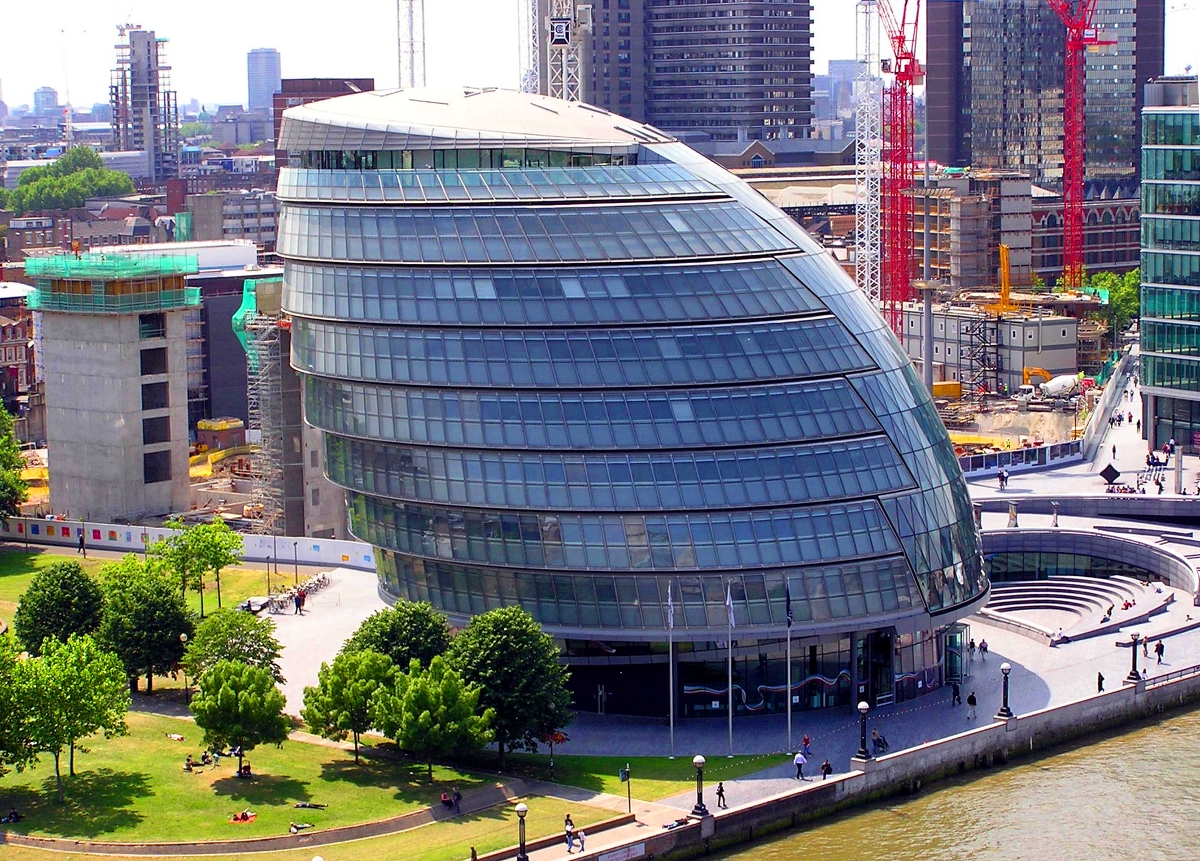
Miniature models tend to have brighter more vivid colours and photos of them tend to reflect this. We need to fake it. There are a few ways to do it but the lazy way is to adjust the saturation.
- Select Colours->Hue-Saturation
- Adjust the saturation figure until the colours are more vivid and dare I say garish. In this case I adjusted it to 93.
Create a mask
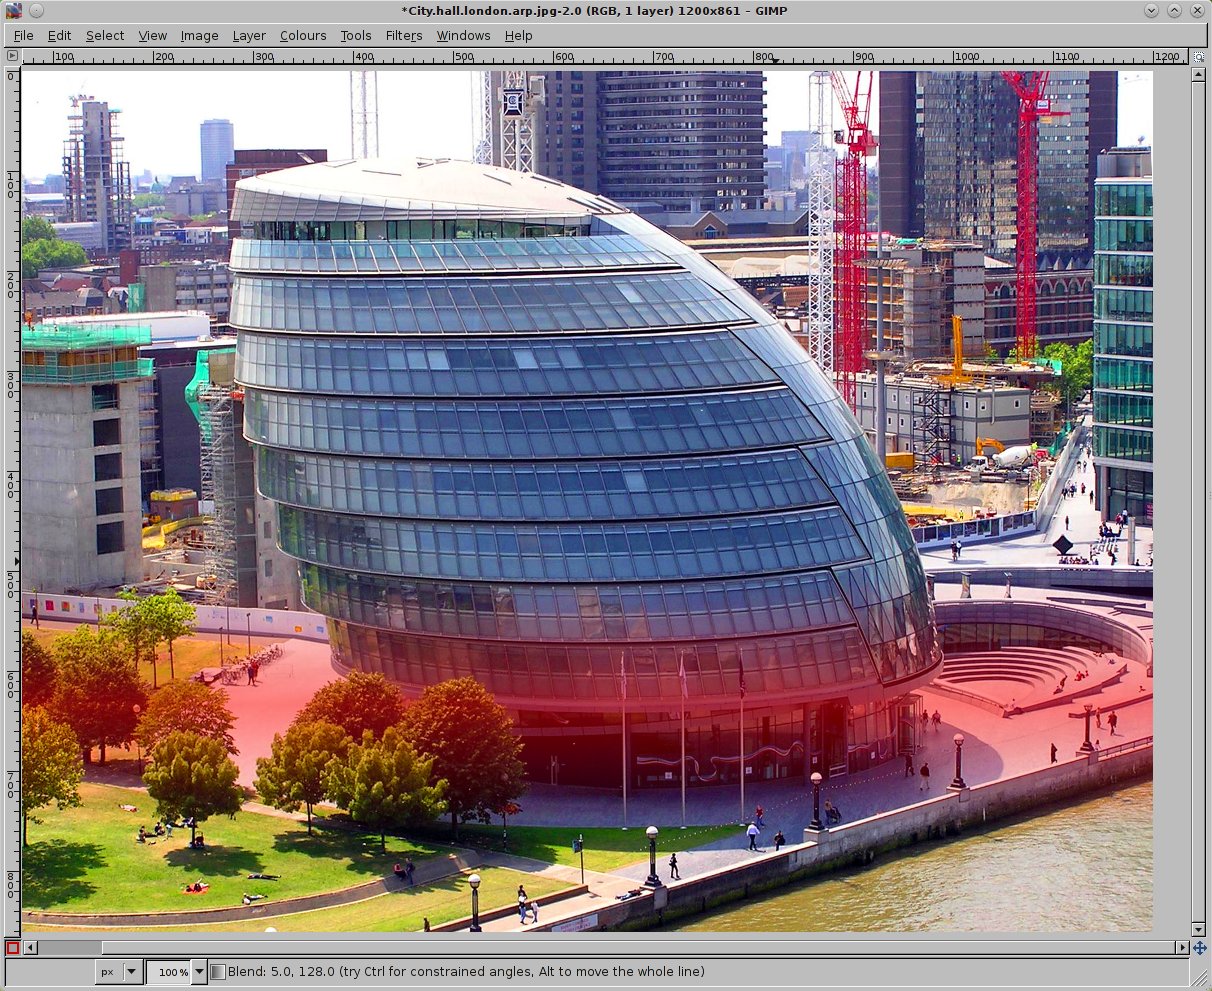
The next step is to apply blurring; first, we must select the right area. To do this we need to create a mask with a gradient (because we need graduated blurring)
Press Shift+Qto create a quick mask – the whole image will be shaded redSelect the Gradient tool(or press L)- Change the gradient type to bi-linear and apply the gradient to a narrow area where the main focus will be. The red should be strongest where the focus will be clearer
- Once you are happy hide the mask using
Shift+Qagain. You should be then left with a selected area.
Apply the blur
Photoshop tutorials for tilt shift usually point to the Lens Blur filter but GIMP doesn't have one of those (see note below). That's fine because we can use the Gaussian blur filter anyway.
- Select
Filters->Blur->Gaussian Blur - Tick the
preview boxand expand the dialog so you can see it - Select your blur setting to suit your photograph. In this case I set it to about 7
(Note: it's not entirely true that Gimp doesn't have the Lens Blur filter. There is the Focus blur plugin which does something similar but I'm sticking with the stock GIMP install here)
Once you are happy with the blur you can drop the selection by Select->None or Ctrl+Shift+A
The final image
Figure 4 shows the final image. Note how the blurring gives the impression of a narrow focal plane and this lends to the fake miniaturisation. With greater time and attention you can achieve a much better result. As with all such things the key is in the detail.

Licensing Notice
This work may be distributed under the terms of the Creative Commons Attribution-ShareAlike License, version 3.0, with attribution to "Ryan Cartwright, first published in Free Software Magazine". Illustrations and photographs are released into the public domain.